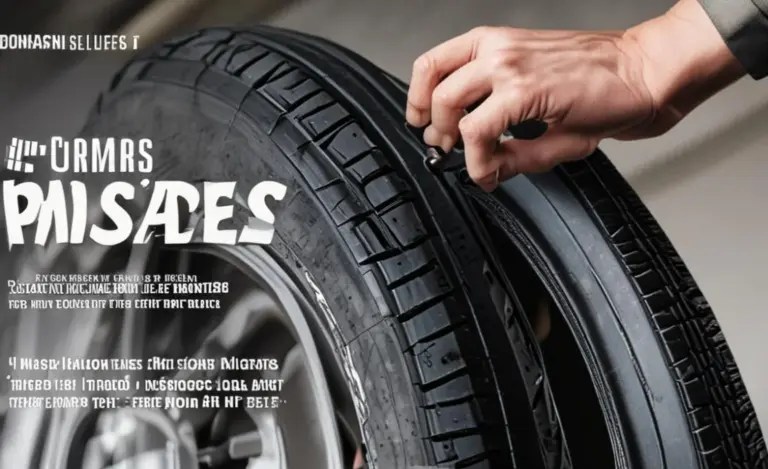
How to Fix a Chain That Slipped Off? Easy Guide
Quick Summary: If your bike chain has slipped off, don’t panic! First, stop safely. Then, check which way the chain fell (inward or outward). Use your hands (or gloves) to gently guide the chain back onto the smallest cog on the rear cassette and the chainring. Pedal forward slowly to reseat it. If it keeps happening, your derailleur might need adjustment.
A slipped bike chain is one of the most common—and most annoying—problems cyclists face. It always seems to happen at the worst time, like when you’re climbing a hill or trying to beat a red light. But don’t worry, getting your chain back on is usually a quick and easy fix. This guide will walk you through the steps, so you can get back to enjoying your ride in no time. We’ll cover everything from identifying the problem to preventing it from happening again. Let’s get started!
What You’ll Need

Before you start, gather these basic items:
- Gloves (optional): Protect your hands from grease and dirt.
- Clean rag or paper towels: For wiping your hands and the chain.
- Multi-tool (recommended): Some have tools that can help if the chain is really stuck.
Step-by-Step Guide to Fixing a Slipped Bike Chain

Step 1: Assess the Situation and Stay Safe
First things first: safety. Pull over to a safe location away from traffic before attempting any repairs.
- Stop safely: Signal your intentions and move to the side of the road or trail.
- Take a breath: Assess the situation calmly. Getting frustrated won’t help!
- Identify the problem: Determine which way the chain has slipped (inward toward the frame or outward away from the frame). This will help you understand what might have caused it.
Step 2: Getting Your Hands Dirty (or Not!)
Now it’s time to get your hands a little greasy. If you have gloves, now is the time to put them on.
Chain Slipped Inward (Toward the Frame)
This is the most common scenario. The chain usually falls off the smallest cog (the one that makes it hardest to pedal) onto the frame.
- Position the chain: Use your hand to lift the chain and guide it onto the smallest cog on the rear cassette. Make sure it’s seated properly.
- Reposition the derailleur (if needed): Sometimes, the derailleur (the mechanism that moves the chain between gears) is pushed too far inward. Gently push it outward to create space for the chain.
- Pedal forward gently: With the chain on the cog, slowly pedal forward. This should help the chain engage properly. If it doesn’t, stop and readjust.
Chain Slipped Outward (Away from the Frame)
This is less common, but it happens. The chain usually falls off the largest cog (the one that makes it easiest to pedal).
- Position the chain: Lift the chain and guide it onto the largest cog on the rear cassette.
- Reposition the derailleur (if needed): In this case, the derailleur might be pushed too far outward. Gently push it inward to create space.
- Pedal backward gently: Instead of pedaling forward, try pedaling backward slowly. This can sometimes help the chain reseat itself.
Step 3: Using the “Backpedal Method” (If Necessary)
If simply pedaling forward or backward doesn’t work, try the backpedal method. This is especially useful if the chain is wedged tightly.
- Lift the rear wheel: If possible, lift the rear wheel off the ground. This will allow it to spin freely.
- Position the chain: Manually place the chain onto the correct cog (smallest or largest, depending on which way it slipped).
- Backpedal slowly: Gently turn the pedals backward with your hand. This should help the chain climb onto the cog.
Step 4: Dealing with a Front Derailleur Issue
Sometimes, the chain slips off the front chainring (the gears near the pedals). This is often due to a misaligned or improperly adjusted front derailleur.
- Assess the situation: Determine which way the chain has slipped (inward or outward).
- Position the chain: Lift the chain and guide it back onto the appropriate chainring.
- Adjust the front derailleur (if needed): If the chain keeps slipping off the front, the front derailleur might need adjustment. This is a more complex task, but there are plenty of online tutorials. Here’s a helpful video.
Step 5: Cleaning Up and Preventing Future Problems
You’ve got your chain back on! Now, let’s clean up and think about prevention.
- Wipe your hands: Use your rag or paper towels to clean off any grease and dirt.
- Inspect the chain: Look for any signs of damage, such as bent links or excessive wear.
- Check your derailleur alignment: Make sure your derailleurs are properly aligned. If they’re not, they could be causing the chain to slip.
- Consider chain lubrication: A dry chain is more likely to slip. Lubricate your chain regularly with a good-quality bike chain lube.
Troubleshooting Common Issues
The Chain Keeps Slipping Off
If your chain keeps slipping off, there’s likely an underlying problem. Here are a few things to check:
- Derailleur alignment: As mentioned earlier, misaligned derailleurs are a common cause of chain slippage.
- Worn chain or cassette: Over time, chains and cassettes wear out. This can cause the chain to skip or slip off. If your chain is excessively worn, it’s time to replace it.
- Stiff chain links: Sometimes, links in the chain can become stiff, preventing them from moving smoothly. Try lubricating the chain thoroughly and working the stiff links back and forth.
The Chain is Really Stuck
Sometimes, the chain gets wedged so tightly that it’s difficult to remove. Here’s what to do:
- Don’t force it: Forcing the chain can damage it or your bike.
- Use a multi-tool: Some multi-tools have tools that can help you gently pry the chain loose.
- Try penetrating oil: Apply a small amount of penetrating oil to the stuck area. This can help loosen things up.
Preventing Chain Slippage

Prevention is always better than cure. Here are some tips to prevent your chain from slipping off in the first place:
- Regular maintenance: Keep your chain clean and lubricated.
- Proper shifting: Avoid shifting under heavy load (e.g., when climbing a steep hill).
- Check your derailleur alignment: Make sure your derailleurs are properly aligned.
- Replace worn parts: Replace your chain and cassette when they’re worn.
Understanding Derailleurs

Derailleurs are the unsung heroes of your bike’s drivetrain. They’re responsible for moving the chain between gears, allowing you to tackle different terrains and speeds. Understanding how they work can help you troubleshoot chain slippage issues.
Rear Derailleur
The rear derailleur is located near the rear wheel. It moves the chain between the cogs on the rear cassette.
- High and low limit screws: These screws adjust the range of movement of the derailleur, preventing the chain from falling off either the smallest or largest cog.
- B-tension screw: This screw adjusts the distance between the derailleur and the cassette, ensuring smooth shifting.
Front Derailleur
The front derailleur is located near the pedals. It moves the chain between the chainrings.
- Cage alignment: The cage of the front derailleur needs to be properly aligned with the chainrings to ensure smooth shifting.
- Height adjustment: The height of the front derailleur also needs to be properly adjusted to prevent the chain from rubbing.
Tools for the Job
While you can often fix a slipped chain with just your hands, having the right tools can make the job easier and prevent damage to your bike.
| Tool | Description | Use |
|---|---|---|
| Gloves | Protect your hands from grease and dirt. | Keeps hands clean and provides better grip. |
| Clean Rag | For wiping your hands and the chain. | Cleaning off dirt and grease. |
| Multi-tool | A compact tool with various wrenches, screwdrivers, and chain tools. | Adjusting derailleurs, tightening bolts, and repairing chains. |
| Chain Lube | Lubricates the chain to reduce friction and prevent rust. | Ensuring smooth shifting and prolonging chain life. |
When to Seek Professional Help
While most chain slippage issues can be resolved at home, there are times when it’s best to seek professional help from a bike mechanic.
- You’re not comfortable working on your bike: If you’re not confident in your mechanical skills, it’s best to leave it to the professionals.
- The problem is persistent: If your chain keeps slipping off despite your best efforts, there may be a more serious underlying issue.
- You suspect damage to your bike: If you suspect that your bike has been damaged (e.g., bent derailleur hanger), it’s important to have it checked by a professional.
The Importance of Bike Maintenance
Regular bike maintenance is crucial for ensuring a safe and enjoyable riding experience. A well-maintained bike is less likely to experience problems like chain slippage, and it will also perform better overall. Here’s why bike maintenance is so important:
- Safety: A well-maintained bike is safer to ride. Regular inspections can help identify potential problems before they lead to accidents.
- Performance: A clean and lubricated bike will perform better. You’ll be able to shift gears more smoothly and pedal more efficiently.
- Longevity: Regular maintenance can extend the life of your bike. By keeping your bike clean and lubricated, you can prevent wear and tear on critical components.
- Cost savings: Regular maintenance can save you money in the long run. By catching problems early, you can prevent them from escalating into more expensive repairs.
Understanding Chain Wear
One of the key aspects of bike maintenance is understanding chain wear. Over time, bike chains stretch and wear out. This can lead to poor shifting performance and increased wear on your cassette and chainrings. Here’s what you need to know about chain wear:
Causes of Chain Wear
- Friction: The constant friction between the chain and the cassette/chainrings causes wear.
- Dirt and grime: Dirt and grime act as abrasives, accelerating chain wear.
- Lack of lubrication: A dry chain experiences more friction, leading to increased wear.
Signs of Chain Wear
- Stretching: A worn chain will stretch over time. You can measure chain stretch with a chain wear tool.
- Poor shifting: A worn chain can cause poor shifting performance, such as skipping or hesitating.
- Increased noise: A worn chain may be noisier than a new chain.
Replacing Your Chain
It’s important to replace your chain before it becomes excessively worn. A worn chain can damage your cassette and chainrings, leading to more expensive repairs. Here’s how to determine when to replace your chain:
- Use a chain wear tool: A chain wear tool will tell you how much your chain has stretched.
- Follow the manufacturer’s recommendations: Some manufacturers recommend replacing the chain after a certain number of miles.
- Inspect your cassette and chainrings: If your cassette and chainrings show signs of wear, it’s time to replace them along with the chain.
FAQ: Common Questions About Slipped Bike Chains
- Why does my bike chain keep falling off?
- A chain that repeatedly falls off often indicates a misaligned derailleur, a worn chain or cassette, or stiff chain links. Check these components and adjust or replace them as needed.
- Can I use any type of lubricant on my bike chain?
- No, it’s best to use a lubricant specifically designed for bike chains. These lubricants are formulated to penetrate the chain and provide long-lasting protection against wear.
- How often should I lubricate my bike chain?
- Lubricate your chain every few rides, or more often if you ride in wet or dusty conditions. A dry chain is more likely to slip and wear out quickly.
- Is it safe to ride with a slightly worn chain?
- It’s generally safe, but a worn chain can cause poor shifting performance and increase wear on your cassette and chainrings. It’s best to replace the chain before it becomes excessively worn.
- What is a derailleur hanger, and why is it important?
- The derailleur hanger is a small piece of metal that connects the rear derailleur to the frame. It’s designed to bend or break in the event of a crash, protecting the frame from damage. A bent derailleur hanger can cause chain slippage and poor shifting performance.
- Do I need special tools to adjust my derailleurs?
- While you can adjust your derailleurs with basic tools like screwdrivers and wrenches, having a dedicated bike multi-tool can make the job easier and more precise.
- Can I fix a slipped chain while wearing regular clothes?
- Yes, but be prepared to get your clothes dirty. Wearing gloves can help protect your hands, but it’s still a good idea to have a clean rag handy to wipe off any grease or dirt.
Conclusion
Fixing a slipped bike chain is a common but manageable part of cycling. By following these steps, you can quickly get your chain back on and get back to enjoying your ride. Remember to prioritize safety, take your time, and don’t be afraid to get your hands a little dirty. Regular maintenance and preventative measures can help minimize the chances of your chain slipping off in the first place. And if you’re ever unsure or uncomfortable, don’t hesitate to seek professional help from a bike mechanic. With a little practice and patience, you’ll be able to handle most chain slippage issues with confidence.