
How to Sync Chuck with Air Tank Setup: Easy Guide
Quick Summary: Syncing your chuck with an air tank setup is straightforward. First, ensure both the chuck and tank fittings are compatible. Next, connect the chuck securely to the air hose from the tank. Test the connection for leaks using soapy water. Adjust the tank’s regulator to the desired pressure, and you’re ready to inflate tires or other equipment with consistent, controlled airflow.
Ever felt frustrated trying to inflate your bike tires, only to find the chuck and air tank just won’t cooperate? It’s a common issue, whether you’re at home or on the road. Getting a proper seal and consistent airflow is key for efficient inflation and accurate pressure. Don’t worry; it’s easier than you think!
In this guide, I’ll walk you through the simple steps to perfectly sync your chuck with an air tank setup. We’ll cover everything from checking compatibility to troubleshooting common issues. By the end, you’ll have the confidence to inflate your tires quickly and accurately, so you can get back to enjoying your ride. Let’s get started!
Understanding the Basics
Before diving into the “how-to,” let’s cover some essential background information. Understanding the components and principles involved will make the process smoother and help you troubleshoot any issues that might arise. Here’s what you need to know:
What is a Chuck?
A chuck is the part that physically connects to the valve stem on your tire or inflatable. It’s the interface between the air source (your tank) and the tire. There are two main types of chucks:
- Presta Chucks: Designed for Presta valves, which are commonly found on road bikes and some high-performance mountain bikes. They are narrower and have a locking nut to seal the valve.
- Schrader Chucks: Designed for Schrader valves, which are the same type you find on car tires. These are more common on mountain bikes, hybrid bikes, and kids’ bikes.
Some chucks are designed to work with both Presta and Schrader valves, offering versatility. These typically have a dual-head design or an adapter.
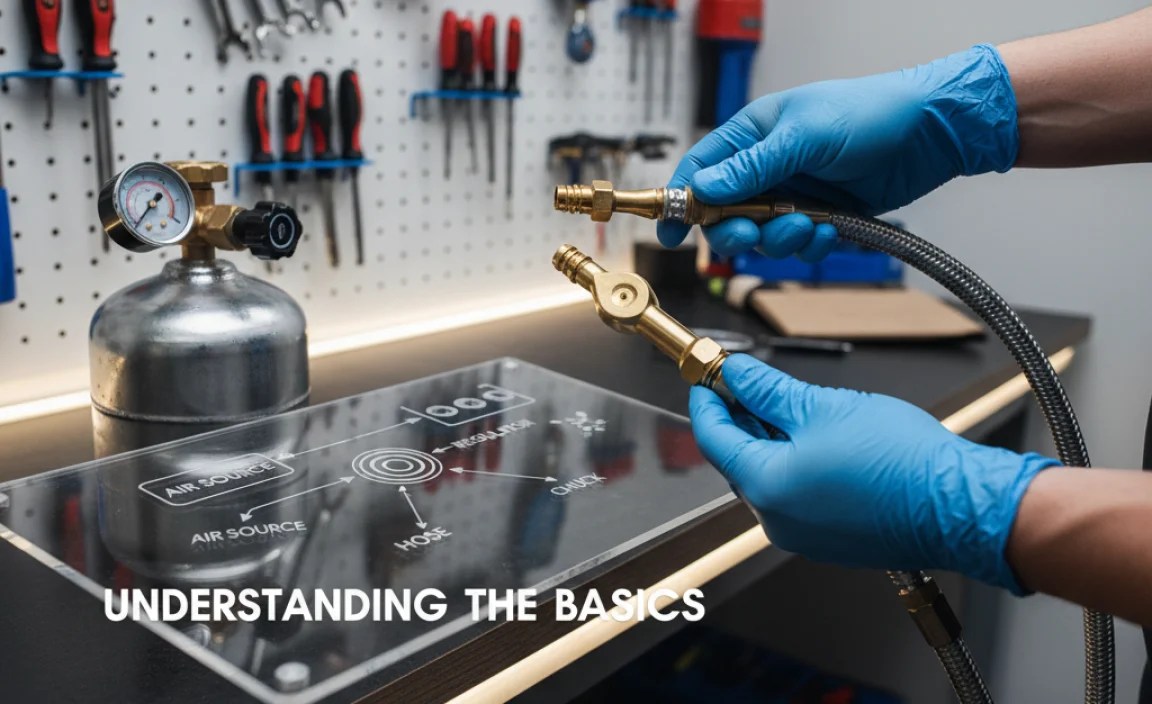
What is an Air Tank Setup?
An air tank setup consists of a compressed air tank, a regulator, and an air hose. It provides a reservoir of pressurized air that you can use to inflate tires and other inflatables quickly and efficiently.
- Air Tank: The tank stores compressed air. They come in various sizes, from small portable tanks to larger stationary units.
- Regulator: The regulator controls the air pressure released from the tank. It allows you to set the desired pressure for inflation.
- Air Hose: The hose connects the tank to the chuck, delivering the air.
Why is Synchronization Important?
Synchronization, in this context, means ensuring all the components work together seamlessly. A proper connection between the chuck and the air tank setup ensures:
- Efficient Inflation: No air leaks mean faster and more effective inflation.
- Accurate Pressure: A stable connection allows you to achieve the desired tire pressure precisely.
- Safety: A secure setup minimizes the risk of the chuck popping off under pressure, which can be dangerous.
Tools and Materials You’ll Need

Before you start, gather the necessary tools and materials. Having everything on hand will make the process quicker and more efficient. Here’s a checklist:
- Air Tank with Regulator: Make sure your air tank is filled and the regulator is functioning correctly.
- Air Hose: Ensure the hose is in good condition, without any cracks or leaks.
- Chuck (Presta or Schrader, or Dual-Head): Choose the correct chuck for your valve type.
- Thread Seal Tape (Teflon Tape): For sealing threaded connections to prevent air leaks.
- Adjustable Wrench: For tightening fittings.
- Soapy Water in a Spray Bottle: To test for air leaks.
- Rag or Cloth: To clean any spills or excess sealant.
- Safety Glasses: To protect your eyes.
Step-by-Step Guide to Syncing Your Chuck with an Air Tank Setup

Now, let’s get to the main event: syncing your chuck with the air tank setup. Follow these steps carefully to ensure a secure and efficient connection.
Step 1: Check Compatibility
The first step is to ensure that your chuck and air hose fittings are compatible. Most air hoses use a standard ¼-inch NPT (National Pipe Thread) fitting, but it’s always a good idea to double-check.
- Inspect the Threads: Make sure the threads on the chuck and the air hose fitting match. They should be clean and undamaged.
- Use Adapters if Necessary: If the threads don’t match, you can use adapters to bridge the gap. These are available at most hardware stores.
Step 2: Prepare the Threads
Properly preparing the threads is crucial for creating an airtight seal. Use thread seal tape (Teflon tape) to ensure a leak-free connection.
- Clean the Threads: Use a rag to clean the threads on both the chuck and the air hose fitting. Remove any dirt or debris.
- Apply Thread Seal Tape: Wrap the Teflon tape clockwise around the male threads (usually on the chuck fitting) two or three times. Overlap the tape slightly with each wrap.
- Smooth the Tape: Press the tape firmly into the threads to ensure it adheres well.
Step 3: Connect the Chuck to the Air Hose
Now it’s time to connect the chuck to the air hose. Follow these steps for a secure connection:
- Align the Fittings: Carefully align the threads of the chuck and the air hose fitting.
- Hand-Tighten: Screw the chuck onto the air hose fitting by hand until it’s snug.
- Use a Wrench: Use an adjustable wrench to tighten the connection further. Be careful not to overtighten, as this can damage the threads. A quarter to a half turn past hand-tight is usually sufficient.
Step 4: Test for Leaks
After connecting the chuck, it’s essential to test for leaks. This will ensure that your setup is airtight and functioning correctly.
- Prepare Soapy Water: Mix some dish soap with water in a spray bottle.
- Spray the Connection: Spray the soapy water around the connection point between the chuck and the air hose.
- Observe for Bubbles: Watch for bubbles forming in the soapy water. Bubbles indicate an air leak.
- Tighten or Re-Tape if Necessary: If you find a leak, tighten the connection slightly with the wrench. If the leak persists, disconnect the chuck, re-apply thread seal tape, and reconnect it.
Step 5: Adjust the Regulator
The regulator controls the air pressure released from the tank. Adjust it to the desired pressure for your tires or inflatables.
- Locate the Regulator: The regulator is usually located on the air tank itself. It has a knob or dial that you can turn to adjust the pressure.
- Set the Pressure: Turn the knob or dial to set the desired pressure. Refer to your tire’s sidewall for the recommended pressure (PSI).
- Test the Pressure: Use a separate tire pressure gauge to verify the pressure. Adjust the regulator as needed to achieve the correct pressure.
Step 6: Using the Chuck
Now that your chuck is synced with the air tank setup, you’re ready to use it to inflate your tires or other inflatables.
- Connect the Chuck to the Valve: Attach the chuck securely to the valve stem on your tire. For Presta valves, remember to unscrew the valve nut first.
- Inflate to the Desired Pressure: Squeeze the trigger or lever on the chuck to release air into the tire. Watch the pressure gauge on the chuck or use a separate gauge to monitor the pressure.
- Remove the Chuck: Once you reach the desired pressure, release the trigger or lever and carefully remove the chuck from the valve. For Presta valves, tighten the valve nut.
Troubleshooting Common Issues
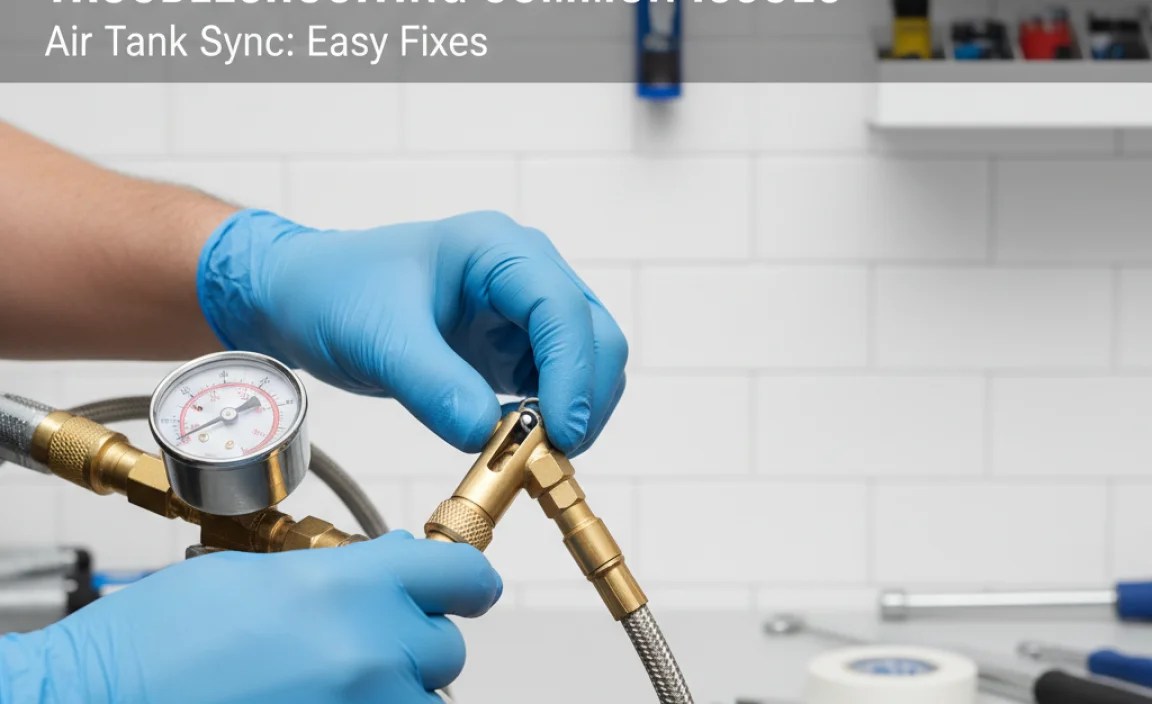
Even with careful preparation, you might encounter some issues. Here are some common problems and how to solve them:
Problem: Air Leaks
Solution: Air leaks are a common issue. Check the following:
- Threaded Connections: Ensure all threaded connections are tight and sealed with Teflon tape.
- Hose Condition: Inspect the air hose for cracks or damage. Replace if necessary.
- Chuck Condition: Make sure the chuck is in good condition and seals properly against the valve stem.
Problem: Chuck Won’t Connect to Valve
Solution: If the chuck won’t connect to the valve, check the following:
- Valve Type: Make sure you’re using the correct chuck for the valve type (Presta or Schrader).
- Valve Condition: Inspect the valve stem for damage. If it’s bent or broken, you may need to replace it.
- Chuck Mechanism: Ensure the chuck mechanism is functioning correctly. Some chucks have a lever or button that needs to be activated to engage the valve.
Problem: Inconsistent Air Pressure
Solution: If you’re getting inconsistent air pressure, check the following:
- Regulator Setting: Make sure the regulator is set to the desired pressure and is functioning correctly.
- Tank Pressure: Ensure the air tank has sufficient pressure. If the tank is running low, the pressure may fluctuate.
- Gauge Accuracy: Verify the accuracy of your pressure gauge. Use a separate gauge to double-check the reading.
Tips for Maintaining Your Air Tank Setup

Proper maintenance will prolong the life of your air tank setup and ensure it continues to function efficiently. Here are some tips:
- Drain the Tank Regularly: Compressed air tanks can accumulate moisture over time. Drain the tank regularly to prevent rust and corrosion. Most tanks have a drain valve at the bottom.
- Inspect the Hose: Regularly inspect the air hose for cracks, kinks, or other damage. Replace the hose if necessary.
- Clean the Chuck: Keep the chuck clean and free of debris. Use a cloth to wipe it down after each use.
- Store Properly: Store the air tank in a cool, dry place. Avoid exposing it to extreme temperatures or direct sunlight.
Benefits of a Properly Synced Chuck and Air Tank
Taking the time to properly sync your chuck with an air tank setup offers several benefits:
- Time Savings: Efficient inflation means you spend less time pumping and more time riding.
- Consistent Tire Pressure: Accurate pressure ensures optimal performance and handling.
- Reduced Effort: Using an air tank is much easier than manual pumping, especially for high-volume tires.
- Versatility: An air tank can be used for a variety of inflation tasks, from bike tires to sports equipment.
Table: Comparing Chuck Types
| Feature | Presta Chuck | Schrader Chuck |
|---|---|---|
| Valve Type | Presta | Schrader |
| Common Uses | Road bikes, high-performance bikes | Mountain bikes, hybrid bikes, car tires |
| Diameter | Narrower | Wider |
| Sealing Mechanism | Locking nut | Spring-loaded valve core |
| Pressure Accuracy | High | Good |
Table: Troubleshooting Guide
| Problem | Possible Cause | Solution |
|---|---|---|
| Air Leaks | Loose connections, damaged hose | Tighten connections, replace hose |
| Chuck Won’t Connect | Incorrect chuck type, damaged valve | Use correct chuck, replace valve |
| Inconsistent Pressure | Regulator issues, low tank pressure | Adjust regulator, refill tank |
FAQ
Here are some frequently asked questions about syncing chucks with air tank setups:
- Q: What is the ideal PSI for my bike tires?
- A: The ideal PSI depends on your tire type, riding conditions, and personal preference. Check the sidewall of your tire for the recommended pressure range. As a general rule, road bike tires typically require higher pressure (80-130 PSI), while mountain bike tires use lower pressure (25-40 PSI).
- Q: Can I use the same air tank for my car and bike tires?
- A: Yes, you can use the same air tank, but you’ll need to ensure you have the correct chuck or adapter for each valve type (Schrader for cars, Presta or Schrader for bikes). Also, be mindful of the pressure settings. Car tires typically require higher pressure than bike tires.
- Q: How often should I drain my air tank?
- A: The frequency depends on the humidity in your environment and how often you use the tank. As a general guideline, drain the tank after each use or at least once a month to prevent moisture buildup and corrosion.
- Q: What is Teflon tape, and why is it important?
- A: Teflon tape (also known as thread seal tape) is a thin, white tape used to seal threaded connections. It creates an airtight seal by filling the gaps between the threads, preventing air leaks. It’s essential for ensuring a secure and efficient connection between the chuck and the air hose.
- Q: Can I over-inflate my tires using an air tank?
- A: Yes, it’s possible to over-inflate your tires, which can lead to blowouts. Always use a pressure gauge to monitor the pressure while inflating, and never exceed the recommended PSI on the tire sidewall.
- Q: What should I do if my air tank won’t hold pressure?
- A: If your air tank won’t hold pressure, check for leaks in the connections, hose, and tank itself. Tighten any loose connections, replace damaged components, and ensure the tank’s drain valve is closed tightly. If the problem persists, consult a professional.
- Q: Are there any safety precautions I should take when using an air tank?
- A: Yes, always wear safety glasses to protect your eyes. Never exceed the maximum pressure rating of the tank or tires. Inspect the tank and hose regularly for damage. Store the tank in a cool, dry place away from direct sunlight and extreme temperatures.
Conclusion
Syncing your chuck with an air tank setup doesn’t have to be a headache. By following these simple steps, you can ensure a secure, efficient, and reliable connection every time. From checking compatibility to troubleshooting common issues, you’re now equipped with the knowledge to maintain your setup and enjoy the benefits of quick and accurate tire inflation. So go ahead, sync that chuck, pump up those tires, and get back on the road with confidence!


