
How to Fix a Short Cycling Well Pump with an Empty Tank
Quick Summary: Short cycling happens when your well pump turns on and off too frequently. To fix it, start by checking your pressure tank’s air charge. If it’s low, recharge it. Next, inspect the pressure switch for damage or debris. Make sure your well isn’t running dry and that there are no leaks in your system. If these steps don’t solve the problem, consider calling a well pump professional.
Is your well pump driving you crazy by turning on and off every few seconds? This annoying issue, known as short cycling, not only wastes energy but can also damage your well pump over time. The good news is that you can often fix it yourself with a few simple steps! We’ll walk you through the most common causes of short cycling and provide easy-to-follow instructions to get your water system back on track. Let’s dive in and get your water flowing smoothly again!
Understanding Short Cycling

Before we start fixing things, let’s make sure we understand what short cycling really is. Imagine your well pump is like a runner sprinting and stopping constantly. This puts a lot of stress on the motor and other parts, leading to premature wear and tear. The main causes include:
- Low Air Charge in the Pressure Tank: The most common culprit.
- Waterlogged Pressure Tank: When the tank fills with too much water.
- Faulty Pressure Switch: A malfunctioning switch can cause erratic pump behavior.
- Low Well Water Level: If your well is running dry, the pump will cycle rapidly.
- Leaks in the Plumbing: Leaks cause the pressure to drop quickly, triggering the pump.
Tools You’ll Need
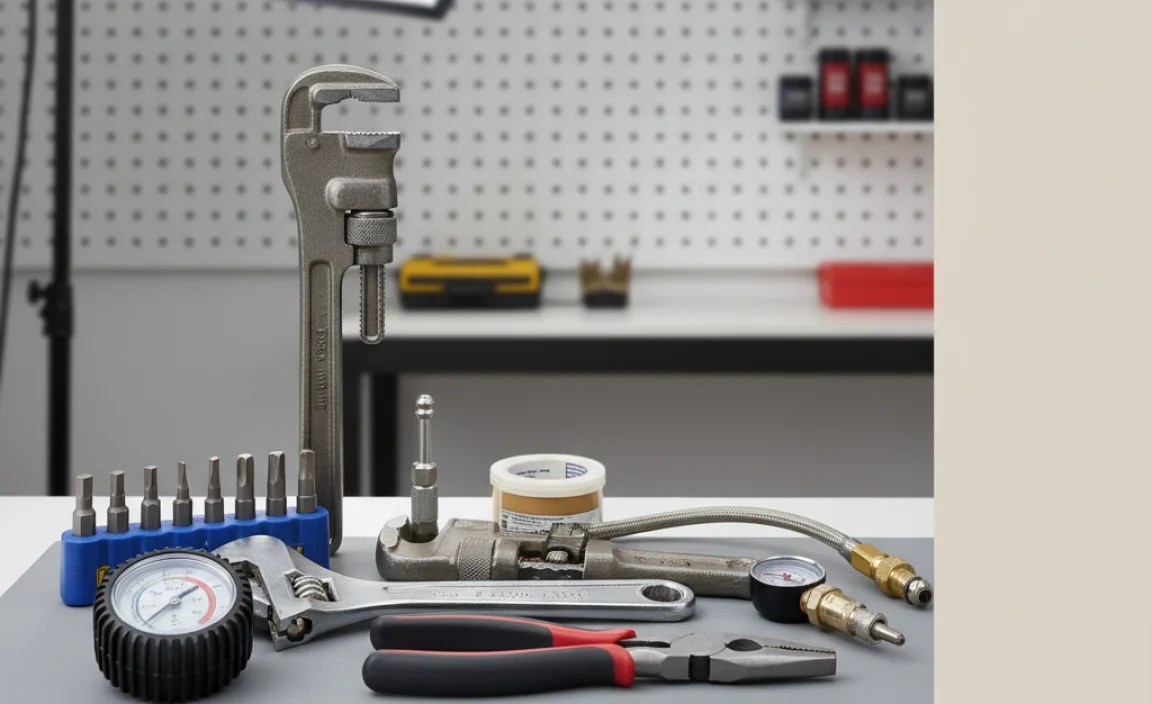
Before you begin, gather these essential tools:
- Pressure Gauge: To check the water pressure in your system. A standard tire pressure gauge will also work for checking the air charge.
- Screwdrivers: Both flathead and Phillips head may be needed.
- Wrench: For tightening fittings and adjusting the pressure switch.
- Air Compressor: To recharge the pressure tank.
- Multimeter: To test the pressure switch (optional but recommended).
- Safety Glasses: Always protect your eyes.
- Gloves: To protect your hands.
Step-by-Step Guide to Fixing Short Cycling

Here’s how to tackle the problem. Remember to turn off the power to the well pump at the breaker before starting any work!
Step 1: Check the Pressure Tank’s Air Charge
The pressure tank stores water under pressure, providing a steady supply when you need it. A low air charge is a very common cause of short cycling. Here’s how to check and recharge it:
- Turn Off the Pump: Locate the circuit breaker for the well pump and switch it off. This is crucial for safety.
- Drain the Tank: Open a faucet somewhere in your house and let the water run until the pressure tank is completely empty. The faucet will sputter and then stop.
- Locate the Schrader Valve: This valve looks just like the valve on your car’s tire and is usually located at the top of the tank, often covered by a plastic cap.
- Check the Air Pressure: Use a tire pressure gauge to check the air pressure. It should be 2 PSI below the pump’s cut-in pressure (the pressure at which the pump turns on). For example, if your pump turns on at 30 PSI, the air pressure should be 28 PSI.
- Recharge the Tank: If the pressure is low, use an air compressor to add air until it reaches the correct level.
- Turn the Pump Back On: Flip the breaker switch back on and let the tank refill. Monitor the pump to see if the short cycling has stopped.
Step 2: Inspect the Pressure Switch
The pressure switch senses the water pressure and tells the pump when to turn on and off. If it’s faulty, it can cause short cycling. Here’s how to check it:
- Turn Off the Pump: Again, safety first! Switch off the breaker.
- Locate the Pressure Switch: It’s usually mounted on a pipe near the pressure tank.
- Inspect for Damage: Look for any signs of corrosion, water damage, or loose wires.
- Clean the Switch: Remove the cover and gently clean any debris or mineral buildup inside. A small brush can be helpful.
- Test the Switch (Optional): Use a multimeter to test the continuity of the switch. If it’s not working correctly, it may need to be replaced. Here’s how to use a multimeter:
- Set the multimeter to the continuity setting (it looks like a sound wave symbol).
- Disconnect the wires from the pressure switch.
- Place one probe on each terminal of the switch.
- With the pump off, the multimeter should show continuity (a beep or a reading of 0 ohms).
- Manually press the switch lever to simulate the pump turning on. The multimeter should now show no continuity (an open circuit).
- If the switch doesn’t behave this way, it’s likely faulty and needs replacing.
- Adjust the Pressure Settings (If Necessary): Some pressure switches have adjustable screws. Consult your owner’s manual for instructions on how to adjust the cut-in and cut-out pressure settings. Make small adjustments and monitor the pump’s behavior.
- Reassemble and Test: Replace the cover and turn the pump back on. Observe whether the short cycling has stopped.
Step 3: Check for a Waterlogged Pressure Tank
Over time, pressure tanks can become waterlogged, meaning they lose their air cushion. This reduces their ability to regulate water pressure, leading to short cycling.
- Turn Off the Pump: As always, switch off the breaker.
- Tap on the Tank: Gently tap on the side of the tank from top to bottom. A waterlogged tank will sound full or solid all the way down. A healthy tank will sound hollow at the top.
- Drain the Tank Completely: Open a faucet and let the tank drain until empty.
- Check for Water Coming from the Air Valve: With the tank drained, press the Schrader valve. If water comes out, the bladder inside the tank has likely failed, and the tank needs to be replaced.
- Recharge and Monitor: If no water comes out of the air valve, recharge the tank as described in Step 1 and monitor its performance. If it quickly becomes waterlogged again, replacement is necessary.
Step 4: Check for Leaks in the Plumbing
Leaks can cause a rapid drop in pressure, triggering the pump to cycle on and off frequently. Inspect all visible pipes and fittings for leaks.
- Inspect Visible Pipes: Check all pipes, especially joints and connections, for any signs of water leakage. Look for drips, wet spots, or mineral buildup.
- Check Faucets and Toilets: Make sure all faucets are completely shut off and that toilets are not running continuously. A leaky toilet can cause a significant pressure drop over time.
- Check the Well Head: Inspect the area around the well head for any signs of water seeping out of the ground.
- Pressure Test: If you suspect a leak but can’t find it, you can perform a pressure test. Turn off all water-using appliances and fixtures. Observe the pressure gauge on the pump. If the pressure drops steadily, you likely have a leak.
- Fix Any Leaks: Tighten loose fittings, repair or replace damaged pipes, and fix any leaky fixtures.
Step 5: Check the Well Water Level
If your well’s water level is too low, the pump may suck air, causing it to cycle rapidly. This is more common during periods of drought or heavy water use.
- Monitor Water Usage: Be mindful of your water consumption, especially during dry periods. Avoid excessive watering of lawns or gardens.
- Listen to the Pump: If the pump is making unusual noises, such as gurgling or sputtering, it may be a sign that it’s sucking air.
- Check Well Records: If you have access to your well’s drilling records, they may indicate the static water level (the level of water in the well when it’s not being pumped).
- Consult a Professional: If you suspect a low water level, it’s best to consult a well drilling professional. They can perform a well yield test to determine the well’s capacity and recommend solutions, such as deepening the well or installing a storage tank.
Troubleshooting Table
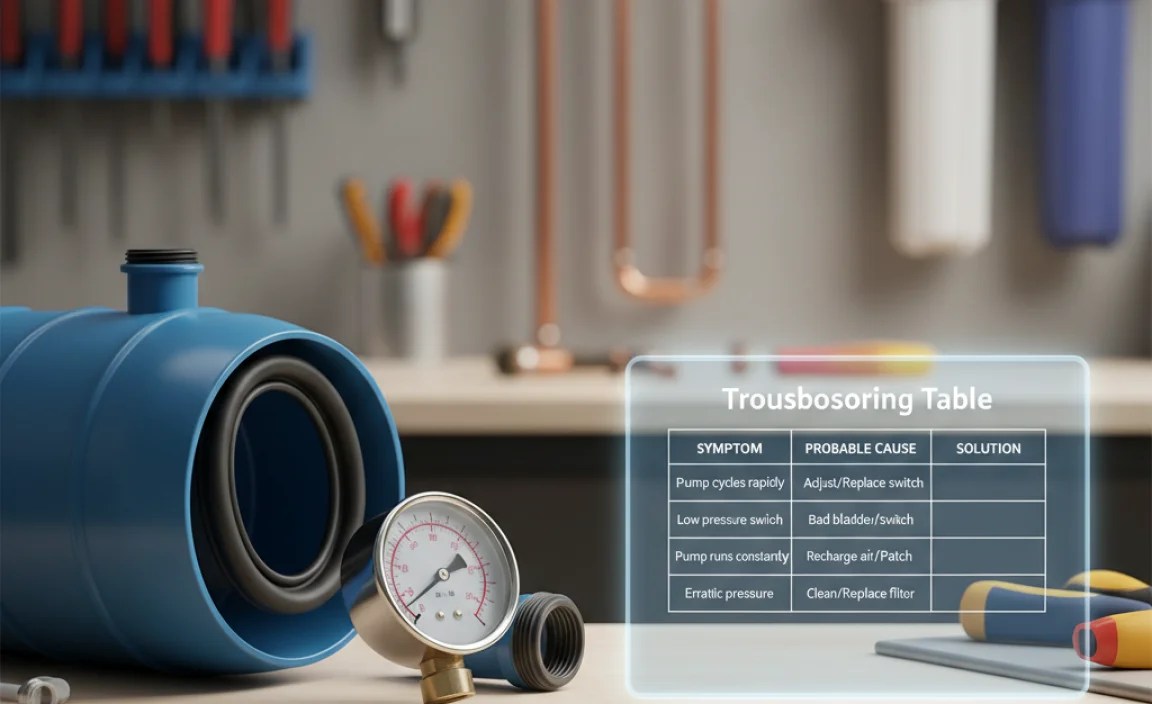
Here’s a handy table to help you quickly identify and troubleshoot common issues:
| Symptom | Possible Cause | Solution |
|---|---|---|
| Pump cycles on and off rapidly | Low air charge in pressure tank | Recharge the tank |
| Pump cycles on and off rapidly | Waterlogged pressure tank | Replace the tank |
| Pump cycles on and off rapidly | Faulty pressure switch | Replace the pressure switch |
| Pump cycles on and off rapidly, especially during heavy use | Low well water level | Conserve water, consult a professional about deepening the well |
| Pump cycles on and off rapidly, pressure drops quickly | Leaks in the plumbing | Inspect and repair any leaks |
Preventive Maintenance Tips
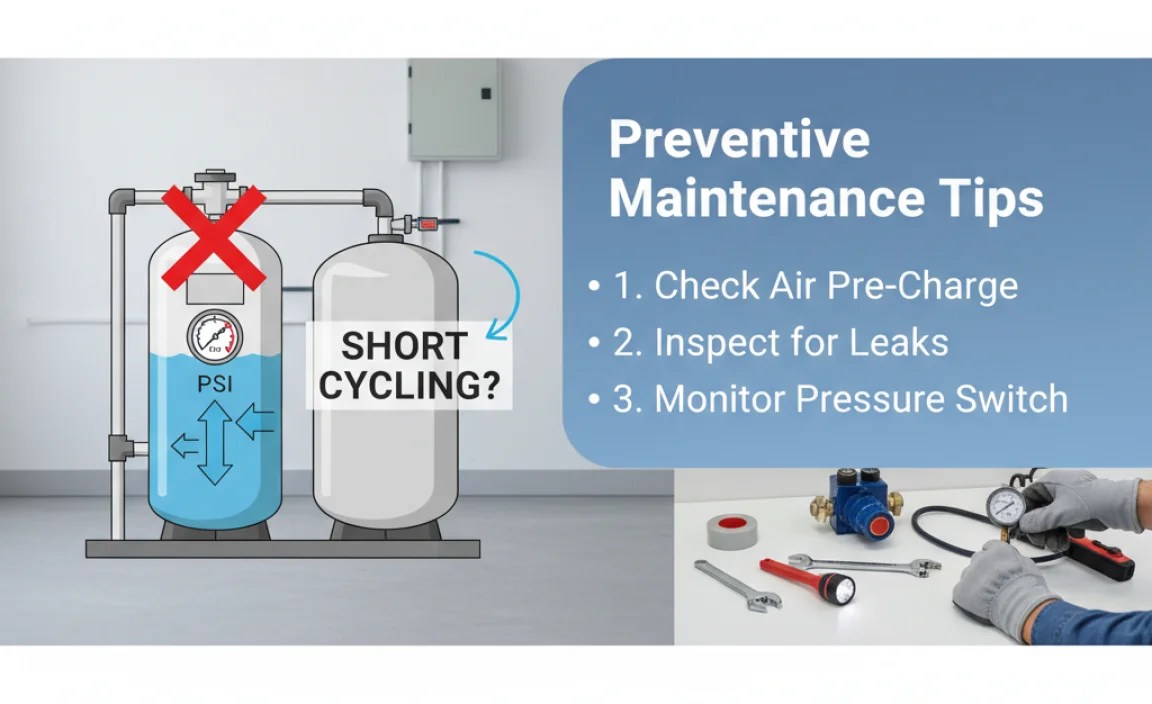
To keep your well pump running smoothly and prevent short cycling, follow these maintenance tips:
- Regularly Check the Air Charge: Check the pressure tank’s air charge every 6 months to a year.
- Inspect for Leaks: Periodically inspect your plumbing for any signs of leaks.
- Monitor Water Usage: Be mindful of your water consumption, especially during dry periods.
- Consider a Well Inspection: Have your well professionally inspected every few years to identify any potential problems. The EPA also provides useful guidelines for maintaining your well water system.
When to Call a Professional
While many short cycling issues can be resolved with DIY troubleshooting, some situations require the expertise of a qualified well pump technician. Here are some signs that it’s time to call a pro:
- You’ve tried the above steps and the problem persists.
- You’re uncomfortable working with electrical components or plumbing.
- You suspect a problem with the pump itself (e.g., unusual noises, low pressure).
- You have a deep well or a complex water system.
FAQ: Fixing Short Cycling in Well Pumps
What is short cycling and why is it bad?
Short cycling is when your well pump turns on and off too frequently. It’s bad because it wastes energy, puts extra wear and tear on the pump, and can shorten its lifespan.
How do I know if my well pump is short cycling?
You’ll notice the pump turning on and off every few seconds or minutes, rather than running for longer periods. You might also see fluctuating water pressure.
What is the correct air pressure for my pressure tank?
The air pressure should be 2 PSI below the pump’s cut-in pressure (the pressure at which the pump turns on). Check your pump’s specifications or consult a well professional.
Can a leaky toilet cause short cycling?
Yes, a leaky toilet can cause a slow but steady drop in water pressure, which can trigger the pump to cycle on and off more frequently.
How often should I check my pressure tank?
It’s a good idea to check the pressure tank’s air charge at least once every six months to a year.
What if water comes out of the air valve on my pressure tank?
If water comes out of the Schrader valve when you press it, it means the bladder inside the tank has likely failed, and the tank needs to be replaced.
Is it safe to work on my well pump myself?
Working on a well pump involves electricity and water pressure, so it’s important to take precautions. Always turn off the power to the pump before starting any work, and if you’re not comfortable with electrical or plumbing tasks, it’s best to call a professional.
Conclusion
Fixing a short cycling well pump might seem daunting at first, but with a systematic approach, you can often resolve the issue yourself. By checking the air charge in your pressure tank, inspecting the pressure switch, looking for leaks, and monitoring your well water level, you can identify and address the most common causes of short cycling. Regular maintenance and prompt attention to any problems will keep your well pump running efficiently and reliably for years to come. Remember, if you’re ever unsure or uncomfortable, don’t hesitate to call a qualified well pump technician. Now, go get that water flowing smoothly!
“`


