
How to Use Adapter with Single-Type Chuck: Easy Guide
**Quick Summary:** Using an adapter with a single-type chuck lets you handle various drill bit sizes that your chuck might not normally accommodate. First, identify the correct adapter for your drill bit. Then, securely insert the adapter into the chuck, just like a regular drill bit. Tighten the chuck firmly to ensure the adapter is stable. Finally, insert your drill bit into the adapter and tighten. This simple process expands your drill’s versatility.
Ever tried using a drill bit only to find it’s just a hair too small or too big for your drill’s chuck? It’s a common frustration! Single-type chucks, while reliable, can limit the range of bits you can use. But don’t worry, there’s a simple solution: adapters. These handy little tools bridge the gap, allowing you to use a wider variety of drill bit sizes with your existing chuck.
In this guide, I’ll walk you through how to use an adapter with a single-type chuck, step by step. We’ll cover everything from choosing the right adapter to ensuring a secure and wobble-free fit. With a few simple tricks, you’ll be expanding your drilling capabilities in no time!
Understanding Single-Type Chucks and Adapters

Before we dive into the “how-to,” let’s quickly cover the basics of single-type chucks and adapters. Knowing how they work will make the whole process much easier.
What is a Single-Type Chuck?
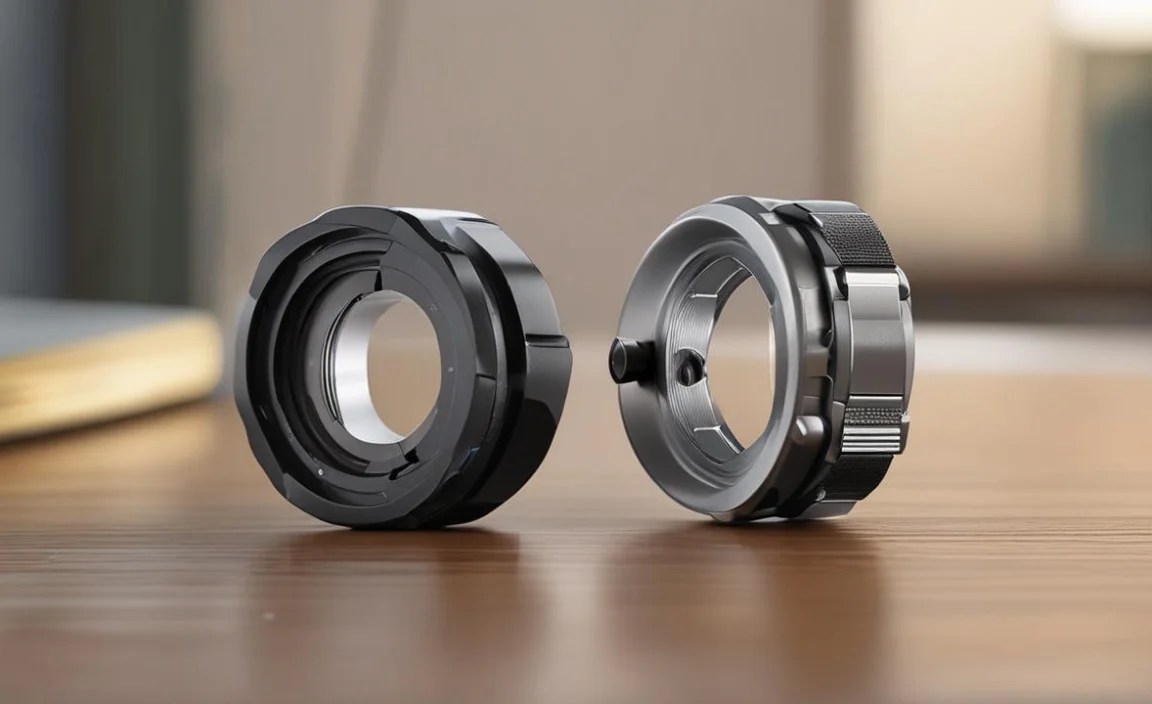
A single-type chuck (also called a standard chuck) is a common type of chuck found on many drills. It typically uses a keyed or keyless mechanism to open and close three jaws, which grip the drill bit. The “single-type” refers to the limited range of bit sizes it can accommodate directly. The range is usually marked on the chuck itself, for example 1/16″ to 3/8″.
Why Use an Adapter?
Adapters are used to extend the range of bit sizes a drill can handle. They allow you to use bits with shanks (the part that goes into the chuck) that are either too small or too large for your drill’s chuck. For instance, you might need an adapter to use a small 1/32″ drill bit in a chuck that only goes down to 1/16″, or to use a larger shanked drill bit in a smaller chuck.
Types of Adapters
There are several types of adapters available, each designed for specific purposes:
- Sleeve Adapters: These are used to adapt smaller shank sizes to fit larger chucks. They are essentially hollow sleeves that slide over the smaller bit’s shank, increasing its diameter.
- Reducer Adapters: Similar to sleeve adapters, but designed for impact drivers and wrenches. They reduce the size of the drive to fit smaller sockets.
- Extension Adapters: These extend the reach of a drill bit, allowing you to drill in tight or hard-to-reach spaces.
- Chuck Adapters: Allow using a drill chuck on a different tool, like a lathe or mill, or adapting a chuck to a different thread size.
Choosing the Right Adapter

Selecting the correct adapter is crucial for a secure and accurate drilling experience. Here’s what to consider:
1. Identify Your Drill Bit’s Shank Size
The first step is to determine the shank size of the drill bit you want to use. This is the diameter of the part of the bit that fits into the chuck. You can usually find this information printed on the drill bit itself or on its packaging. If not, use calipers or a ruler to measure it accurately.
2. Check Your Drill Chuck’s Capacity
Next, check the capacity of your drill chuck. This is the range of shank sizes that the chuck can accommodate. It’s usually printed on the chuck itself (e.g., 1/16″ – 3/8″).
3. Select the Appropriate Adapter
Now, compare the drill bit’s shank size to your drill chuck’s capacity. If the drill bit’s shank is outside the chuck’s range, you’ll need an adapter. Choose an adapter that matches the drill bit’s shank size and fits within your drill chuck’s capacity. For example, if you have a 1/4″ chuck and want to use a drill bit with a 1/2″ shank, you’ll need an adapter that has a 1/2″ inner diameter and a 1/4″ outer diameter.
Here is a table to help you choose the right adapter:
| Drill Chuck Capacity | Drill Bit Shank Size | Recommended Adapter |
|---|---|---|
| 1/16″ – 3/8″ | 1/2″ | 1/2″ to 3/8″ Sleeve Adapter |
| 1/16″ – 3/8″ | 1/32″ | 1/32″ to 1/16″ Sleeve Adapter |
| 1/8″ – 1/2″ | 3/4″ | 3/4″ to 1/2″ Sleeve Adapter |
4. Consider the Adapter’s Quality
Always choose high-quality adapters made from durable materials like hardened steel. Cheap adapters can be inaccurate, wear out quickly, or even break during use, posing a safety risk. Brands like Irwin and DeWalt offer reliable adapters. Also, consider reading user reviews before buying.
Step-by-Step Guide: Using an Adapter
Alright, let’s get down to the nitty-gritty. Here’s a step-by-step guide on how to use an adapter with a single-type chuck:
Step 1: Gather Your Tools and Materials
Before you start, make sure you have everything you need:
- Your drill
- The drill bit you want to use
- The appropriate adapter
- Chuck key (if your drill has a keyed chuck)
- Safety glasses
- Gloves (optional, but recommended)
Step 2: Prepare the Drill
First, ensure your drill is switched off and unplugged (or the battery is removed for cordless drills). This is a crucial safety step to prevent accidental starts.
Step 3: Insert the Adapter into the Chuck
Now, open the chuck jaws wide enough to accommodate the adapter. Insert the adapter into the chuck as far as it will go. Make sure it’s centered and flush with the chuck opening.
Step 4: Tighten the Chuck
If you have a keyed chuck, insert the chuck key into the appropriate hole and tighten the chuck securely. Use all three holes in the chuck to ensure even pressure. If you have a keyless chuck, simply rotate the chuck sleeve by hand until it’s tight. Ensure the adapter is held firmly and doesn’t wobble.
Step 5: Insert the Drill Bit into the Adapter
Next, open the adapter jaws (if it has a chuck) or insert the drill bit into the adapter sleeve. Make sure the drill bit is fully seated and centered.
Step 6: Tighten the Adapter (if applicable)
If your adapter has its own chuck, tighten it securely using the chuck key or by hand (for keyless adapters). Ensure the drill bit is held firmly in place.
Step 7: Test the Setup
Before you start drilling, give the drill bit a quick spin by hand to check for any wobble or runout. If the bit wobbles, loosen the chuck and adapter, readjust them, and tighten again. A wobbly bit can lead to inaccurate drilling and even break the bit.
Step 8: Start Drilling
Put on your safety glasses and gloves (if you’re using them). Position the drill bit on your workpiece and start drilling. Apply steady, even pressure. Let the drill bit do the work; don’t force it.
Here is a table summarizing the steps:
| Step | Action | Details |
|---|---|---|
| 1 | Gather Tools | Drill, bit, adapter, chuck key, safety glasses, gloves |
| 2 | Prepare Drill | Switch off and unplug or remove battery |
| 3 | Insert Adapter | Open chuck, insert adapter fully |
| 4 | Tighten Chuck | Use chuck key or hand-tighten securely |
| 5 | Insert Drill Bit | Open adapter, insert drill bit fully |
| 6 | Tighten Adapter | Use chuck key or hand-tighten securely |
| 7 | Test Setup | Spin by hand, check for wobble |
| 8 | Start Drilling | Apply steady pressure, let the bit work |
Safety Tips When Using Adapters
Safety should always be your top priority when working with power tools. Here are some important safety tips to keep in mind when using adapters:
- Always wear safety glasses: Drill bits can break or shatter during use, sending fragments flying. Safety glasses will protect your eyes from these hazards.
- Use gloves: Gloves will protect your hands from sharp edges and splinters.
- Ensure a secure fit: Make sure the adapter and drill bit are securely tightened in the chuck. A loose adapter can cause the drill bit to wobble or come loose, leading to inaccurate drilling and potential injury.
- Don’t over-tighten: Over-tightening the chuck can damage the chuck jaws or the adapter. Tighten it just enough to hold the adapter and drill bit securely.
- Use the correct speed: Use the appropriate speed for the material you’re drilling and the size of the drill bit. Drilling too fast can cause the bit to overheat and break.
- Apply even pressure: Apply steady, even pressure to the drill. Don’t force the bit; let it do the work. Forcing the bit can cause it to break or bind.
- Unplug the drill when changing bits or adapters: This will prevent accidental starts.
- Inspect the adapter regularly: Check the adapter for signs of wear or damage. Replace it if it’s cracked, bent, or otherwise damaged.
Troubleshooting Common Issues

Even with the best preparation, you might encounter some issues when using adapters. Here are some common problems and how to fix them:
- Wobbling drill bit: This is usually caused by a loose adapter or drill bit. Loosen the chuck and adapter, readjust them, and tighten again. Also, make sure the adapter and drill bit are centered in the chuck.
- Adapter slipping: This can happen if the adapter is not properly tightened or if the chuck jaws are worn. Try tightening the chuck more securely. If the problem persists, replace the chuck or adapter.
- Drill bit breaking: This can be caused by using the wrong speed, applying too much pressure, or using a dull drill bit. Use the correct speed for the material you’re drilling and the size of the drill bit. Apply steady, even pressure. Replace dull drill bits.
- Adapter getting stuck: If the adapter gets stuck in the chuck, try tapping it gently with a hammer. You can also use a penetrating oil to help loosen it. If it still won’t come out, you may need to disassemble the chuck.
Advantages and Disadvantages of Using Adapters
Like any tool, adapters have their pros and cons. Here’s a quick overview:
Advantages
- Increased versatility: Adapters allow you to use a wider range of drill bit sizes with your existing drill.
- Cost-effective: Adapters are much cheaper than buying a new drill with a different chuck size.
- Convenience: Adapters are easy to use and can be quickly installed and removed.
Disadvantages
- Potential for wobble: If not properly installed, adapters can cause the drill bit to wobble, leading to inaccurate drilling.
- Reduced power: Adapters can reduce the amount of power transferred from the drill to the drill bit.
- Added length: Adapters can add length to the drill bit, making it difficult to use in tight spaces.
FAQ: Adapters and Single-Type Chucks
Here are some frequently asked questions about using adapters with single-type chucks:
Q: Can I use any adapter with any drill?
A: No, you need to choose an adapter that is compatible with your drill chuck’s capacity and the shank size of the drill bit you want to use. Always check the specifications before buying an adapter.
Q: Are adapters safe to use?
A: Yes, adapters are safe to use as long as you follow the safety guidelines and ensure a secure fit. Always wear safety glasses and gloves, and make sure the adapter and drill bit are properly tightened.
Q: Will an adapter reduce the power of my drill?
A: Yes, adapters can slightly reduce the amount of power transferred from the drill to the drill bit. However, this is usually not noticeable for most drilling tasks.
Q: How do I remove a stuck adapter from my drill chuck?
A: Try tapping the adapter gently with a hammer. You can also use a penetrating oil to help loosen it. If it still won’t come out, you may need to disassemble the chuck.
Q: Can I use an adapter with an impact driver?
A: Yes, but you need to use a reducer adapter specifically designed for impact drivers. Standard drill adapters are not designed to withstand the high torque of impact drivers.
Q: Where can I buy adapters for my drill?
A: You can buy adapters at most hardware stores, home improvement centers, and online retailers like Amazon and Home Depot.
Q: How often should I replace my drill adapter?
A: Replace your drill adapter if you notice any signs of wear or damage, such as cracks, bends, or excessive wobble. Regular inspection will help ensure safe and accurate drilling.
Conclusion
Using an adapter with a single-type chuck is a simple and effective way to expand the versatility of your drill. By choosing the right adapter and following the steps outlined in this guide, you can safely and accurately use a wider range of drill bit sizes. Remember to always prioritize safety and inspect your adapter regularly for signs of wear or damage.
So, the next time you’re faced with a drill bit that’s just a bit too small or too big, don’t despair! Grab an adapter, follow these instructions, and get back to drilling. Happy building!


