
How to Repair Chuck Head Spring: Easy Fix!
Quick Summary: Fixing a chuck head spring is easier than you think! First, take apart the chuck head to access the spring. Replace the old, broken spring with a new one. Put the chuck head back together carefully. Test it to make sure it works right. Now you’re ready to pump up those tires!
Is your bike pump not working like it used to? Does the chuck head feel loose or not grip the valve properly? Chances are, the chuck head spring is broken or worn out. This little spring is super important. It keeps the chuck head tight against the valve. When it fails, your pump loses pressure, and you can’t inflate your tires. Don’t worry! Replacing it is a simple fix. This guide walks you through each step. Soon, you’ll be back on the road with perfectly inflated tires!
Understanding Chuck Head Springs

Before we dive into the repair, let’s understand what a chuck head spring does and why it’s so important.
What is a Chuck Head?
The chuck head is the part of your bike pump that connects to the tire valve. It’s designed to create a tight seal so air doesn’t leak while you’re pumping. Most chuck heads have two sides: one for Schrader valves (the type you find on car tires) and one for Presta valves (common on road bikes).
The Role of the Spring
Inside the chuck head is a small spring. This spring provides the pressure needed to keep the chuck head firmly pressed against the valve. It ensures a secure, airtight connection. Over time, this spring can weaken, break, or get gunked up, leading to leaks and making it hard to inflate your tires.
Why Springs Fail
Chuck head springs fail for a few reasons:
- Wear and Tear: Constant use weakens the metal over time.
- Corrosion: Moisture and dirt can cause the spring to rust and break.
- Over-Extension: Pulling too hard on the chuck head can stretch the spring beyond its limits.
Tools and Materials You’ll Need

Before you start, gather these tools and materials:
- Replacement Spring: Buy a new spring that matches your chuck head model. Check online retailers or your local bike shop.
- Small Screwdriver Set: You’ll need this to take apart the chuck head.
- Pliers: For gripping small parts.
- Clean Rag: To wipe away dirt and grease.
- Grease or Lubricant: To help the new spring move smoothly.
- Work Gloves: To keep your hands clean and protected.
- Safety Glasses: To protect your eyes from flying debris.
Step-by-Step Guide to Repairing a Chuck Head Spring

Follow these steps to replace your chuck head spring:
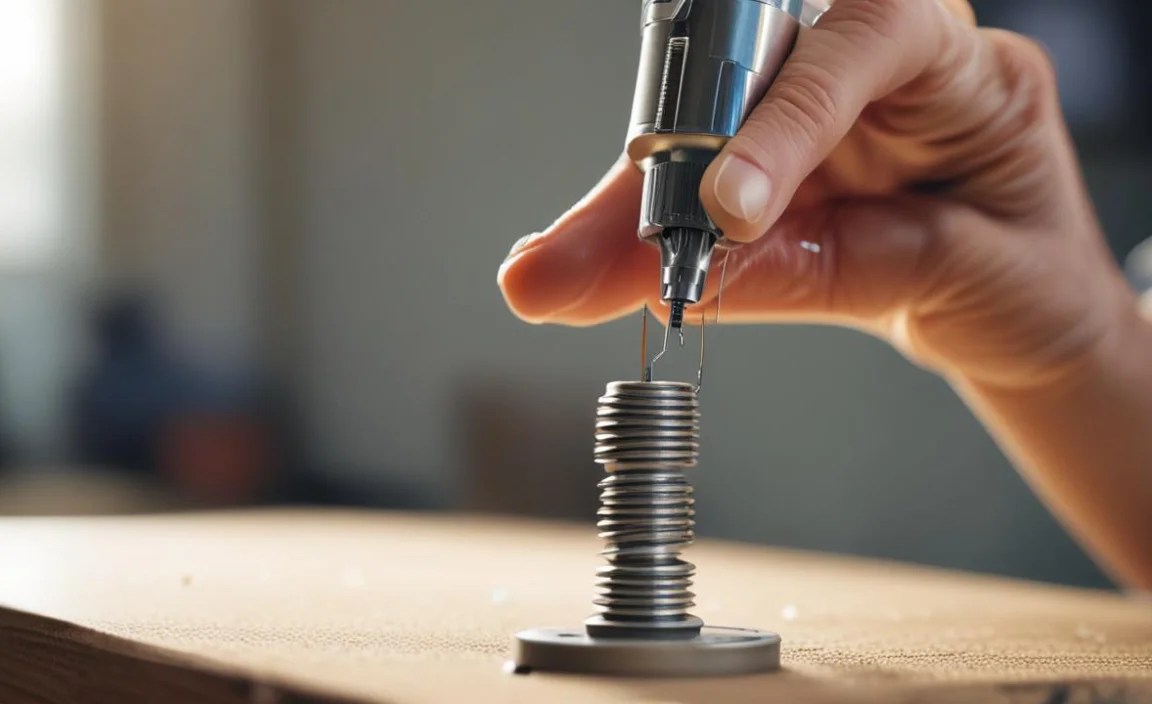
Step 1: Disassemble the Chuck Head
Carefully take apart the chuck head. This usually involves unscrewing a few small screws or removing retaining clips. Keep track of all the parts to make reassembly easier. You may want to take pictures as you go.
- Locate the Screws: Find the screws holding the chuck head together. They’re usually on the sides or ends.
- Unscrew Carefully: Use the correct size screwdriver to avoid stripping the screw heads. Turn slowly and apply steady pressure.
- Remove Retaining Clips: Some chuck heads use small clips instead of screws. Use pliers or a small screwdriver to gently pry them off.
- Separate the Halves: Once the screws or clips are removed, carefully pull the two halves of the chuck head apart.
Step 2: Remove the Old Spring
Once the chuck head is open, you’ll see the old spring. It might be broken, bent, or covered in grime.
- Identify the Spring: Look for a small coil spring, usually located in the center of the chuck head.
- Remove Debris: Clean away any dirt or grease around the spring.
- Extract the Spring: Use pliers or a small screwdriver to gently remove the spring. If it’s broken, be careful of any sharp edges.
Step 3: Clean the Chuck Head
Before installing the new spring, clean all the parts of the chuck head to remove any dirt or grime. This helps ensure smooth operation.
- Wipe Down Parts: Use a clean rag to wipe down all the components of the chuck head.
- Remove Stubborn Grime: For stubborn dirt, use a small brush or cotton swab with a bit of degreaser.
- Dry Thoroughly: Make sure all parts are completely dry before reassembling.
Step 4: Install the New Spring
Now it’s time to put in the new spring. Make sure it’s properly seated in its place.
- Position the Spring: Place the new spring in the same location as the old one.
- Seat it Properly: Make sure the spring is fully seated and aligned correctly. It should fit snugly.
- Apply Lubricant: Add a small amount of grease or lubricant to the spring. This helps it move smoothly and prevents corrosion.
Step 5: Reassemble the Chuck Head
Put the chuck head back together carefully. Make sure all the parts are aligned correctly and securely fastened.
- Align the Halves: Carefully align the two halves of the chuck head.
- Replace Screws or Clips: Reinstall the screws or retaining clips, tightening them securely.
- Check Alignment: Make sure all parts fit together properly and move freely.
Step 6: Test the Chuck Head
Before you declare victory, test the chuck head to make sure it works. Attach it to a tire valve and try pumping. Check for leaks and smooth operation.
- Attach to Valve: Connect the chuck head to a tire valve (Schrader or Presta).
- Check for Leaks: Listen for any hissing sounds that indicate air leaks.
- Pump the Tire: Try pumping the tire to see if the chuck head grips the valve properly and allows air to flow.
Troubleshooting Common Issues
Sometimes, things don’t go as planned. Here are some common issues and how to fix them:
Issue: Leaks After Repair
If you’re still getting leaks after replacing the spring, check these things:
- Spring Position: Make sure the spring is correctly seated.
- Seal Condition: Check the rubber seals inside the chuck head. They may need to be replaced.
- Tighten Connections: Ensure all screws or clips are tightened securely.
Issue: Chuck Head Won’t Attach
If the chuck head won’t attach to the valve, try these fixes:
- Valve Type: Make sure you’re using the correct side of the chuck head for the valve (Schrader or Presta).
- Obstructions: Check for any dirt or debris blocking the valve or chuck head.
- Spring Tension: The spring might be too tight. Try loosening it slightly.
Issue: Pumping is Difficult
If pumping feels harder than usual, consider these points:
- Lubrication: Make sure the spring and other moving parts are properly lubricated.
- Hose Condition: Check the pump hose for kinks or blockages.
- Pump Internals: The problem might be with the pump itself, not the chuck head.
Tips for Maintaining Your Chuck Head

To keep your chuck head in good condition, follow these tips:
- Regular Cleaning: Clean the chuck head regularly to remove dirt and grime.
- Proper Storage: Store your pump in a dry place to prevent corrosion.
- Gentle Handling: Avoid pulling too hard on the chuck head when attaching or detaching it from the valve.
- Periodic Lubrication: Lubricate the spring and other moving parts periodically.
Choosing the Right Replacement Spring
Finding the right replacement spring is crucial. Here’s what to consider:
- Model Compatibility: Make sure the spring is designed for your specific chuck head model.
- Material Quality: Look for springs made from durable, corrosion-resistant materials like stainless steel.
- Spring Tension: Choose a spring with the correct tension for your needs. Too weak, and it won’t seal properly. Too strong, and it will be hard to attach.
Different Types of Chuck Heads and Springs
Bike pumps come with different types of chuck heads, each with its own spring design. Here are some common types:
| Chuck Head Type | Spring Design | Common Use |
|---|---|---|
| Threaded Chuck Head | Coil spring inside the threaded connector | High-pressure road bike pumps |
| Lever-Lock Chuck Head | Compression spring behind the lever mechanism | Floor pumps for various tire types |
| Dual-Head Chuck | Two separate springs, one for each valve type | Versatile pumps for both Schrader and Presta valves |
| Slip-On Chuck Head | Small coil spring providing tension for a friction fit | Compact travel pumps |
When to Replace the Entire Chuck Head
Sometimes, the damage is beyond a simple spring replacement. Here are situations where you should replace the entire chuck head:
- Cracked Housing: If the plastic or metal housing is cracked, it won’t hold the spring properly.
- Worn Seals: If the rubber seals are damaged or worn, they’ll leak air no matter how good the spring is.
- Stripped Threads: If the threads are stripped, the chuck head won’t attach securely to the valve.
- Extensive Corrosion: If the chuck head is heavily corroded, it’s better to replace it for reliability.
Advantages of DIY Repair
Fixing your chuck head spring yourself has several advantages:
- Cost Savings: Replacement springs are cheap compared to buying a new pump or chuck head.
- Convenience: You can do the repair at home, on your own schedule.
- Skill Building: You’ll learn more about how your bike pump works and gain valuable repair skills.
- Satisfaction: There’s a great feeling of accomplishment that comes from fixing something yourself.
Cost Comparison: DIY vs. Professional Repair
Let’s break down the cost differences between fixing the chuck head spring yourself and taking it to a professional.
| Repair Method | Cost | Pros | Cons |
|---|---|---|---|
| DIY Spring Replacement | $5 – $15 (for the spring) | Cost-effective, convenient, educational | Requires some technical skill, potential for mistakes |
| Professional Repair | $20 – $50 (labor + parts) | Guaranteed quality, saves time | More expensive, less convenient |
| New Chuck Head | $15 – $40 | New components, eliminates wear and tear | More expensive than spring replacement |
Essential Bike Pump Maintenance Tips
Keeping your bike pump in top condition ensures reliable performance and extends its lifespan. Here are some essential maintenance tips:
- Regular Cleaning: Wipe down the pump body and hose with a damp cloth to remove dirt and grime.
- Lubrication: Periodically lubricate the moving parts, such as the piston and chuck head spring, with silicone-based lubricant.
- Check for Leaks: Inspect the hose and connections for leaks. Tighten any loose fittings and replace worn-out seals.
- Store Properly: Store your pump in a dry, sheltered location to prevent rust and corrosion.
- Inspect Valves: Regularly check the tire valves for damage or debris. Clean or replace them as needed.
External Resources for Bike Maintenance
For more in-depth information on bike maintenance, consider these resources:
- Park Tool Repair Help: Offers detailed guides and videos on various bike repairs.
- REI Expert Advice: Provides articles and tips on bike maintenance and gear.
- Local Bike Shops: Your local bike shop is a great resource for advice and assistance.
FAQ: Chuck Head Spring Repair
Q: Why does my bike pump lose pressure?
A: The most common reason is a faulty chuck head spring. It might be broken or weak, causing a poor seal on the tire valve.
Q: Can I use any spring as a replacement?
A: No, you should use a spring specifically designed for your chuck head model. A mismatched spring can cause leaks or damage.
Q: How often should I replace the chuck head spring?
A: It depends on how often you use your pump. Inspect it regularly and replace it when you notice leaks or reduced performance.
Q: Do I need special tools to replace the spring?
A: Usually, you just need a small screwdriver set and pliers. Some models might require specific tools, so check your pump’s manual.
Q: Is it worth repairing the chuck head, or should I just buy a new pump?
A: Repairing the chuck head is usually cheaper and easier than buying a new pump. If the rest of the pump is in good condition, replacing the spring is a smart choice.
Q: Can dirt affect the chuck head spring?
A: Yes! Dirt and grime can cause the spring to corrode or lose tension. Regular cleaning helps prevent this.
Q: Where can I buy a replacement chuck head spring?
A: You can find replacement springs at most bike shops or online retailers that sell bike parts and accessories.
Conclusion
Repairing a chuck head spring might seem daunting, but it’s a straightforward task with the right tools and guidance. By following these steps, you can save money, extend the life of your bike pump, and enjoy hassle-free tire inflation. Remember to keep your pump clean and well-maintained to avoid future problems. Happy cycling!


