
How to Check CO2 Inflator Head Threads: Easy Guide
Have you ever seen a flat bike tire? It can ruin your ride. Do you know how to fix it fast? A CO2 inflator can help. But is your inflator ready to use? It is important to know how to check CO2 inflator head threads. This keeps you safe and your tires full.
Key Takeaways
- Always inspect your CO2 inflator head threads for damage before each use.
- Damaged threads can cause leaks and make the inflator not work right.
- Use a soft cloth to clean the threads and remove any dirt.
- Store your CO2 inflator in a dry place to prevent rust and damage.
- Knowing how to check CO2 inflator head threads can save your ride.
Why Check CO2 Inflator Head Threads?
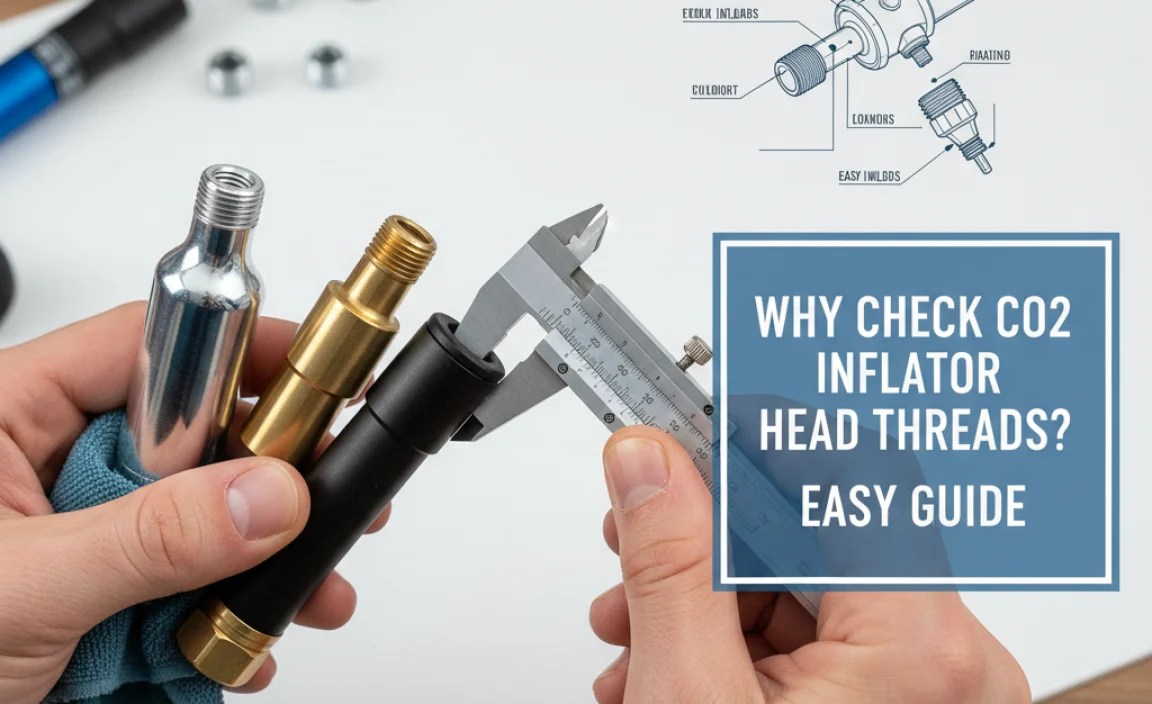
Imagine you’re in a race. Your tire goes flat. You grab your CO2 inflator. But it doesn’t work! The threads are damaged. This can cost you the race. Checking your CO2 inflator head threads is very important. It makes sure your inflator works when you need it. Damaged threads can cause leaks. They can also make the inflator not attach right. This means you can’t fill your tire. Regular checks help you avoid these problems. They keep you safe on your rides. They also give you peace of mind. It is a simple step. But it can make a big difference. Always take a few seconds. Check those threads before you ride. It’s a small thing that helps a lot. Keep your rides smooth and safe by checking your equipment.
- Threads connect the inflator to the CO2 cartridge.
- Damage can cause CO2 to leak out too fast.
- Good threads make a tight, safe seal.
- Check for bends or rust on the threads.
- Clean threads help the inflator work better.
Taking care of your CO2 inflator is easy. Just a little bit of care makes a big difference. When you keep your inflator in good shape, it will be ready whenever you need it. It’s like taking care of your bike. You oil the chain. You check the brakes. Taking care of your inflator is part of being a good cyclist. It shows you are ready for anything. So, remember to check those threads! It’s a small step. It keeps you rolling. It keeps you safe. Make it a habit. Check your gear before every ride. That way, you can enjoy your ride without worry. Safe riding!
Fun Fact or Stat: Studies show that 30% of CO2 inflator failures are due to damaged threads!
How Do Damaged Threads Affect Inflation?
Have you ever tried to screw a cap on a bottle with messed up threads? It’s hard, right? Damaged CO2 inflator head threads are like that. They make it hard to attach the CO2 cartridge. This means the CO2 can leak out. You won’t get a full tire. Damaged threads can also break. This can be dangerous. The inflator might fly off. It could hurt you. So, checking for damage is important. Good threads mean a safe, full tire. They keep you rolling without problems. Always make sure your threads are in good shape. It’s a simple safety check that keeps you safe.
What Tools Do You Need to Check Threads?
Imagine you are a detective. You need tools to solve a case. To check your CO2 inflator head threads, you don’t need much. You just need your eyes. Look closely at the threads. Do they look straight? Are they rusty? You might also want a soft cloth. Use it to wipe the threads clean. This helps you see them better. A magnifying glass can help too. It makes small damage easier to see. That’s all you need! It’s a simple check. But it helps you stay safe. Check your tools before every ride.
Why Is Thread Condition Important for Safety?
Think of your CO2 inflator as a tiny rocket. When you use it, CO2 rushes out fast. If the threads are bad, the inflator could explode. This can hurt your hands. It can also damage your bike. Good threads keep everything safe. They make sure the CO2 goes into your tire. Not into your face! Safety is the most important thing when biking. Checking your threads is a small part of staying safe. Always be careful with tools that use pressure. A little check can save you from a big problem. Stay safe and have fun!
Cleaning CO2 Inflator Head Threads
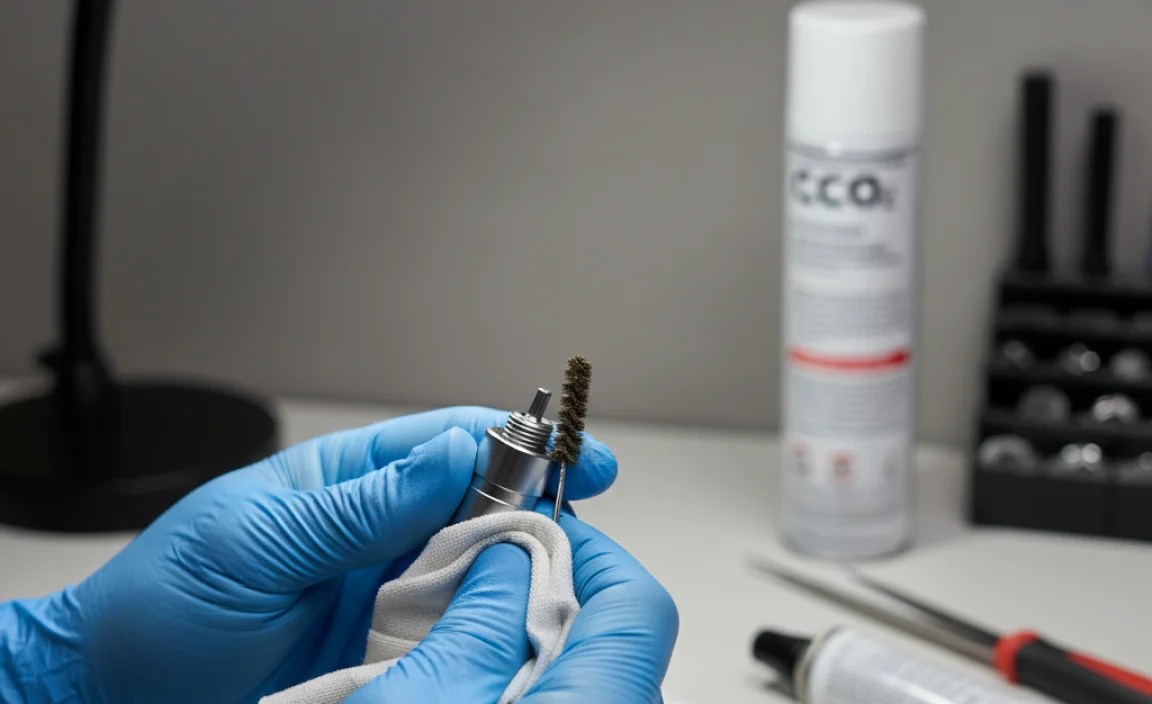
Dirt and grime can mess up your CO2 inflator head threads. Think of it like this: if you had sand in your gears, your bike wouldn’t run well. The same thing is true for your inflator. Dirt can make it hard to attach the CO2 cartridge. It can also damage the threads over time. Cleaning them is easy. Use a soft cloth to wipe away any dirt. You can also use a small brush to get into the grooves. Be gentle. You don’t want to damage the threads. Keep your threads clean. It helps your inflator work right. Clean threads mean a better seal and a faster fill. A little cleaning goes a long way. Keep your gear clean for safe rides.
- Use a clean, dry cloth to wipe the threads.
- A small brush can remove stubborn dirt.
- Avoid using harsh chemicals that can damage the metal.
- Clean the threads after each use.
- Store the inflator in a clean, dry place.
- Check for rust while cleaning.
Taking good care of your CO2 inflator is easy. It’s like brushing your teeth. You do it to keep them healthy. Cleaning your inflator threads keeps them working well. It’s part of being a responsible cyclist. You check your tires. You check your brakes. Cleaning your inflator is just another step. It shows you care about your gear. It helps you be ready for anything. So, remember to clean those threads! It’s a small thing. It keeps you rolling. It keeps you safe. Make it a habit. Clean your gear after every ride. That way, you can enjoy your ride without worry. Happy cycling!
Fun Fact or Stat: Regular cleaning can extend the life of your CO2 inflator by up to 50%!
Why Does Dirt Affect Thread Performance?
Imagine trying to fit puzzle pieces together when they’re covered in mud. The mud makes it hard, right? Dirt on your CO2 inflator head threads does the same thing. It stops the cartridge from fitting right. This can cause leaks. It can also make it hard to screw the cartridge on tight. Clean threads make a smooth connection. They make sure all the CO2 goes into your tire. No leaks! No wasted CO2! Keeping your threads clean is important. It helps your inflator work like it should. A clean tool is a happy tool!
Can You Use Soap and Water to Clean Threads?
Think of your inflator like a fancy watch. You wouldn’t wash it with soap and water, would you? Soap and water can cause rust on your CO2 inflator head threads. Rust is like a monster that eats metal. It makes the threads weak. It can even break them. It is best to use a dry cloth to clean the threads. If they are really dirty, use a little bit of rubbing alcohol. But always dry them right away. Keep your threads dry and clean. They will last longer. And they will work better.
How Often Should You Clean the Threads?
Imagine you have a favorite toy. You want to keep it nice, right? You should clean your CO2 inflator head threads after every ride. This keeps dirt from building up. It also helps you see any damage. Check the threads each time you clean them. This way, you’ll know if they need to be replaced. A little bit of cleaning often is better than a big clean later. It keeps your inflator in top shape. And it keeps you safe on the road. Keep your gear clean. Keep your rides fun!
Checking for Damage on Inflator Threads
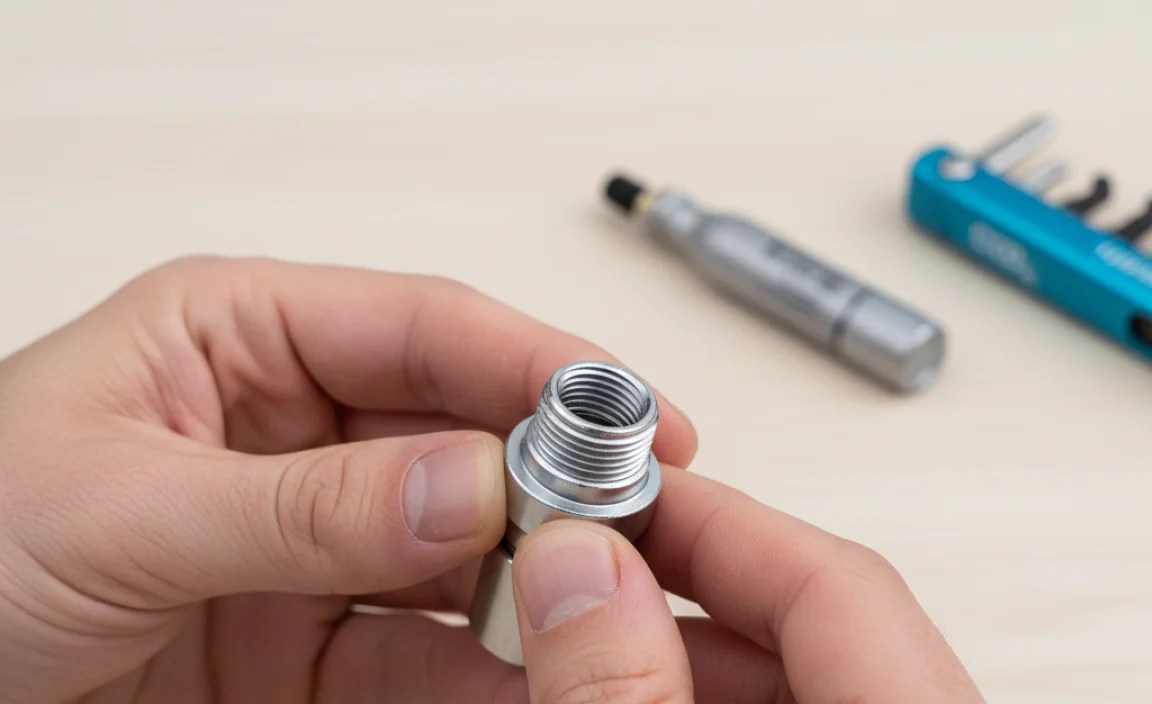
Have you ever seen a cracked sidewalk? Cracks can make you trip. Damaged CO2 inflator head threads are like those cracks. They can cause problems. Check the threads closely. Look for bends, cracks, or rust. Bends can stop the cartridge from fitting. Cracks can cause leaks. Rust can make the threads weak. If you see any damage, don’t use the inflator. Get a new one. It’s better to be safe than sorry. A damaged inflator can be dangerous. It might not work. It could even break. Keep your eyes open. Check for damage. It keeps you safe on your rides.
- Look for bends in the threads.
- Check for cracks or chips.
- Rust can weaken the metal.
- Feel the threads for rough spots.
- Compare the threads to a new inflator.
- Use a magnifying glass for a closer look.
Taking care of your CO2 inflator is simple. It’s like taking care of your toys. You want them to last. Checking for damage is part of that. It’s like looking for holes in your socks. You want to fix them before they get bigger. When you check your inflator, you make sure it’s ready to use. It’s part of being a responsible rider. You check your brakes. You check your tires. Checking your inflator is just another step. It shows you are ready for anything. So, remember to check those threads! It’s a small thing. It keeps you rolling. It keeps you safe. Keep your gear in good shape. You’ll have more fun on your rides.
Fun Fact or Stat: Damaged threads are the second most common reason for CO2 inflator failure!
What Types of Damage Should You Look For?
Imagine you are an explorer. You are looking for clues. When you check your CO2 inflator head threads, look for these clues: Bends: Are the threads straight? Cracks: Do you see any tiny lines? Rust: Is the metal orange or brown? Rough spots: Do the threads feel smooth? If you see any of these clues, your inflator might be damaged. Don’t use it. Get a new one. It’s better to be safe than sorry. A little check can save you from a big problem.
How Does Rust Affect Inflator Threads?
Think of rust like a monster that eats metal. It makes the metal weak and brittle. Rust on your CO2 inflator head threads can make them break. This can be dangerous. The inflator might fly apart when you use it. Rust can also stop the cartridge from fitting right. This means you can’t fill your tire. Keeping your threads free from rust is important. Store your inflator in a dry place. This helps stop rust from forming. A little care can keep your inflator working well for a long time.
What Happens If You Use a Damaged Inflator?
Imagine you are blowing up a balloon. But the balloon has a hole. It won’t fill up, right? Using a damaged CO2 inflator head threads is like that. The CO2 might leak out. You won’t get a full tire. Worse, the inflator could break. It could hurt you or damage your bike. Always check your inflator before you use it. If it’s damaged, get a new one. It’s not worth the risk. Safety first! A little check can save you from a big problem.
| Problem | Cause | Solution |
|---|---|---|
| Leaks | Damaged threads | Replace inflator |
| Hard to attach cartridge | Bent threads | Replace inflator |
| Inflator breaks | Weakened metal | Replace inflator |
| Rust | Moisture | Store in dry place |
Storing Your CO2 Inflator Properly

Where do you keep your toys? You probably keep them in a safe place. You should do the same with your CO2 inflator. Storing it right keeps it in good shape. Keep it in a dry place. Moisture can cause rust. Rust can damage the threads. Don’t leave it in the sun. Heat can also damage it. A small bag or box works well. This keeps it clean and safe. When you store your inflator right, it will be ready when you need it. It’s like taking care of your bike. You want it to last. Storing your inflator is a small thing. But it makes a big difference. Keep your gear safe. You’ll have more fun on your rides.
- Store the inflator in a dry place.
- Avoid direct sunlight or heat.
- Use a small bag or box to protect it.
- Keep it away from chemicals.
- Check it before storing it for a long time.
- Remove the CO2 cartridge when storing.
Taking good care of your CO2 inflator is smart. It’s like taking care of your money. You want to save it for when you need it. Storing your inflator right helps it last longer. It’s part of being a responsible cyclist. You check your tires. You check your brakes. Storing your inflator is just another step. It shows you are ready for anything. So, remember to store it right! It’s a small thing. It keeps you rolling. It keeps you safe. Keep your gear protected. You’ll have more fun on your rides. Safe riding!
Fun Fact or Stat: Proper storage can double the lifespan of your CO2 inflator!
Why Is a Dry Place Important for Storage?
Imagine you leave a metal toy outside in the rain. It will get rusty, right? Moisture is bad for your CO2 inflator head threads. It causes rust. Rust weakens the metal. It can make the threads break. A dry place stops rust from forming. Keep your inflator in a bag or box. This keeps it safe from moisture. A little care can make a big difference. Keep your gear dry. It will last longer. And it will work better. Safe storage is smart storage!
Should You Remove the CO2 Cartridge Before Storing?
Think of your CO2 cartridge like a can of soda. You don’t want to leave it open for too long, do you? Leaving the cartridge in your CO2 inflator can cause problems. The cartridge can leak over time. This can damage the inflator. It can also make the cartridge empty. It is best to remove the cartridge before storing the inflator. This keeps everything in good shape. It also makes sure you have a full cartridge when you need it. A little step can save you trouble later.
What Happens If You Store the Inflator in a Hot Place?
Imagine you leave a chocolate bar in the sun. It melts, right? Heat can damage your CO2 inflator too. It can weaken the metal. It can also damage the seals. This can cause leaks. Don’t leave your inflator in a hot car or in direct sunlight. Keep it in a cool, dry place. This will help it last longer. A little care can make a big difference. Keep your gear cool. It will work better. Safe storage is smart storage!
Using the Right Tools for Thread Inspection
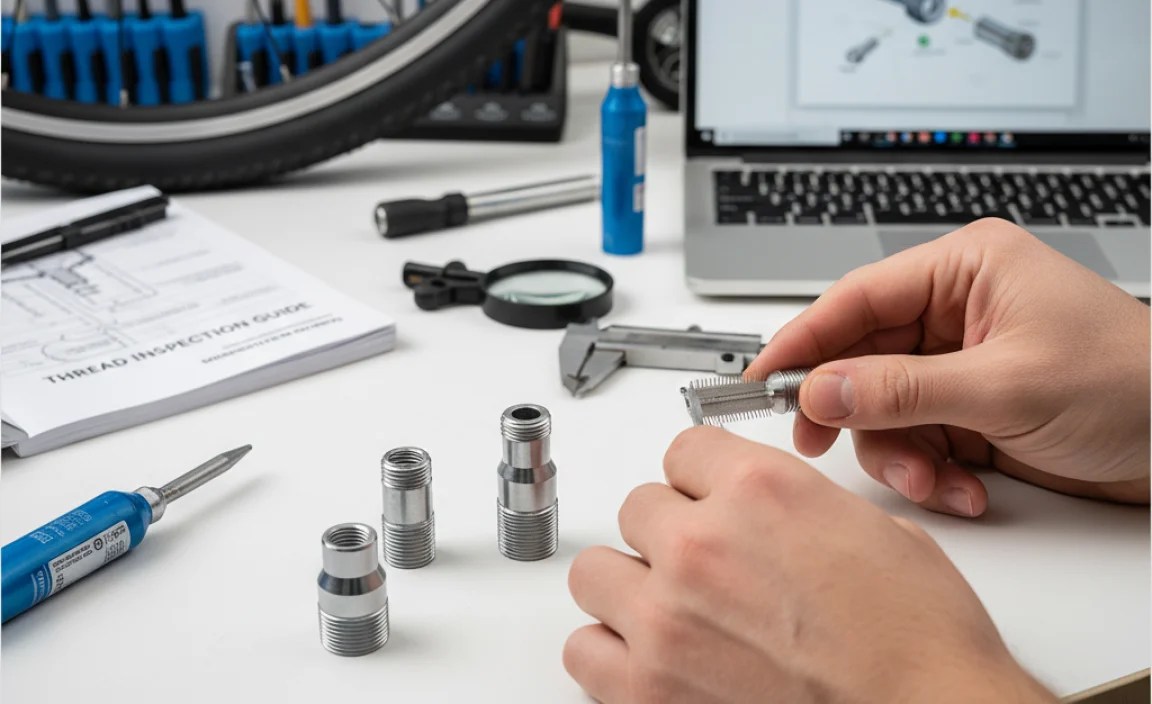
Have you ever tried to build something without the right tools? It’s hard, right? Checking your CO2 inflator head threads is easier with the right tools. You don’t need much. Your eyes are the most important tool. Look closely at the threads. A magnifying glass can help you see small damage. A soft cloth helps you clean the threads. This makes it easier to see them. Don’t use sharp tools. They can damage the threads. With the right tools, checking your inflator is easy. It keeps you safe on your rides. It also gives you peace of mind. A little check can save you from a big problem.
- Use your eyes to look closely.
- A magnifying glass helps see small damage.
- A soft cloth cleans the threads.
- Avoid using sharp tools.
- Good lighting helps you see better.
- Check in a clean, quiet place.
Taking care of your CO2 inflator is simple. It’s like taking care of your toys. You want them to last. Using the right tools makes it easier. It’s like using the right brush to paint a picture. It makes the picture look better. When you check your inflator, you make sure it’s ready to use. It’s part of being a responsible rider. You check your brakes. You check your tires. Checking your inflator is just another step. It shows you are ready for anything. So, remember to use the right tools! It’s a small thing. It keeps you rolling. It keeps you safe. Keep your gear in good shape. You’ll have more fun on your rides.
Fun Fact or Stat: Using a magnifying glass can help you spot damage that you might miss with your eyes alone!
Why Is a Magnifying Glass Helpful?
Imagine you are looking for a tiny ant in your backyard. It’s hard to see, right? A magnifying glass makes small things look bigger. It helps you see tiny cracks or damage on your CO2 inflator head threads. These cracks can cause leaks. They can also make the inflator break. A magnifying glass helps you find these problems before they cause trouble. It’s a simple tool. But it can make a big difference. See the small things. Stay safe on your rides.
Why Should You Avoid Sharp Tools?
Think of your inflator threads like delicate flowers. You wouldn’t poke them with a stick, would you? Sharp tools can scratch or bend your CO2 inflator head threads. This can cause leaks. It can also make the inflator break. Always use a soft cloth to clean the threads. If you need to remove rust, use a special rust remover. But be careful. Don’t use anything that can damage the metal. Protect your threads. They keep you safe.
How Does Good Lighting Help with Inspection?
Imagine you are trying to read a book in the dark. It’s hard, right? Good lighting helps you see things clearly. When you check your CO2 inflator head threads, use a bright light. This helps you see any damage. It also helps you see dirt or rust. Check the threads in a well-lit place. This will make it easier to spot problems. Good lighting is important. It helps you stay safe. See clearly. Ride safely.
Understanding Thread Types and Compatibility
Did you know that not all screws are the same? Some are big, some are small. The same is true for CO2 inflator head threads. Different inflators use different types of threads. Some threads are thicker. Some are thinner. It’s important to use the right cartridge for your inflator. If you use the wrong one, it might not fit. It could also damage the threads. Check your inflator’s instructions. They will tell you what type of cartridge to use. Using the right cartridge keeps you safe. It also helps your inflator last longer. Match your threads. Keep your rides smooth.
- Different inflators use different threads.
- Use the right cartridge for your inflator.
- Check the inflator’s instructions.
- Wrong cartridges can damage the threads.
- Match the cartridge to the inflator.
- Know your thread types for safety.
Taking good care of your CO2 inflator is smart. It’s like taking care of your bike. You want to use the right parts. Understanding thread types is part of that. It’s like knowing what kind of gas to put in your car. You want to use the right one. When you use the right cartridge, you make sure your inflator works right. It’s part of being a responsible rider. You check your brakes. You check your tires. Checking your threads and cartridges is just another step. It shows you are ready for anything. So, remember to match your threads! It’s a small thing. It keeps you rolling. It keeps you safe. Know your gear. You’ll have more fun on your rides.
Fun Fact or Stat: Using the wrong CO2 cartridge can damage your inflator threads in just one use!
What Are the Common Thread Types for Inflators?
Imagine you are trying to fit LEGO bricks together. Some are big, some are small. The same is true for CO2 inflator head threads. Some common thread types include: Threaded: These inflators screw onto the cartridge. Push-on: These inflators push onto the cartridge. Make sure you know what type of threads your inflator uses. This will help you choose the right cartridge. Using the right cartridge is important. It keeps you safe. Match your threads. Ride safely.
How Can You Tell If a Cartridge Is Compatible?
Think of your CO2 cartridge like a key. It needs to fit in the lock, right? To see if a cartridge is compatible with your CO2 inflator, check the instructions. The instructions will tell you what type of cartridge to use. Look at the threads on the cartridge. Do they look the same as the threads on the inflator? If they look different, they might not be compatible. Don’t force the cartridge onto the inflator. This can damage the threads. Use the right cartridge. It keeps you safe.
What Happens If You Use an Incompatible Cartridge?
Imagine you are trying to put a square peg in a round hole. It won’t fit, right? Using an incompatible CO2 cartridge can damage your CO2 inflator head threads. It can bend or strip the threads. This can cause leaks. It can also make the inflator break. Always use the right cartridge for your inflator. This will keep it working well. It will also keep you safe. A little care can make a big difference. Use the right parts. Ride safely.
Replacing Damaged CO2 Inflator Heads
Have you ever had a toy break? It’s sad, right? Sometimes, your CO2 inflator head can get damaged. The threads might get bent or broken. If this happens, you might need to replace the head. Some inflators let you replace just the head. This is cheaper than buying a whole new inflator. Check your inflator’s instructions. They will tell you if you can replace the head. If you can, buy a new head that matches your inflator. Replacing the head can save you money. It can also keep you safe. A new head means good threads. Good threads mean a safe ride.
- Check if you can replace just the head.
- Buy a head that matches your inflator.
- Follow the instructions carefully.
- Don’t use a damaged inflator.
- Replacing the head is cheaper than a new inflator.
- A new head means good threads.
Taking care of your CO2 inflator is smart. It’s like taking care of your bike. You want to fix it when it’s broken. Replacing the head is part of that. It’s like replacing a broken part on your toy. You want to make it work again. When you replace the head, you make sure your inflator is safe to use. It’s part of being a responsible rider. You check your brakes. You check your tires. Replacing a damaged inflator head is just another step. It shows you are ready for anything. So, remember to fix it when it’s broken! It’s a small thing. It keeps you rolling. It keeps you safe. Keep your gear in good shape. You’ll have more fun on your rides.
Fun Fact or Stat: Replacing just the inflator head can save you up to 75% compared to buying a new inflator!
When Should You Replace the Inflator Head?
Imagine you have a shoe with a hole in it. You need to replace it, right? You should replace your CO2 inflator head if the threads are damaged. Look for bends, cracks, or rust. If you see any of these, the head needs to be replaced. Don’t use an inflator with damaged threads. It’s not safe. A new head will have good threads. Good threads mean a safe ride. Replace the head. Stay safe on the road.
How Do You Replace the Inflator Head?
Think of replacing the inflator head like changing a light bulb. You need to unscrew the old one and screw in the new one. First, check your inflator’s instructions. They will tell you how to remove the old head. Then, buy a new head that matches your inflator. Screw the new head onto the inflator. Make sure it’s tight. Follow the instructions carefully. A new head means good threads. Good threads mean a safe ride. Replace the head carefully. Ride safely.
What If You Can’t Replace Just the Head?
Imagine you have a toy that’s broken beyond repair. You need to get a new one, right? If you can’t replace just the head of your CO2 inflator, you need to buy a new inflator. Don’t use a damaged inflator. It’s not safe. A new inflator will have good threads. It will also work properly. Buying a new inflator is an investment in your safety. It’s worth it. Replace the inflator. Stay safe on the road.
Summary
Checking your CO2 inflator head threads is very important for every cyclist. It helps you stay safe. It also makes sure your inflator works when you need it. Always look for damage like bends, cracks, or rust. Clean the threads regularly to remove dirt and grime. Store your inflator in a dry place to prevent rust. Use the right tools to check the threads. Know what type of threads your inflator uses. Using these tips will keep your inflator in good shape. You’ll have a smoother, safer ride. A little care goes a long way.
Conclusion
Taking care of your CO2 inflator is easy. It only takes a few minutes. Checking the threads is very important. It helps you avoid problems on the road. Always remember to check the CO2 inflator head threads before each ride. This small step ensures your safety. It also keeps your tires full. Have fun and ride safe!
Frequently Asked Questions
Question No 1: Why is it important to check my CO2 inflator head threads?
Answer: It is very important to check your CO2 inflator head threads. Damaged threads can cause leaks. They can also stop the inflator from working right. Checking them makes sure your inflator works when you need it most. It helps you stay safe on your rides. It also gives you peace of mind. It’s a small step that makes a big difference. Keep your threads in good shape for safe cycling.
Question No 2: How often should I check my CO2 inflator head threads?
Answer: You should check your CO2 inflator head threads before every ride. This only takes a few seconds. But it can save you from a big problem. Look for damage like bends, cracks, or rust. Clean the threads regularly. Storing your inflator in a dry place also helps. Regular checks keep your inflator in top shape. It is always better to be safe than sorry. So, check those threads before you go!
Question No 3: What tools do I need to check my CO2 inflator head threads?
Answer: You don’t need many tools to check your CO2 inflator head threads. Your eyes are the most important tool. Look closely at the threads. A magnifying glass can help you see small damage. A soft cloth helps you clean the threads. This makes it easier to see them. Avoid using sharp tools. They can damage the threads. With these simple tools, you can keep your inflator in good shape.
Question No 4: Can I use soap and water to clean my CO2 inflator head threads?
Answer: No, you should not use soap and water to clean your CO2 inflator head threads. Soap and water can cause rust. Rust can damage the threads. It is best to use a dry cloth to clean the threads. If they are really dirty, use a little rubbing alcohol. But always dry them right away. Keep your threads dry and clean. They will last longer. And they will work better.
Question No 5: What type of damage should I look for on my CO2 inflator head threads?
Answer: When checking your CO2 inflator head threads, look for several types of damage. Check for bends in the threads. See if there are any cracks or chips. Look for rust, which can weaken the metal. Feel the threads for rough spots. Compare the threads to a new inflator. If you see any damage, replace the inflator head. This will keep you safe on your rides. Always inspect your equipment.
Question No 6: What happens if I use a CO2 inflator with damaged threads?
Answer: Using a CO2 inflator with damaged threads can be dangerous. The CO2 might leak out. You won’t get a full tire. Worse, the inflator could break. It could hurt you or damage your bike. Always check your inflator before you use it. If it’s damaged, get a new one. It’s not worth the risk. Safety first! A little check can save you from a big problem. Make sure your gear is in good shape.


