
CO2 Inflator for Mountain Bikes – Best Practice. Easy!
Have you ever been on a mountain bike ride? Did you get a flat tire far from home? It can be scary. A CO2 inflator for mountain bikes can help. It gets you back on the trail fast. Let’s learn the best practice for using one.
A CO2 inflator is a small tool. It uses a CO2 cartridge to fill your tire. It is much faster than a hand pump. It is also lighter to carry. Knowing how to use it is very important. This article will show you how. We will cover all the steps.
Using a CO2 inflator seems easy. But there are some things to know. You need to use it safely. You also need to use it correctly. This will help you avoid problems. Are you ready to learn more? Let’s get started and explore CO2 inflators for mountain bikes. We will focus on the best practice.
Key Takeaways
- Always check your CO2 inflator and cartridge before each mountain bike ride.
- Wear gloves to protect your hands from the cold CO2 cartridge during inflation.
- Practice using your CO2 inflator at home to get comfortable with the process.
- Use short bursts of CO2 to avoid over-inflating your mountain bike tire. This is best practice.
- After inflation, check the tire pressure with a gauge for optimal performance and safety.
Using a CO2 Inflator: Best Practice Steps
A CO2 inflator is great for fixing flats fast. But you need to know how to use it right. The best practice starts with getting ready. First, check your inflator. Make sure it works. Look for any damage. Then, check your CO2 cartridge. Make sure it is full. Carry extra cartridges. You might need them. Next, gather your tools. You’ll need tire levers. These help you take off the flat tire. You’ll also need a new tube. Or a patch kit. A patch kit can fix small holes. Don’t forget gloves. The CO2 cartridge gets very cold. Gloves protect your hands. Finally, find a safe place to fix your tire. Get off the trail. Make sure you are away from traffic. Now you are ready to start fixing your flat. Follow these steps for the best practice.
- Check your CO2 inflator before each ride.
- Carry extra CO2 cartridges.
- Use tire levers to remove the tire.
- Wear gloves to protect your hands.
- Find a safe place to fix your tire.
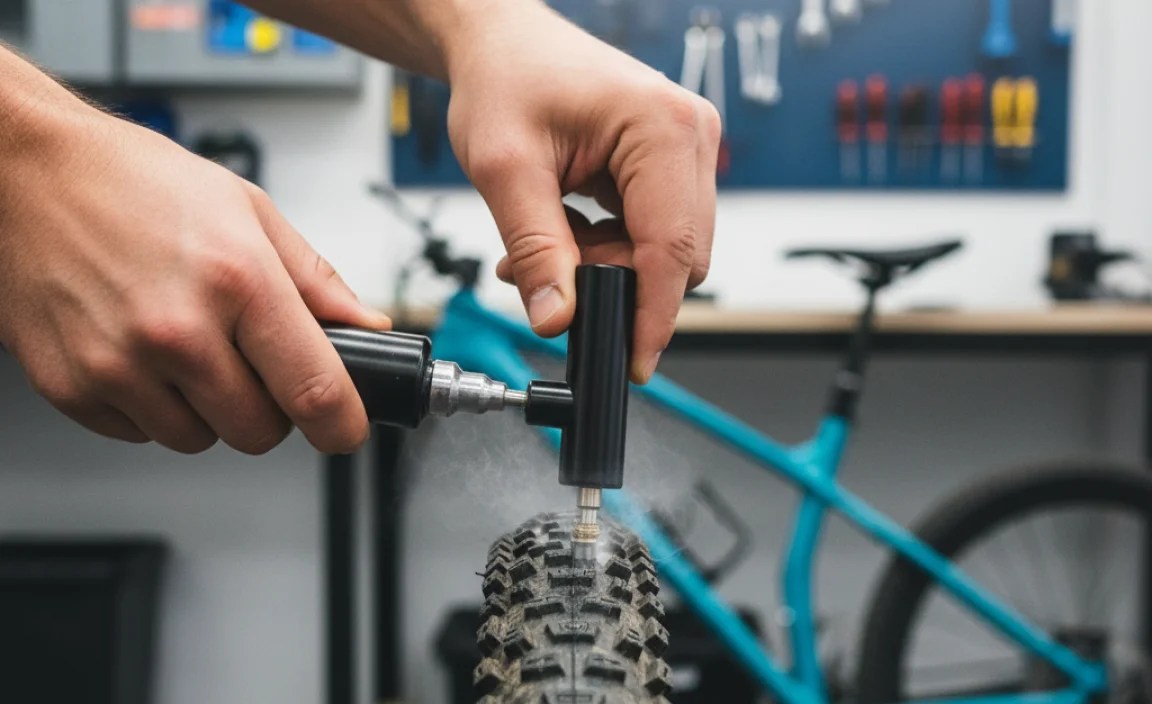
Now that you are prepped, let’s get to the repair. Take the wheel off your bike. Use the tire levers to get one side of the tire off the rim. Pull out the old tube. Check the tire for anything sharp. Remove anything stuck in the tire. Put in the new tube. Start by putting the valve in the hole on the rim. Then, carefully tuck the tube inside the tire. Use your thumbs to push the tire back onto the rim. Make sure the tube isn’t pinched. Now, you are ready to use the CO2 inflator. Follow the next steps for the best practice. This will make sure your tire is filled correctly. And you can get back to riding your mountain bike fast and safely.
Fun Fact or Stat: Did you know that a 16-gram CO2 cartridge can inflate a mountain bike tire to about 30-40 PSI?
Why Check Your Inflator Before Riding?
Imagine you are on a long ride. You get a flat tire. You reach for your CO2 inflator. But it doesn’t work! That would be terrible. This is why checking before riding is important. Make sure the inflator is clean. Check the threads. The threads connect to the cartridge. If they are damaged, it won’t work. Also, check the nozzle. The nozzle pushes air into the tire. It should be clear. No dirt or mud should be blocking it. If you find any problems, fix them before you leave. A little check can save you a lot of trouble. Always follow this best practice.
What Kind of Gloves Should You Use?
The CO2 cartridge gets very cold. It can freeze your skin. This is why gloves are important. But not all gloves are the same. Thick gloves are best. They protect your hands from the cold. Leather gloves work well. Work gloves are also good. Even thick fabric gloves are better than nothing. Avoid thin gloves. They won’t protect you enough. If you don’t have gloves, use something else. A rag or a piece of cloth will help. Just make sure to protect your skin. This is a key part of the best practice for using a CO2 inflator.
Why Find a Safe Place to Fix Your Tire?
Fixing a flat tire can be tricky. You need to focus. You don’t want to be distracted. That’s why a safe place is important. Get off the trail. Move away from other riders. Find a flat spot. This will make it easier to work. Look around for hazards. Watch out for sharp rocks or branches. You don’t want to get hurt. If you are on a road, be very careful. Move far away from traffic. Wear bright colors. Make sure cars can see you. A safe place makes fixing your tire easier. It also keeps you safe. This is all part of the best practice.
Connecting the CO2 Inflator Properly

Now you have the new tube in place. It is time to connect the CO2 inflator. This step is very important. If you don’t connect it right, the CO2 will leak. You will waste the cartridge. First, make sure the inflator is closed. Most inflators have a knob or a lever. This controls the flow of CO2. Turn the knob all the way off. Or close the lever. Next, screw the CO2 cartridge into the inflator. Screw it in until it is snug. But don’t over-tighten it. That could damage the inflator. Now, push the inflator nozzle onto the tire valve. Make sure it is on tight. You should hear a little hiss of air. This means it is connected. If it is not connected right, try again. Make sure it is secure. Now you are ready to inflate the tire. This is the next step in the best practice.
- Close the inflator before connecting the cartridge.
- Screw the CO2 cartridge in until snug.
- Push the inflator nozzle onto the tire valve.
- Ensure a tight connection to prevent leaks.
- Double-check the connection before inflating.
Now, let’s talk about different types of valves. There are two main types: Presta and Schrader. Presta valves are skinny. They are common on mountain bikes. Schrader valves are wider. They are like the ones on car tires. Make sure your inflator works with your valve type. Some inflators work with both. Others only work with one. If you have a Presta valve, you need to unlock it. Unscrew the little nut on the end. Then, push it in a little. This opens the valve. Now you can connect the inflator. Remember to lock the valve after inflating. Following these steps will help you connect the CO2 inflator correctly. This is a key part of the best practice.
Fun Fact or Stat: Some high-end CO2 inflators come with a pressure gauge. This helps you inflate your tire to the perfect PSI!
What if the CO2 Cartridge Won’t Screw In?
Sometimes, the CO2 cartridge won’t screw in. This can be frustrating. First, check the threads. Make sure they are clean. Look for any dirt or damage. If the threads are dirty, clean them. Use a small brush. If they are damaged, you might need a new inflator. Next, make sure you are using the right cartridge. Some inflators only work with certain sizes. Check the instructions for your inflator. Also, make sure you are screwing it in straight. If you screw it in crooked, it won’t work. Be gentle. Don’t force it. If it still won’t screw in, try another cartridge. The first one might be defective. Keep these tips in mind for the best practice.
How Tight Should the Cartridge Be?
You want the CO2 cartridge to be tight. But not too tight. If it’s too loose, the CO2 will leak. If it’s too tight, you could damage the inflator. The goal is to make it snug. Screw the cartridge in until you feel resistance. Then, give it a little extra turn. That should be enough. If you are not sure, check for leaks. Listen for a hissing sound. If you hear a hiss, tighten it a little more. But be careful. Don’t overdo it. Remember, snug is good. Too tight is bad. This is an important part of the best practice.
What if the Inflator Doesn’t Fit My Valve?
Not all inflators fit all valves. If your inflator doesn’t fit, don’t force it. You could damage the valve. Or the inflator. First, check what kind of valve you have. Is it Presta or Schrader? Then, check your inflator. Does it work with that valve type? Some inflators are universal. They work with both. Others only work with one. If your inflator doesn’t fit, you have a few choices. You can buy an adapter. An adapter lets you use the inflator with a different valve. Or you can buy a new inflator. Make sure it fits your valve. Knowing this is part of the best practice.
Inflating the Tire Safely and Effectively

Now the inflator is connected. It is time to inflate the tire. This is where things can get tricky. You don’t want to over-inflate the tire. That can cause it to explode. You also don’t want to under-inflate it. That can lead to a flat again. The key is to use short bursts of CO2. Open the inflator valve a little bit. Let some CO2 into the tire. Then, close the valve. Check the tire pressure. Squeeze the tire with your fingers. It should feel firm. Not too hard, not too soft. Repeat this process until the tire is inflated properly. Take your time. Don’t rush. It is better to under-inflate than over-inflate. This is a critical part of the best practice.
| Tire Size | Recommended PSI | CO2 Cartridge Size | Notes |
|---|---|---|---|
| 26 x 2.0 | 30-40 PSI | 16 gram | Common for older bikes |
| 27.5 x 2.3 | 25-35 PSI | 16 gram | Good for trail riding |
| 29 x 2.2 | 22-32 PSI | 16 gram | Fast rolling |
| 29 x 2.5 | 20-30 PSI | 20 gram | More grip, lower pressure |
- Use short bursts of CO2 to inflate.
- Check the tire pressure frequently.
- Squeeze the tire to feel the pressure.
- Avoid over-inflating the tire.
- Take your time and be patient.
After inflating, check the tire carefully. Look for any bulges or weak spots. If you see anything, let some air out. The tire might be damaged. It is better to be safe than sorry. Also, remember that CO2 leaks out of tires faster than regular air. So, you will need to re-inflate the tire with a pump later. The CO2 is just a temporary fix. It gets you home or to the next repair shop. When you get home, take the tire off. Check the tube. Make sure there are no punctures. If you find any, patch them. Or replace the tube. Following these steps will help you inflate your tire safely and effectively. This is all part of the best practice for using a CO2 inflator.
Fun Fact or Stat: Pro mountain bikers often carry two CO2 cartridges per race, just in case they get multiple flats!
How Do You Know How Much to Inflate?
Knowing how much to inflate is key. Too much air can cause a blowout. Too little air can cause a flat. The right pressure depends on a few things. Your weight matters. The type of tire matters. The terrain you are riding on matters. Look at the sidewall of your tire. There should be a PSI range. This tells you the minimum and maximum pressure. Start in the middle of the range. Then, adjust as needed. If you are lighter, use lower pressure. If you are heavier, use higher pressure. Experiment to find what works best for you. This is part of the best practice.
What If I Over-Inflate the Tire?
Over-inflating the tire can be dangerous. The tire could explode. This could hurt you. It could also damage your bike. If you over-inflate, don’t panic. Carefully let some air out. Use the inflator valve. Or use a small tool to press on the valve. Let out small amounts of air. Check the pressure often. Squeeze the tire. Make sure it is not too hard. Be patient. It is better to let out too little air than too much. This is a key part of the best practice for safe inflation.
Why Does CO2 Leak Out Faster Than Air?
CO2 leaks out faster than regular air. This is because CO2 molecules are smaller. They can pass through the tire more easily. This means you need to re-inflate your tire with a pump later. The CO2 is just a temporary fix. It gets you home. Or to a place where you can use a pump. Don’t rely on CO2 for long-term inflation. Always carry a pump with you. And remember to re-inflate your tire with air as soon as possible. This is important to remember for the best practice.
Checking Tire Pressure After Inflation
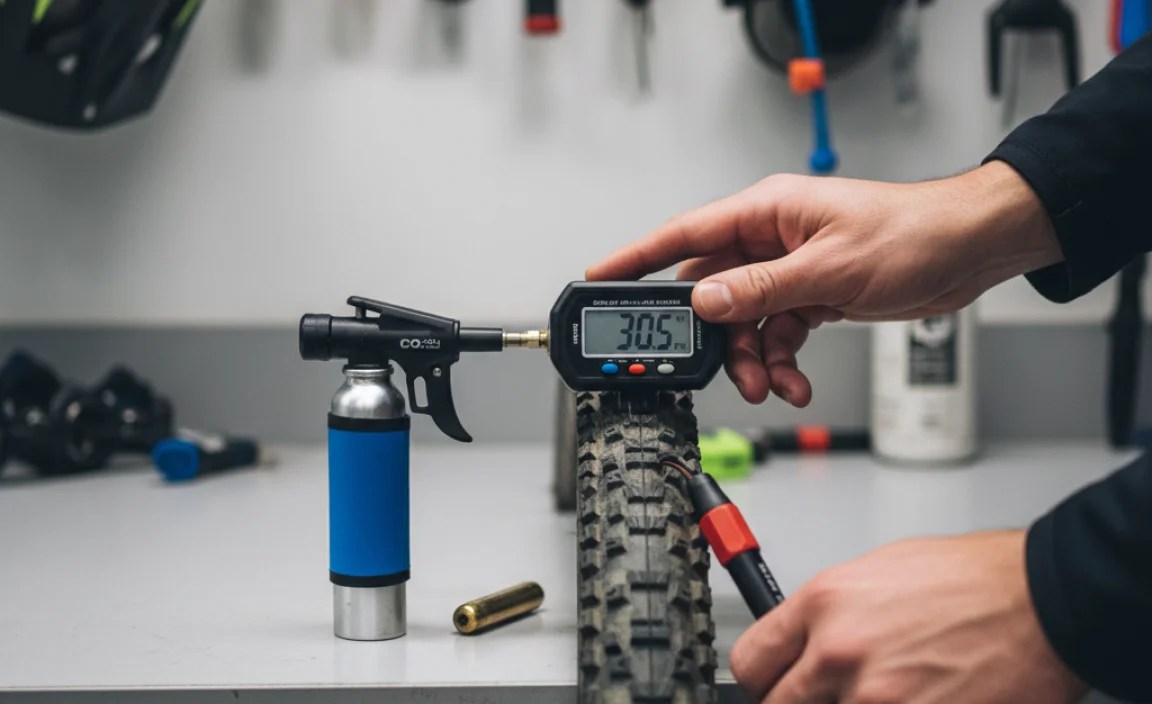
After you inflate your tire, check the pressure. This is a very important step. It makes sure your tire is safe to ride on. You can use a tire pressure gauge. This tool tells you the exact PSI. Push the gauge onto the tire valve. It will give you a reading. Compare the reading to the recommended PSI. It should be within the range on your tire. If it is too low, add more air. If it is too high, let some air out. If you don’t have a gauge, you can use your fingers. Squeeze the tire. It should feel firm. Not too hard, not too soft. This takes practice. But you will get better at it over time. Always check the pressure before riding. This is part of the best practice.
- Use a tire pressure gauge for accuracy.
- Compare the reading to the recommended PSI.
- Squeeze the tire to check firmness.
- Adjust pressure as needed for optimal feel.
- Check the pressure before every ride.
Let’s talk more about tire pressure gauges. There are two main types: digital and analog. Digital gauges are easy to read. They give you a precise number. Analog gauges have a needle. The needle points to the pressure. Some people find analog gauges easier to use. Choose the one you like best. Both types will help you check your tire pressure. No matter what, it is better to check the pressure. Remember to check it often. Especially after using a CO2 inflator. This is a best practice tip.
Fun Fact or Stat: The ideal tire pressure for mountain bikes can vary by as much as 10 PSI depending on the trail conditions!
Why Is Checking Pressure So Important?
Checking tire pressure is very important. It affects your ride. The right pressure makes riding easier. It also makes it safer. Too little pressure can cause a flat. Too much pressure can make the ride bumpy. The right pressure gives you better grip. It also helps you roll faster. That’s why checking pressure is important. Do it before every ride. Get a tire pressure gauge. Learn how to use it. It will make a big difference. This is a key part of the best practice.
What Happens If the Pressure Is Too Low?
If the tire pressure is too low, you might get a flat. The tire can pinch the tube. This is called a pinch flat. Low pressure also makes it harder to pedal. The tire has more rolling resistance. This means it takes more effort to move. You also have less control. The tire can feel squishy. It can be hard to steer. That’s why you should always check the pressure. Make sure it is within the recommended range. This is part of the best practice.
What Happens If the Pressure Is Too High?
If the tire pressure is too high, the ride will be bumpy. The tire won’t absorb bumps. You will feel every rock and root. High pressure also reduces grip. The tire won’t conform to the ground. This can make it harder to control. You might slip or slide. In extreme cases, the tire can explode. This is dangerous. That’s why you should never over-inflate. Always check the pressure. Make sure it is not too high. This is part of the best practice for safe riding.
Storing CO2 Inflators and Cartridges

Proper storage is key for CO2 inflators. It keeps them ready when you need them. Store the inflator in a safe place. A small bag works well. This keeps it clean and dry. Protect it from dirt and mud. Also, store the CO2 cartridges carefully. Keep them away from heat. Heat can make them explode. Don’t leave them in direct sunlight. Don’t store them near a fire. A cool, dry place is best. Check the cartridges regularly. Look for any signs of damage. If a cartridge is rusty or dented, replace it. Proper storage helps your inflator last longer. It also keeps you safe. This is the best practice for storage.
- Store the inflator in a clean, dry bag.
- Keep CO2 cartridges away from heat.
- Avoid direct sunlight and fire.
- Check cartridges for damage regularly.
- Replace damaged cartridges immediately.
Think about where you keep your bike tools. A saddlebag is a good place. Or a small backpack. Keep the inflator and cartridges together. This makes it easy to find them. When you need them, they will be right there. Also, tell someone where you keep your tools. This is important for safety. If you get hurt, someone can find your tools. They can help you fix your bike. Proper storage is not just about the tools. It is also about your safety. Keep these points in mind for best practice.
Fun Fact or Stat: Some riders attach their CO2 inflator directly to their bike frame using special mounts for quick access!
Why Is It Important to Keep the Inflator Clean?
A clean inflator works better. Dirt and mud can clog the nozzle. This makes it hard to inflate the tire. Clean the inflator after each ride. Use a small brush. Or a cloth. Remove any dirt or mud. Also, check the threads. Make sure they are clean. Clean threads make it easier to screw in the cartridge. A clean inflator is a reliable inflator. This is part of the best practice for maintenance.
What Are the Signs of a Damaged CO2 Cartridge?
Damaged CO2 cartridges can be dangerous. Look for signs of damage. Rust is a bad sign. It means the cartridge is old. It might not work properly. Dents are also a bad sign. They can weaken the cartridge. It could explode. Leaks are another sign. If you see any of these signs, replace the cartridge. Don’t risk using a damaged cartridge. This is important for safety and best practice.
How Long Can You Store CO2 Cartridges?
CO2 cartridges don’t expire. But they can degrade over time. Heat and moisture can damage them. That’s why proper storage is important. Keep them in a cool, dry place. Check them regularly for damage. If they look good, they should be fine to use. But if you are not sure, replace them. It is better to be safe than sorry. Remember this for the best practice.
Practicing Before You Need It
The best practice is to practice using your CO2 inflator at home. Don’t wait until you have a flat on the trail. Practice in your garage or backyard. This will help you get comfortable with the process. First, read the instructions. Make sure you understand how the inflator works. Then, get your tools ready. You’ll need tire levers, a new tube, and gloves. Practice removing the tire. Practice putting in the new tube. Practice connecting the inflator. Practice inflating the tire. Do this a few times. This will make you more confident. You’ll be ready to fix a flat quickly and easily. This is a key part of the best practice.
- Read the instructions carefully.
- Practice at home before your ride.
- Get comfortable with each step.
- Repeat the process a few times.
- Build your confidence for trail repairs.
Practicing also helps you find problems. You might discover that your inflator doesn’t work. Or that your tire levers are too small. It is better to find these problems at home. Then you can fix them before you go riding. You can buy new tools. Or you can learn a different technique. Practicing also helps you learn how much CO2 to use. You’ll get a feel for how long to inflate. You’ll learn how to check the pressure. All of this will make you a better mountain biker. Remember to practice for the best practice.
Fun Fact or Stat: Many bike shops offer workshops on basic bike maintenance, including how to use a CO2 inflator!
Why Is It Important to Read the Instructions?
Reading the instructions is always important. Every CO2 inflator is different. Some have different features. Some work in different ways. The instructions will tell you everything you need to know. They will show you how to use the inflator safely. They will also give you tips for best performance. Don’t skip this step. Take the time to read the instructions. It will save you time and trouble later. This is part of the best practice.
What If I Don’t Have a Spare Tube?
Sometimes, you might not have a spare tube. That’s okay. You can still fix a flat. Use a patch kit. A patch kit has small patches. You can use them to cover the hole in the tube. First, find the hole. Then, rough up the area around the hole. Use the sandpaper in the kit. Next, apply the glue. Let it dry for a few minutes. Then, put on the patch. Press it down firmly. Wait a few more minutes. Now, you can inflate the tube. A patch kit is a great backup. It can save you when you don’t have a spare tube. This is a good thing to know for the best practice.
How Can I Make Practice More Realistic?
To make practice more realistic, simulate a real flat. Go to a park or a trail. Take off your tire. Put a small hole in the tube. Now, fix the flat like you would on a ride. This will help you get used to the conditions. You’ll be dealing with dirt and mud. You might be tired. This will make the practice more challenging. It will also make it more effective. You’ll be better prepared for a real flat. This is a great way to practice the best practice.
Summary
A CO2 inflator is a great tool for mountain bikers. It helps you fix flats quickly. But it is important to use it correctly. The best practice includes several steps. First, check your inflator and cartridges. Make sure they are in good condition. Next, gather your tools. You’ll need tire levers, a new tube, and gloves. Then, find a safe place to fix your tire. Remove the flat tire and install the new tube. Connect the CO2 inflator properly. Inflate the tire in short bursts. Check the pressure. Finally, store your inflator and cartridges safely.
Remember to practice using your CO2 inflator at home. This will help you get comfortable with the process. It will also help you avoid mistakes. By following these steps, you can fix flats quickly and safely. You can get back to enjoying your ride. A CO2 inflator is a valuable tool. Knowing how to use it is essential. The best practice ensures you are always prepared.
Conclusion
Using a CO2 inflator for mountain bikes can seem tricky. But it is easy once you know the steps. Always be prepared. Check your equipment before each ride. Practice at home. This will help you fix flats quickly on the trail. Stay safe by following the best practice. With a little practice, you’ll be a pro at using a CO2 inflator. You can enjoy your mountain bike rides without worrying about flats.
Frequently Asked Questions
Question No 1: How do I choose the right size CO2 cartridge for my mountain bike?
Answer: The right size CO2 cartridge depends on your tire size. A 16-gram cartridge works well for most mountain bike tires. If you have larger tires, consider a 20 or 25-gram cartridge. Check your tire’s recommended pressure. Then, choose a cartridge that can reach that pressure. It’s always good to carry an extra cartridge, just in case. Following this best practice ensures you’re prepared for any flat tire situation on the trail. Remember to check your tire size and pressure requirements.
Question No 2: What should I do if I accidentally discharge the entire CO2 cartridge at once?
Answer: If you accidentally discharge the entire CO2 cartridge, don’t panic. This happens sometimes. First, check your tire. See if it’s inflated enough. If not, you’ll need another cartridge. That’s why it’s good to carry extras. If the tire is inflated too much, let some air out. Use the inflator valve. Or a small tool. Next time, use short bursts of CO2. This gives you more control. Practicing at home can help you avoid this. Remember, short bursts are part of the best practice. This prevents wasting CO2.
Question No 3: Can I reuse a CO2 cartridge after it has been partially used?
Answer: No, you cannot reuse a CO2 cartridge. Once you pierce the seal, all the CO2 will escape. Even if you only use a little bit. CO2 cartridges are designed for single use only. So, once it is used, recycle it. Always use a fresh cartridge for each inflation. This ensures you have enough pressure to fill your tire. Keep this in mind for the best practice. Using a fresh CO2 cartridge is always recommended. Do not try to reuse them, as they are not designed for that.
Question No 4: How do I dispose of used CO2 cartridges properly?
Answer: Dispose of used CO2 cartridges properly. They are made of steel. So, they can be recycled. Check with your local recycling center. See if they accept steel cartridges. Some bike shops also have recycling programs. If you can’t recycle them, throw them away in the trash. But be careful. The edges can be sharp. Wrap them in paper or cardboard. This will protect the garbage collectors. Proper disposal is part of being a responsible cyclist. Always remember the best practice for our environment.
Question No 5: Is it safe to use a CO2 inflator on tubeless mountain bike tires?
Answer: Yes, it is safe to use a CO2 inflator on tubeless tires. But there are a few things to consider. CO2 can dry out the sealant in your tubeless tire. This can make it less effective. So, re-inflate the tire with air as soon as possible. This will help the sealant last longer. Also, be careful not to over-inflate. Tubeless tires can be more sensitive to pressure. Follow the best practice for inflation. Check the pressure often. Using a CO2 inflator on tubeless tires requires extra care.
Question No 6: What are the advantages of using a CO2 inflator compared to a hand pump for mountain biking?
Answer: CO2 inflators are faster than hand pumps. They inflate tires in seconds. Hand pumps take much longer. CO2 inflators are also lighter. They are easier to carry on the trail. Hand pumps can be bulky. However, hand pumps don’t run out of air. You can use them as many times as you need. CO2 cartridges are single-use. The best practice is to carry both. A CO2 inflator for quick fixes. A hand pump as a backup. This ensures you’re always prepared, combining speed and reliability.


