DIY Chain Repair for Mountain Bikes: Easy Fix!
Snapped your mountain bike chain on the trail? Don’t sweat it! This guide shows you how to quickly repair it yourself. You’ll need a chain tool, a new chain link (or quick link), and a few minutes. We’ll walk you through removing the broken section, connecting the chain, and getting back to your ride. Stay safe, and happy trails!
Breaking a chain on a mountain bike ride is super frustrating. You’re out in nature, enjoying the trails, and then *snap*—your ride is over. But don’t let a broken chain ruin your day! With a few simple tools and a little know-how, you can quickly repair your chain and get back to shredding. It’s easier than you think.
This guide will walk you through the process step-by-step, so even if you’ve never done it before, you can confidently fix your chain. We’ll cover everything from identifying the problem to using a chain tool and installing a new link. Get ready to become a trailside repair pro!
What You’ll Need
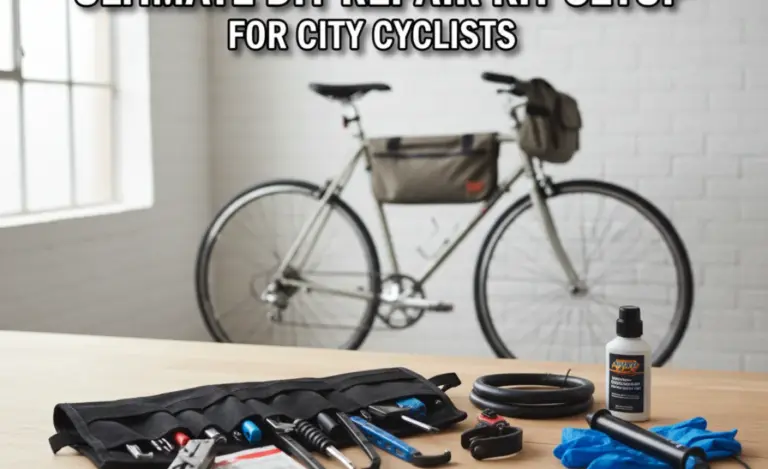
Before you start, gather these essential tools and supplies. Having everything ready will make the repair process smooth and efficient.
- Chain Tool: This is a must-have for any cyclist. It’s used to push chain pins in and out.
- New Chain Link (Quick Link): These special links are designed for easy chain connection and removal. Make sure you get the right size for your chain (usually 8, 9, 10, 11, or 12-speed).
- Pliers (Optional): Some quick links can be stiff, so pliers can help with installation and removal.
- Gloves (Optional): Keep your hands clean!
- Rag: For wiping off dirt and grime.
Step-by-Step Guide to Repairing Your Mountain Bike Chain
Follow these steps to repair your chain quickly and safely. Remember to take your time and double-check your work.
Step 1: Assess the Damage
First, examine the chain to see where it broke. Identify the damaged section that needs to be removed. Look for bent plates, broken links, or any other visible damage. Usually, the break will occur at a chain link.
Step 2: Position the Chain
Shift your bike to the smallest cog in the rear and the smallest chainring in the front. This will give you the most slack in the chain, making it easier to work with. If possible, find a stable place to work on your bike, like leaning it against a tree or rock.
Step 3: Remove the Broken Section
Use the chain tool to push out the pin on either side of the broken link. Place the chain tool’s pin against the chain pin you want to remove. Turn the handle of the chain tool to push the pin out. You don’t need to push the pin all the way out; just enough to release the link. Repeat on the other side of the broken link to remove the damaged section.
Important: Be careful not to push the pin out too far. If you do, it can be difficult to reinsert it. Only push it out enough to separate the link.
Step 4: Prepare the Chain Ends
After removing the broken section, you’ll have two open ends of the chain. Make sure the ends are clean and free of any debris. Check that the remaining links move freely. If any links are stiff, use the chain tool to gently loosen them.
Step 5: Install the Quick Link
Take your new quick link and insert one half into each end of the chain. Make sure the quick link is facing the correct direction. The open end of the quick link should be on the top run of the chain (the part that goes from the chainring to the cassette).
Note: Some quick links are directional, so check the manufacturer’s instructions to ensure you install it correctly.
Step 6: Connect the Quick Link
There are two main types of quick links:
- Tool-Free Quick Links: These can usually be connected by hand. Once the two halves are inserted, pull on the chain on either side of the quick link. This will seat the link in place. You may hear a click.
- Pliers-Required Quick Links: Some quick links are tighter and require pliers. Use pliers to gently squeeze the two halves of the quick link together until they click into place.
Step 7: Verify the Connection
Once the quick link is installed, double-check that it’s securely fastened. Rotate the pedals backward to move the quick link around the drivetrain. Make sure it moves smoothly and doesn’t catch on anything. If it feels stiff, try lubricating the quick link with chain lube.
Step 8: Test Ride
Before hitting the trails again, take a short test ride to ensure the chain repair is successful. Shift through all the gears to make sure the chain is running smoothly. Listen for any unusual noises or vibrations. If everything seems okay, you’re good to go!
Troubleshooting Common Issues
Even with careful attention, you might encounter some problems during the repair. Here’s how to troubleshoot common issues:
- Chain Tool Pin Won’t Budge: Make sure the chain tool is properly aligned with the chain pin. Apply steady pressure, and avoid forcing it. If it’s still stuck, try lubricating the chain pin with penetrating oil like WD-40 and wait a few minutes before trying again.
- Quick Link is Too Stiff: Some quick links can be tight, especially when new. Try lubricating it with chain lube and working it back and forth. If it’s still too stiff, use pliers to gently squeeze it until it moves freely.
- Chain Skipping After Repair: This could indicate that the quick link is not fully seated or that the chain is not properly aligned. Double-check the quick link installation and make sure the chain is running straight. If the problem persists, your chain might be too worn and need replacement.
Essential Tips for Mountain Bike Chain Maintenance
Preventing chain breaks is better than fixing them. Follow these tips to keep your chain in top condition:
- Regular Cleaning: Clean your chain regularly to remove dirt and grime. Use a chain cleaner or degreaser and a brush to scrub the chain. Then, rinse it with water and dry it thoroughly.
- Proper Lubrication: Lubricate your chain after every cleaning and after riding in wet or muddy conditions. Use a chain-specific lubricant and apply it sparingly. Wipe off any excess lube to prevent dirt buildup.
- Check for Wear: Use a chain wear indicator tool to check for chain stretch. A worn chain can damage your cassette and chainrings, so it’s important to replace it before it causes further damage.
- Replace Regularly: Replace your chain regularly, even if it doesn’t appear worn. Depending on your riding conditions and frequency, you may need to replace your chain every 1,000 to 3,000 miles.
- Inspect Regularly: Inspect your chain regularly. Look for stiff links, rust, and damage. Address issues early to prevent them from escalating.
Choosing the Right Chain and Quick Link
Selecting the right chain and quick link is crucial for optimal performance and durability. Here’s what to consider:
Chain Speed
Chains are designed for specific drivetrain speeds (e.g., 8-speed, 9-speed, 10-speed, 11-speed, 12-speed). Make sure you choose a chain that’s compatible with your bike’s drivetrain. Using the wrong chain can cause poor shifting and premature wear.
Chain Brand
Reputable chain brands like Shimano, SRAM, and KMC offer high-quality chains that are durable and reliable. While cheaper chains are available, they may not last as long or perform as well. Check out SRAM and Shimano for more information.
Quick Link Compatibility
Ensure the quick link is compatible with your chain. Some quick links are designed for specific chain brands or models. Check the manufacturer’s specifications to ensure compatibility. For example, KMC offers a range of quick links and chains.
Chain Material
Chains are typically made of steel, but some high-end chains may use special coatings or materials to improve durability and reduce friction. Consider your riding conditions and budget when choosing a chain material.
Here’s a simple table showing chain speeds and the recommended chain for each:
| Drivetrain Speed | Recommended Chain |
|---|---|
| 8-Speed | 8-Speed Chain |
| 9-Speed | 9-Speed Chain |
| 10-Speed | 10-Speed Chain |
| 11-Speed | 11-Speed Chain |
| 12-Speed | 12-Speed Chain |
Understanding Chain Wear and Replacement
Knowing when to replace your chain is crucial for maintaining your drivetrain’s performance and preventing costly damage. Here’s what you need to know about chain wear and replacement.
What Causes Chain Wear?
Chain wear occurs due to friction and stress as the chain moves around the cassette and chainrings. Over time, the chain’s pins and rollers wear down, causing the chain to stretch. This stretch can damage your cassette and chainrings, leading to poor shifting and premature wear.
How to Check for Chain Wear
The easiest way to check for chain wear is with a chain wear indicator tool. This tool measures the amount of stretch in your chain. If the tool indicates that the chain is worn, it’s time to replace it.
You can also check for chain wear manually. Use a ruler to measure 12 chain links (from pin to pin). If the measurement is more than 12 1/8 inches, the chain is worn and needs to be replaced. If it’s more than 12 1/4 inches, the chain is severely worn and may have already damaged your cassette and chainrings.
When to Replace Your Chain
Replace your chain when it shows signs of wear, as indicated by a chain wear indicator tool or ruler measurement. Replacing your chain regularly can prevent damage to your cassette and chainrings, saving you money in the long run.
Here’s a typical maintenance schedule for chain replacement based on wear:
| Chain Wear Measurement | Action Required |
|---|---|
| Less than 0.5% | No action needed |
| 0.5% to 0.75% | Consider replacing the chain |
| More than 0.75% | Replace the chain immediately |
What Happens If You Don’t Replace Your Chain?
If you continue to ride with a worn chain, it will eventually damage your cassette and chainrings. This can lead to poor shifting, chain skipping, and ultimately, the need to replace your entire drivetrain, which can be expensive.
Advanced Chain Repair Techniques
Once you’re comfortable with basic chain repair, you can explore these advanced techniques:
Chain Splicing
Chain splicing involves using a chain tool to remove and replace individual links in the chain. This can be useful for fixing a chain with multiple damaged links or for shortening a chain to the correct length. Chain splicing should be done carefully to avoid damaging the chain.
Using a Master Link Plier
A master link plier is a specialized tool designed for installing and removing quick links. It can make the process easier and more efficient, especially for tight or stubborn quick links.
Trailside Chain Cleaning
If your chain gets excessively dirty on the trail, you can perform a quick trailside cleaning. Use a rag or brush to remove as much dirt and grime as possible. Then, apply chain lube to keep the chain running smoothly. A small bottle of chain lube is a great addition to your trail kit.
Safety Precautions
Always prioritize safety when working on your bike. Here are some important safety precautions to keep in mind:
- Wear Gloves: Protect your hands from dirt, grease, and sharp edges.
- Use Eye Protection: Wear safety glasses to protect your eyes from flying debris.
- Work in a Safe Area: Choose a well-lit and stable area to work on your bike.
- Be Careful with Tools: Use tools properly and avoid applying excessive force.
- Inspect Your Work: Double-check your work to ensure everything is properly installed and tightened.
FAQ: DIY Chain Repair for Mountain Bikes
Here are some frequently asked questions about DIY chain repair for mountain bikes:
What is a quick link, and why should I use one?
A quick link is a special chain link designed for easy installation and removal without tools (although some need pliers). It makes chain repair on the trail much faster and simpler compared to using a chain tool for every connection.
How do I know what size quick link to buy?
Match the quick link to your bike’s “speed” (number of gears on the rear cassette). An 11-speed bike needs an 11-speed quick link. Check your bike’s specs or your current chain for the correct speed.
Can I reuse a quick link?
Some quick links are designed for single use only, while others can be reused. Check the manufacturer’s instructions. It’s generally best to replace a quick link after a few uses to ensure a reliable connection.
What if I push the chain pin all the way out with the chain tool?
It can be tricky to get the pin back in. Try using the chain tool to carefully push the pin back through the link. Make sure the pin is flush with the outer plate. If you can’t get it back in, it’s best to replace that link with a new one or use a quick link to bypass it.
How often should I clean and lubricate my mountain bike chain?
Clean and lubricate your chain every 100-200 miles, or more often if you ride in wet or muddy conditions. A clean, lubed chain lasts longer and shifts better.
What happens if I don’t fix a broken chain right away?
You won’t be able to ride your bike! A broken chain renders your bike unusable. Carrying a chain tool and quick link allows you to quickly fix the chain and continue your ride.
Is it safe to ride a mountain bike after repairing the chain?
Yes, but always test the repair thoroughly before resuming intense riding. Shift through all gears, apply brakes, and listen for any unusual noises. If anything feels off, re-inspect the repair or consult a bike mechanic.
Conclusion
Repairing a broken chain on your mountain bike might seem daunting, but with the right tools and knowledge, it’s a manageable task. By following these steps and tips, you can confidently fix your chain and get back to enjoying your ride. Remember to maintain your chain regularly to prevent future breakdowns. With a little practice, you’ll be a trailside repair pro in no time!