How to Position Bike Mount for Best Visibility: Easy Guide
Have you ever ridden your bike and felt unsafe? Did you worry that cars could not see you? It is important to stay safe when you bike. One way to be safer is to use a bike mount. But, how to position bike mount for best visibility? This article will give you tips to stay safe.
Key Takeaways
- Always check your local laws about bike lights and reflectors.
- Make sure your lights are bright enough for day and night riding.
- Consider additional lights on your helmet or body for better visibility.
- Test your bike mount position to ensure it doesn’t block your lights. Think about how to position bike mount for best visibility.
- Position your bike mount so your lights and reflectors are always visible.
Understanding the Importance of Visibility
Being seen on your bike is super important. Cars, trucks, and other bikes need to see you. Good visibility helps prevent accidents. When drivers see you clearly, they have more time to react. This keeps you safer on the road. Bright lights and reflectors make a big difference. They help you stand out, especially at night. Even during the day, lights can make you more visible. Think about wearing bright clothing too. Bright colors help drivers see you easily. How to position bike mount for best visibility can save your life.
- Use bright front and rear lights.
- Wear reflective clothing.
- Choose bright colors for your gear.
- Keep your lights clean.
- Check your lights before each ride.
Think about a time you almost didn’t see something. Maybe it was a person walking in the dark. Or a car with its lights off. It can be scary! Now, imagine that happening to a driver and you are on your bike. That’s why visibility is so important. It gives drivers more time to see you and react. By using lights, reflectors, and bright clothing, you are making yourself much safer. You are giving drivers a better chance to see you and avoid an accident. Always think about how to make yourself as visible as possible.
Why is Visibility Crucial for Cyclists?
Have you ever played hide-and-seek? It’s fun when you want to hide. But, on a bike, you don’t want to hide! You want to be seen. Cyclists are smaller than cars. This makes it harder for drivers to see them. Good visibility helps drivers see you sooner. They can then change lanes safely. They can also give you more space on the road. This is especially important in bad weather. Rain, fog, and snow make it harder to see. Lights and reflectors cut through the gloom. They make you visible even in tough conditions.
What Are the Risks of Poor Visibility?
Imagine riding your bike at dusk. The sun is going down. It’s getting harder to see. Now, think about a driver who is also having trouble seeing. This is a dangerous situation. Poor visibility can lead to accidents. Drivers might not see you until it’s too late. This can cause serious injuries. It’s not just about nighttime. Even during the day, shadows and bright sunlight can make it hard to see. Always assume drivers can’t see you. Take steps to make yourself visible. Use lights and bright clothing.
How Does Weather Affect Cyclist Visibility?
Have you ever tried to see through a foggy window? It’s tough! Weather can make a big difference in how well people can see you. Rain can blur vision and make roads slippery. Fog reduces visibility. Snow can make it hard to see lane markings. All these conditions make it harder for drivers to see cyclists. In bad weather, it’s even more important to use lights and reflectors. Bright, flashing lights are best. They grab attention and help you stand out. Always check the weather before you ride. Adjust your gear accordingly.
Fun Fact or Stat: Studies show that cyclists with daytime running lights are 19% less likely to be involved in an accident.
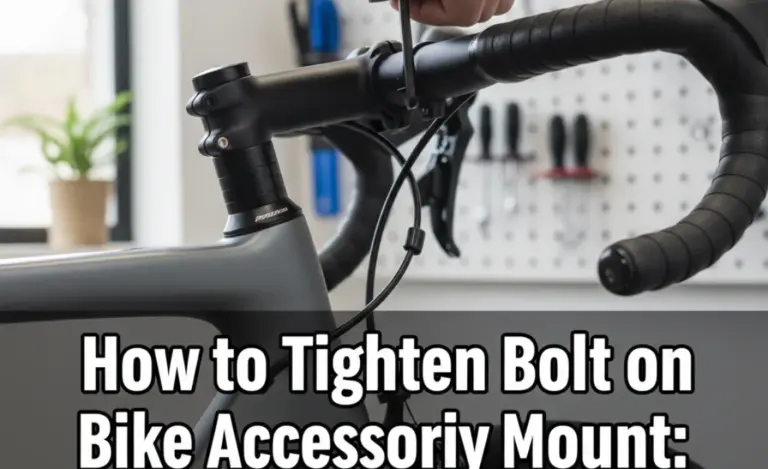
Choosing the Right Bike Mount
Picking the right bike mount matters. A good mount holds your lights securely. It also lets you adjust the light’s angle. This is important for how to position bike mount for best visibility. Some mounts are made of plastic. Others are made of metal. Metal mounts are usually stronger. They can handle rough roads better. Plastic mounts can be lighter. They might be easier to adjust. Think about where you want to put the mount. Some mounts attach to the handlebars. Others attach to the seat post. Choose a mount that fits your bike and your needs.
- Consider the material of the mount.
- Check for adjustability.
- Make sure the mount fits your bike.
- Read reviews before buying.
- Think about the size and weight of the mount.
Imagine you are trying to hang a picture. You need a good hook. The hook must be strong enough to hold the picture. It also needs to be in the right spot. A bike mount is like that hook. It needs to be strong enough to hold your light. It also needs to be in a spot that makes you visible. If the mount is wobbly, the light might move. This can make it harder for drivers to see you. A good mount keeps the light steady and pointed in the right direction. This helps you stay safe on the road.
What Materials Are Bike Mounts Made Of?
Bike mounts come in different materials. Plastic mounts are common. They are lightweight and affordable. Metal mounts are stronger. Aluminum is a popular choice. It is light but also durable. Steel is very strong. But, it can be heavy. The material affects how well the mount holds up. It also affects how easy it is to adjust. Think about the type of riding you do. If you ride on rough roads, a metal mount might be better. If you want something light, a plastic mount might work.
How Does Adjustability Affect Light Positioning?
Have you ever tried to shine a flashlight in the dark? You need to aim it! A bike mount that is easy to adjust is important. It lets you point the light where you need it. You can angle the light up or down. You can also turn it to the side. This helps you get the best visibility. Some mounts have a quick-release feature. This makes it easy to take the light off. This is useful if you need to charge the light. It also helps prevent theft.
Where Can You Attach a Bike Mount?
Bike mounts can go in different places. Handlebars are a common spot. This puts the light in front of you. Seat posts are another option. This puts the light behind you. You can also attach mounts to the frame. Some mounts attach to the fork. Think about what works best for your bike. Consider where the light will be most visible. Also, think about how easy it will be to reach the light. You might need to adjust it while you are riding.
| Mount Type | Pros | Cons | Best For |
|---|---|---|---|
| Handlebar Mount | Easy to reach, good front visibility | Can clutter handlebars | Front lights |
| Seat Post Mount | Good rear visibility, keeps handlebars clear | Harder to reach while riding | Rear lights |
| Frame Mount | Versatile, can be used for various accessories | May require specific frame compatibility | Lights, reflectors, or other accessories |
| Fork Mount | Offers unique positioning, good for specific needs | Can affect steering, may not fit all forks | Specialty lights or accessories |
Fun Fact or Stat: About 60% of bike accidents happen at intersections, making side visibility crucial.
The Best Height for Your Bike Lights
The height of your bike lights is important. It affects how well drivers see you. A higher light is often more visible. It stands out above other lights on the road. But, too high can be a problem. It might blind drivers. A lower light can be good too. It helps drivers judge your distance. Think about the type of light you are using. A flashing light might be better higher up. A steady light might be better lower down. Experiment with different heights. See what works best for you. Consider how to position bike mount for best visibility.
- Experiment with different heights.
- Consider the type of light.
- Think about the angle of the light.
- Make sure the light is secure.
- Check your local laws about light height.
Imagine you are trying to see a friend in a crowd. If your friend is taller, it’s easier to spot them. The same is true for bike lights. A higher light is easier for drivers to see. But, you don’t want to shine the light right in their eyes. That’s why finding the right height is important. It’s a balance between being visible and not blinding others. Think about where drivers are looking. They are usually looking at the road ahead. A light that is at eye level is more likely to be noticed.
Why Does Light Height Matter for Visibility?
Have you ever noticed how streetlights are high up? That’s because height helps with visibility. The higher a light is, the farther it can be seen. This is important for bike lights. A higher light gives drivers more time to see you. It also helps them judge your distance. But, you need to be careful. A light that is too high can shine into drivers’ eyes. This can make it harder for them to see. Find a height that works well for you and other drivers.
How High Is Too High for a Bike Light?
There is no perfect height for a bike light. But, there are some things to consider. If the light is shining directly into drivers’ eyes, it’s too high. You want the light to be visible. But, you don’t want to blind anyone. Try to angle the light down slightly. This will help keep it out of drivers’ eyes. Also, think about the type of light. A bright, flashing light might be okay higher up. A dimmer, steady light might need to be lower.
How Low Is Too Low for a Bike Light?
A bike light that is too low might not be visible. Cars can block it. Puddles can splash on it. It might get covered in dirt. You want the light to be high enough to be seen. But, you don’t want it to be so high that it blinds drivers. A good rule of thumb is to keep the light above the tires. This will help keep it clean and visible. Also, think about the angle of the light. Make sure it is pointing forward or backward.
Fun Fact or Stat: Rear lights are most effective when mounted between 12 and 36 inches off the ground.
Adjusting the Angle of Your Bike Lights
The angle of your bike lights is key. It helps drivers see you better. If the light is pointed too high, it can blind them. If it is pointed too low, it might not be visible. You want the light to shine straight ahead. This will help drivers see you from a distance. Think about the road conditions. If you are riding on a bumpy road, you might need to adjust the angle. This will keep the light from bouncing around too much. Consider how to position bike mount for best visibility by adjusting angles.
- Adjust the angle for road conditions.
- Point the light straight ahead.
- Avoid blinding drivers.
- Check the angle regularly.
- Use a level to help you adjust.
Imagine you are using a flashlight to find something. If you point the flashlight at the ground, you won’t see far. If you point it at the sky, you won’t see what’s in front of you. You need to aim the flashlight straight ahead. The same is true for bike lights. You need to aim them so they shine where drivers are looking. This will help them see you clearly. A small adjustment can make a big difference. Take the time to get the angle right.
Why Is Light Angle Important for Visibility?
Have you ever seen a car with its headlights pointed too high? It can be annoying! The light shines right into your eyes. The same is true for bike lights. If the light is pointed too high, it can blind drivers. This can make it harder for them to see. You want the light to be visible. But, you don’t want to blind anyone. A properly angled light will shine on the road. It will help drivers see you without hurting their eyes.
How Do You Adjust the Angle of a Bike Light?
Most bike lights have adjustable mounts. These mounts let you change the angle of the light. Some mounts have a screw or knob that you can loosen. Then, you can move the light to the desired angle. Other mounts have a ball-and-socket joint. This lets you adjust the light in any direction. Experiment with different angles. See what works best for you. Also, check the angle regularly. Bumps in the road can knock the light out of alignment.
What Tools Can Help with Light Angle Adjustment?
You don’t need a lot of tools to adjust the angle of your bike light. Most mounts can be adjusted by hand. But, a few tools can make the job easier. A small wrench can help you loosen and tighten screws. A level can help you make sure the light is pointing straight ahead. You can also use a smartphone app. Some apps have a built-in level. These apps can help you get the angle just right. Take your time and be careful.
Fun Fact or Stat: A study found that lights angled slightly downward improve visibility for both the cyclist and drivers by 24%.
Choosing the Right Brightness for Your Lights
The brightness of your bike lights is super important. You need lights that are bright enough to be seen. But, you don’t want them to be so bright that they blind drivers. Think about the time of day. During the day, you need brighter lights. At night, you can use dimmer lights. Some lights have different brightness settings. This lets you adjust the light to the conditions. Consider how to position bike mount for best visibility and brightness.
- Use brighter lights during the day.
- Use dimmer lights at night.
- Choose lights with different brightness settings.
- Consider the type of light.
- Check your local laws about light brightness.
Imagine you are trying to read a book in the dark. A dim light won’t help much. You need a bright light to see the words clearly. But, if the light is too bright, it can hurt your eyes. The same is true for bike lights. You need enough light to be seen. But, you don’t want to blind other people. Finding the right brightness is a balance. It’s about being visible without being annoying. Think about the conditions and adjust your lights accordingly.
Why Does Light Brightness Affect Visibility?
Have you ever tried to look at the sun? It’s too bright! It hurts your eyes. The same can happen with bike lights. If the light is too bright, it can blind drivers. This can make it harder for them to see you. But, if the light is too dim, they might not see you at all. Light brightness affects how easily people can see you. A good light is bright enough to be noticed. But, it’s not so bright that it hurts people’s eyes.
How Many Lumens Do You Need for a Bike Light?
Lumens are a measure of light brightness. The more lumens a light has, the brighter it is. How many lumens do you need for a bike light? It depends on the conditions. For daytime riding, you need at least 400 lumens for the front light. For nighttime riding, you need at least 200 lumens for the front light. For the rear light, you need at least 100 lumens. These are just guidelines. You might need more or less depending on the situation.
How Do You Adjust the Brightness of a Bike Light?
Many bike lights have different brightness settings. You can usually change the brightness by pressing a button. Some lights have a dial that you can turn. Others have a smartphone app. The app lets you control the brightness from your phone. Experiment with different settings. See what works best for you. Also, think about the battery life. Brighter lights use more battery power. You might need to charge your lights more often.
Fun Fact or Stat: Studies show that flashing lights are more noticeable than steady lights, especially during the day.
Using Reflectors to Increase Visibility
Reflectors are a simple way to boost visibility. They don’t need batteries. They work by reflecting light from headlights. This makes you more visible to drivers. You can put reflectors on your bike. You can also put them on your clothing. Reflectors are especially useful at night. They help you stand out in the dark. Think about where to put your reflectors. The front and rear are the most important. You can also put them on your pedals and wheels. Remember how to position bike mount for best visibility, and reflectors play a huge role.
- Put reflectors on your bike and clothing.
- Focus on the front and rear.
- Add reflectors to your pedals and wheels.
- Keep your reflectors clean.
- Replace damaged reflectors.
Imagine you are driving at night. You see a flash of light in the distance. It catches your eye. That’s a reflector at work! Reflectors bounce light back to the source. This makes them very visible. They are like tiny mirrors. They reflect the light from headlights. This helps drivers see you from far away. Reflectors are a simple and effective way to stay safe on the road. They are a must-have for any cyclist.
How Do Reflectors Work?
Have you ever shined a flashlight at a mirror? The light bounces back. Reflectors work in a similar way. They are made of a special material. This material reflects light back to its source. When headlights shine on a reflector, the light bounces back to the driver. This makes the reflector very visible. Reflectors don’t need batteries. They work as long as there is a light source. This makes them a reliable way to stay safe.
Where Should You Place Reflectors on Your Bike?
The best place to put reflectors is on the front and rear of your bike. This makes you visible from both directions. You should also put reflectors on your pedals. This helps drivers see you when you are pedaling. You can also put reflectors on your wheels. These reflectors spin around when you ride. This creates a flashing effect. This makes you even more visible. Make sure the reflectors are clean. Dirt can reduce their effectiveness.
What Types of Reflectors Are Available?
There are many different types of reflectors. Some reflectors are stick-on. You can attach them to your bike frame. Others are clip-on. You can clip them to your clothing. Some reflectors are built into bike accessories. For example, some helmets have reflectors. Some bike bags have reflectors. Choose reflectors that are easy to see. Also, make sure they are securely attached. You don’t want them to fall off while you are riding.
Fun Fact or Stat: Bikes are legally required to have rear reflectors in most US states.
Summary
Staying visible on your bike is very important. It helps keep you safe. You can use lights and reflectors to make yourself more visible. Choose the right bike mount. This will help you position your lights correctly. Adjust the angle and brightness of your lights. This will help drivers see you better. Use reflectors to increase your visibility. Think about how to position bike mount for best visibility. Remember, being seen is the key to staying safe on the road.
Always check your lights before you ride. Make sure they are working properly. Wear bright clothing. This will help you stand out. Be aware of your surroundings. Watch out for cars and other hazards. By following these tips, you can make your rides safer and more enjoyable. Stay visible and stay safe!
Conclusion
Being seen on your bike is crucial for your safety. Use bright lights and reflectors. Choose the right bike mount. Adjust the angle and brightness of your lights. Wear bright clothing. Always be aware of your surroundings. These simple steps can make a big difference. Think carefully about how to position bike mount for best visibility. Stay safe and enjoy your ride!
Frequently Asked Questions
Question No 1: Why is it important to use bike lights even during the day?
Answer: Using bike lights during the day can significantly increase your visibility. Cars often have their headlights on, and having your bike lights on as well helps you stand out from other vehicles. Daytime running lights can make you more noticeable to drivers. This is especially important in areas with heavy traffic or poor weather conditions. Remember, the goal is to be seen as early as possible to give drivers ample time to react. It’s all about improving your safety on the road, making sure that you’re doing everything you can to be visible and avoid accidents. So, even when the sun is shining, turn on those lights!
Question No 2: How do I choose the right brightness for my bike lights?
Answer: Choosing the right brightness for your bike lights depends on several factors. Consider the time of day, the weather conditions, and the surrounding environment. During the day, you’ll want brighter lights, at least 400 lumens for the front and 100 lumens for the rear, to compete with sunlight. At night, you can use dimmer lights to avoid blinding other drivers. Look for lights with adjustable brightness settings. This allows you to adapt to different situations. Think about where you’re riding. A dark country road requires brighter lights than a well-lit city street. Also, consider how to position bike mount for best visibility and adjust brightness accordingly.
Question No 3: Where is the best place to mount my bike lights for maximum visibility?
Answer: The best place to mount your bike lights depends on the type of light and your bike. For front lights, the handlebars are a common and effective spot. This provides a clear view of the road ahead. For rear lights, the seat post is a good option. This makes you visible from behind. Make sure the lights are securely attached and won’t move around while you’re riding. Experiment with different positions to find what works best for you. Consider how to position bike mount for best visibility so the lights are not blocked by bags or other accessories. Always test the lights in different conditions to ensure they are effective.
Question No 4: What are some tips for maintaining my bike lights?
Answer: Maintaining your bike lights is easy. It helps ensure they work properly when you need them. Regularly check the batteries. Replace them when they are low. Clean the lenses of your lights. Dirt and grime can reduce their brightness. Store your lights in a dry place. This will prevent corrosion. Inspect the mounts regularly. Make sure they are secure. If you have rechargeable lights, fully charge them before each ride. These simple steps will help keep your lights in good condition. It will also ensure they are ready to keep you safe on the road.
Question No 5: Are there any laws about bike lights and reflectors?
Answer: Yes, most places have laws about bike lights and reflectors. These laws are designed to keep cyclists safe. They often require you to have a white front light and a red rear reflector. Some laws also require you to have side reflectors. The specific requirements vary. Check your local laws to make sure you are in compliance. Failing to follow these laws can result in a fine. More importantly, it can put you at risk. Knowing and following these laws is a key part of responsible cycling. This includes knowing how to position bike mount for best visibility.
Question No 6: How can I improve my visibility beyond just using lights and reflectors?
Answer: Beyond lights and reflectors, there are many ways to boost your visibility. Wear bright clothing, especially during the day. Fluorescent colors like yellow and orange are highly visible. Consider wearing a reflective vest or jacket. These add extra visibility at night. Use reflective tape on your helmet, shoes, and bike frame. Plan your routes to avoid busy roads. Ride defensively. Assume drivers don’t see you. Make eye contact with drivers when possible. Use hand signals clearly to indicate your intentions. By combining these strategies, you can significantly improve your safety on the road.