How to Tighten Bolt on Bike Accessory Mount: Easy Fix
Have you ever seen a bike with cool stuff attached? Maybe a water bottle or a light? These things need to stay put. They use bolts to hold them on. But what happens when the bolts get loose? Learning how to tighten bolt on bike accessory mount is super important. It keeps your stuff safe and your ride fun. Let’s find out how!
Imagine riding your bike and your water bottle falls off. That would be a bummer! A loose bolt can cause this. It can also make your bike light fall off at night. This is why knowing how to tighten bolts is a great skill. It’s easy to learn and can save you trouble. We will show you how to keep your bike accessories secure.
Bike accessories make riding better. Lights help you see. Bottle cages hold your water. Fenders keep you dry. But these things only work if they stay on your bike. The bolts that hold them need to be tight. Knowing how to tighten bolt on bike accessory mount will keep everything in place. Let’s get started!
Is your bike ready for adventure? Do you have all the gadgets you need? Make sure they are safe. Loose bolts can ruin a good ride. They can also be dangerous. We will teach you the right way to tighten those bolts. This will keep you safe and happy on your bike.
Key Takeaways
- Knowing how to tighten bolt on bike accessory mount keeps your bike gear secure.
- Use the right size tool to avoid damaging the bolt or accessory.
- Tighten bolts just enough, not too tight, to prevent damage.
- Regularly check and tighten bolts to keep accessories secure.
- A torque wrench helps you tighten bolts to the correct specification.
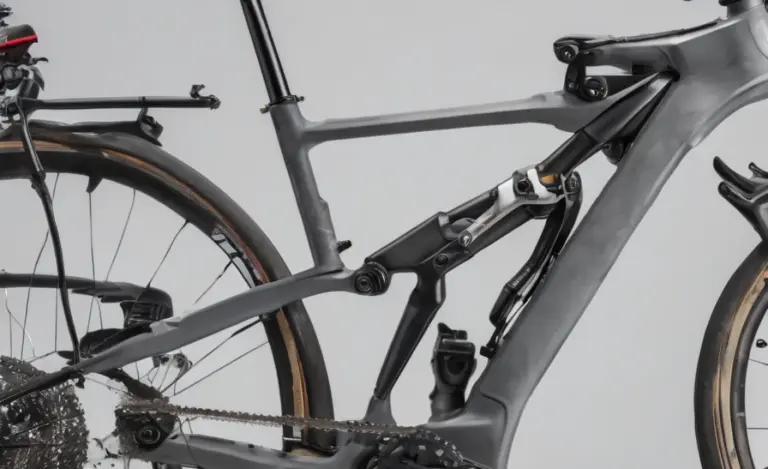
Understanding Bolts on Bike Mounts
Bolts are like tiny screws that hold things together. On your bike, they keep your accessories attached. These accessories can be bottle cages or lights. They can also be fenders or racks. Understanding bolts is the first step. It helps you learn how to tighten bolt on bike accessory mount correctly. Different bolts need different tools. Some bolts are small. Others are bigger. Using the wrong tool can damage the bolt. Damaged bolts are hard to tighten. They can even break. Always use the right size tool for the job.
- Bolts come in different sizes and shapes.
- Use the right wrench or Allen key for each bolt.
- Do not use pliers. Pliers can damage the bolts.
- Check bolts regularly for looseness.
- Clean bolts can make them easier to tighten.
- A little grease can help prevent bolts from sticking.
Bolts keep your bike accessories safe. If they are too loose, your accessories might fall off. If they are too tight, you might break the bolt. It’s important to find the right balance. Many bolts have a recommended torque. Torque is how much force you use to tighten the bolt. A torque wrench helps you measure this force. Using a torque wrench helps prevent damage. It also makes sure your accessories are secure. Learning about bolts helps you take good care of your bike.
Why Bolt Size Matters
Have you ever tried using a shoe that’s too big or too small? It doesn’t work well, right? The same goes for tools and bolts. A wrench that’s too big will slip. This can round off the edges of the bolt. A wrench that’s too small won’t fit at all. Using the correct size ensures a snug fit. This prevents damage and makes tightening easier. Always check the bolt head for the size marking. If you are unsure, try different sizes until you find the perfect match. Using the right size tool is a key part of how to tighten bolt on bike accessory mount.
Types of Bolt Heads
Imagine all the different shapes of cookies. Bolts also come in different shapes. Some have a hexagon shape. These are called Allen bolts. You need an Allen wrench to tighten them. Others have a star shape. These are called Torx bolts. You need a Torx wrench for these. Some have a regular slot for a flathead screwdriver. Knowing the type of bolt head is important. It helps you choose the right tool. Using the right tool prevents damage. It also makes the job easier. Recognizing bolt heads is a useful skill for any bike owner.
Understanding Torque
Have you ever tried to open a jar that’s stuck? You need to use just the right amount of force. Too little, and it won’t open. Too much, and you might break the jar. Torque is the amount of force you use to tighten a bolt. Too little torque, and the bolt will be loose. Too much torque, and you might break the bolt or the accessory. A torque wrench helps you apply the right amount of torque. This tool measures how much force you are using. Using a torque wrench is important for delicate parts. It ensures everything is tight but not too tight. Torque is an important concept when learning how to tighten bolt on bike accessory mount.
Fun Fact or Stat: Did you know that using the wrong size wrench can strip a bolt in seconds? Always double-check your tool size!
Tools Needed to Tighten Bike Bolts
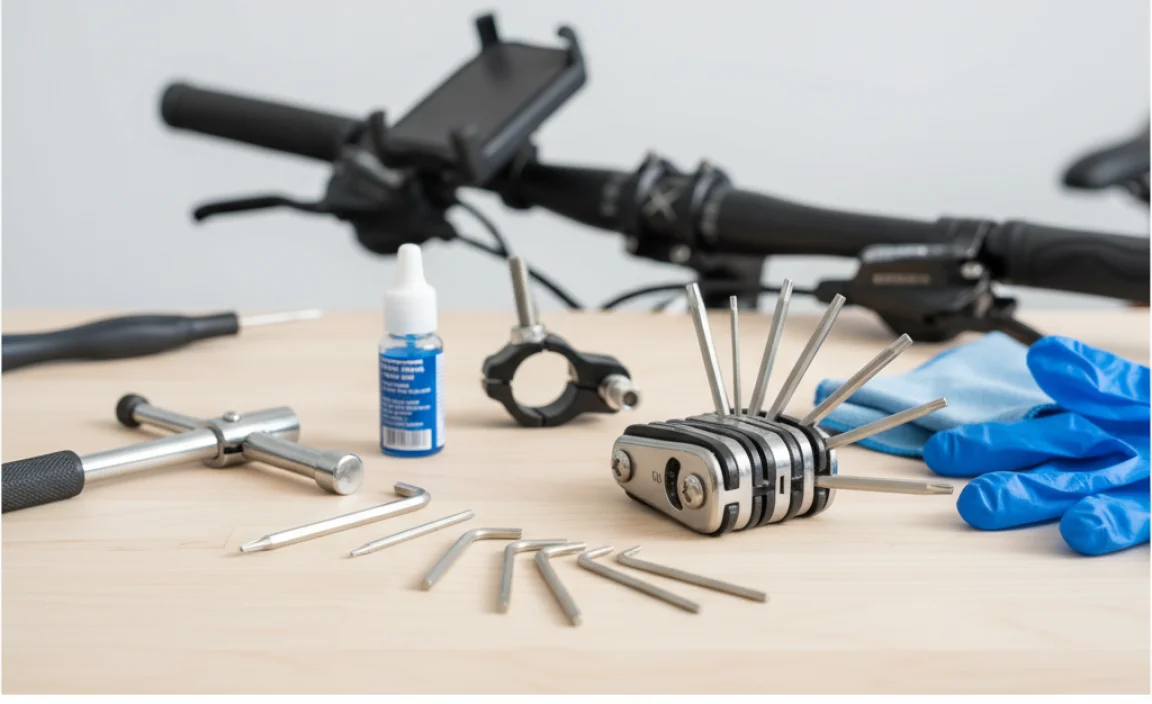
To tighten bolts, you need the right tools. Imagine trying to build a sandcastle without a shovel. It would be hard! The same goes for fixing your bike. You need the right tools to do the job well. A set of Allen wrenches is very important. These wrenches fit into the hexagonal holes of Allen bolts. A torque wrench is also helpful. This tool measures how much force you use. It helps you avoid overtightening. You might also need a regular wrench for some bolts. Having the right tools makes learning how to tighten bolt on bike accessory mount easier. It also prevents damage to your bike and accessories.
- Allen wrench set (various sizes).
- Torque wrench (for precise tightening).
- Regular wrench set (for different bolt types).
- Screwdrivers (flathead and Phillips).
- Grease (for lubricating bolt threads).
- Rag (for cleaning bolts and tools).
Having the right tools is like having a superpower. It makes fixing your bike much easier. A good set of Allen wrenches is a must-have. These come in different sizes. Make sure you have a set that fits all the bolts on your bike. A torque wrench is also a great investment. It helps you tighten bolts to the correct specification. This prevents damage and ensures everything is secure. Keep your tools organized and clean. This will make them last longer. It will also make it easier to find the right tool when you need it.
Allen Wrench Essentials
Have you ever tried to draw with a broken crayon? It’s frustrating, isn’t it? Using worn-out Allen wrenches is similar. Worn wrenches can slip and damage bolts. A good set of Allen wrenches is essential for any bike owner. Look for a set made from strong steel. Make sure the wrenches fit snugly into the bolt heads. A set with a variety of sizes is best. This way, you’ll be prepared for any bolt you encounter. Keep your Allen wrenches clean and dry. This will prevent rust and make them last longer. A good set of Allen wrenches is a key part of knowing how to tighten bolt on bike accessory mount.
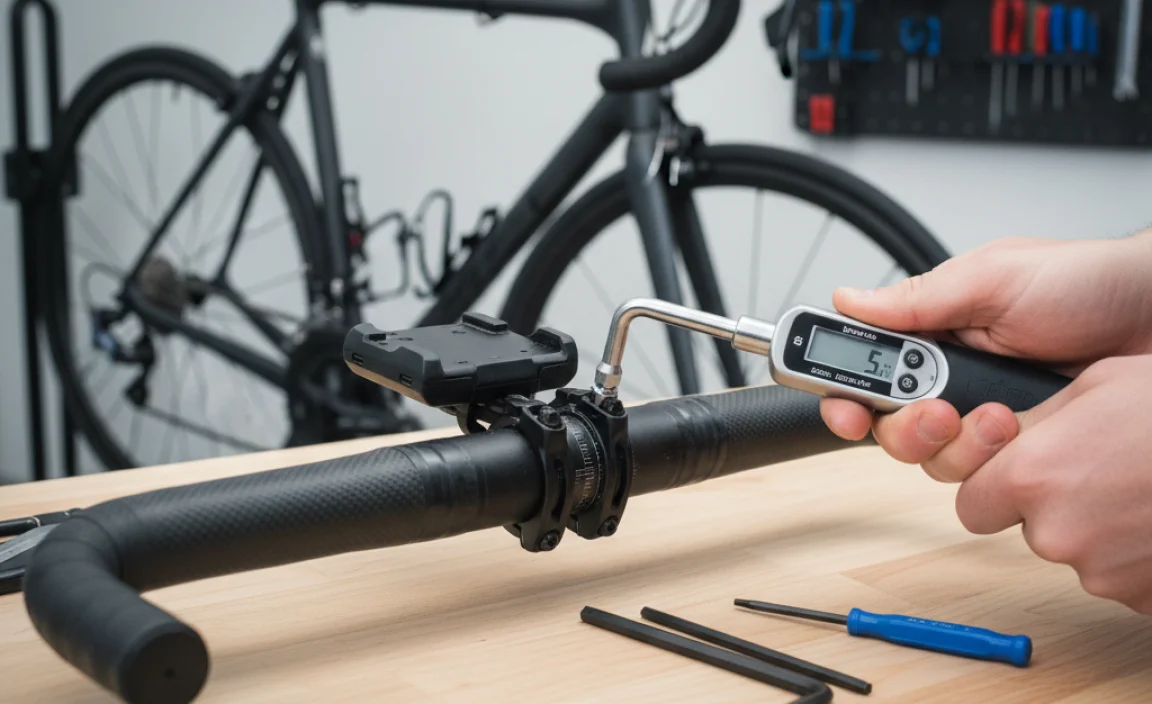
The Importance of a Torque Wrench
Imagine you’re baking a cake. You need to measure the ingredients carefully. Too much or too little of something can ruin the cake. A torque wrench is like a measuring cup for bolts. It helps you apply the right amount of force. This prevents overtightening, which can damage bolts and accessories. A torque wrench is especially important for carbon fiber parts. These parts are more delicate and can break easily. Using a torque wrench ensures everything is tight but not too tight. It’s a worthwhile investment for any serious bike owner. It helps you follow the correct steps for how to tighten bolt on bike accessory mount.
Other Useful Tools
Think of a toolbox as a team of helpers. Each tool has a special job. Besides Allen wrenches and a torque wrench, other tools can be useful. A set of regular wrenches can help with some bolts. Screwdrivers are useful for accessories that use screws. Grease can help prevent bolts from sticking. A rag is useful for cleaning bolts and tools. Having a well-stocked toolbox makes bike maintenance easier. It also makes you more prepared for any repair. A good toolbox is an essential part of learning how to tighten bolt on bike accessory mount.
Fun Fact or Stat: A torque wrench can save you from cracking expensive carbon fiber components on your bike. They can cost hundreds of dollars!
Finding the Right Bolt Tightness
Tightening a bolt isn’t just about turning it until it stops. It’s about finding the right balance. Too loose, and your accessory will wobble or fall off. Too tight, and you risk breaking the bolt or the accessory. The right tightness is called torque. Torque is measured in Newton-meters (Nm). Many accessories have a recommended torque printed on them. Use a torque wrench to achieve this tightness. If you don’t have a torque wrench, tighten the bolt snugly. Then, give it a little extra turn. But be careful not to overtighten. Finding the right bolt tightness is key to how to tighten bolt on bike accessory mount.
- Check the accessory for recommended torque specifications.
- Use a torque wrench to tighten to the specified torque.
- If no torque spec, tighten snugly and check frequently.
- Avoid overtightening, which can damage bolts or accessories.
- Use a star pattern when tightening multiple bolts.
Finding the right bolt tightness is like Goldilocks finding the perfect porridge. It can’t be too hot or too cold. It has to be just right. A torque wrench is your best friend here. It tells you exactly how much force you’re using. If you don’t have a torque wrench, use your best judgment. Tighten the bolt until it feels snug. Then, give it a little extra turn. Check the accessory after a short ride. Make sure it’s still secure. If it’s loose, tighten it a little more. Finding the right bolt tightness takes practice. But it’s an important skill for any bike owner.
Understanding Torque Specs
Imagine you’re following a recipe. The recipe tells you exactly how much of each ingredient to use. Torque specs are like that for bolts. They tell you exactly how much force to use when tightening a bolt. Torque specs are usually printed on the accessory or in the instructions. They are measured in Newton-meters (Nm). A torque wrench helps you achieve the specified torque. Using the correct torque spec prevents damage. It also ensures the accessory is secure. Understanding torque specs is a key part of learning how to tighten bolt on bike accessory mount.
Tightening Without a Torque Wrench
Have you ever cooked without measuring cups? You can still make a great meal, but you have to be careful. Tightening bolts without a torque wrench is similar. You have to rely on your feel. Tighten the bolt until it feels snug. Then, give it a little extra turn. Be careful not to overtighten. Check the accessory after a short ride. If it’s loose, tighten it a little more. This method takes practice, but it can be effective. Just be mindful and avoid using too much force. It is possible to learn how to tighten bolt on bike accessory mount without specific tools.
Checking for Looseness
Think of your bike accessories as pets. You need to check on them regularly to make sure they’re okay. Check the bolts on your accessories before each ride. Make sure they’re not loose. If they are, tighten them. Even if they feel tight, give them a little extra turn. Bolts can loosen over time due to vibrations. Regular checks can prevent accessories from falling off. This is especially important for lights and racks. These accessories can be dangerous if they come loose. Checking for looseness is a simple way to keep your bike safe. It is essential for understanding how to tighten bolt on bike accessory mount.
Fun Fact or Stat: Bolts on bikes can loosen up to 20% faster on bumpy roads compared to smooth surfaces!
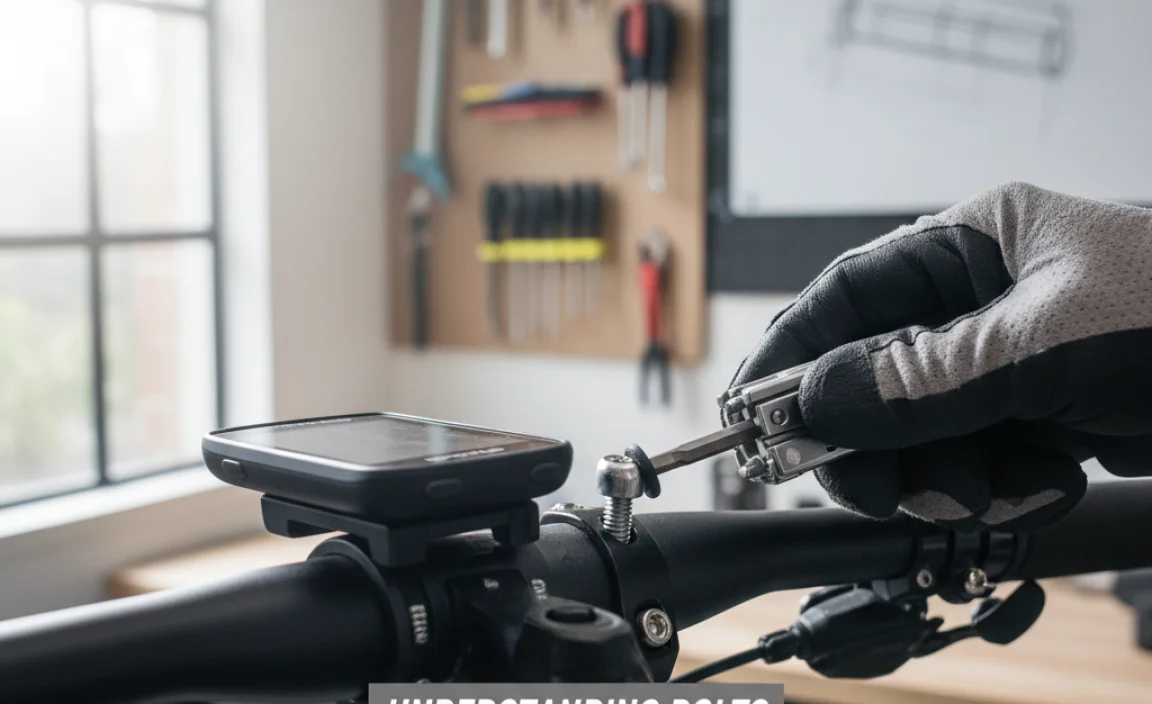
Step-by-Step Guide to Tightening Bolts
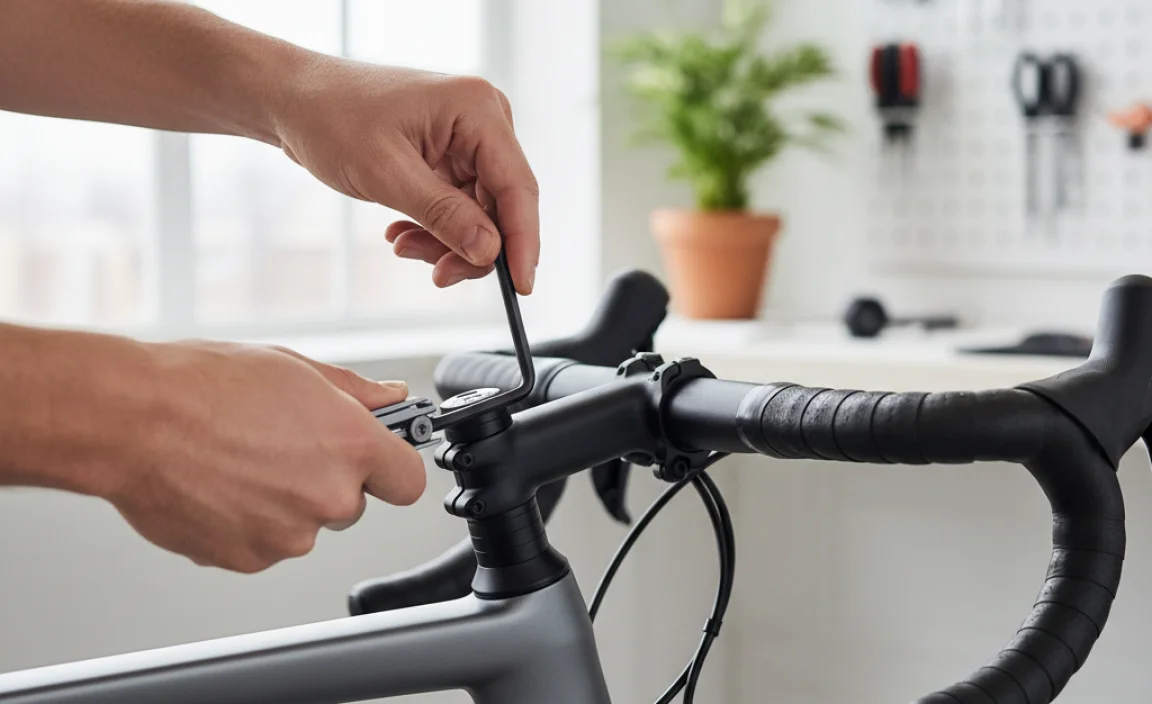
Tightening bolts on your bike is easy. First, find the right size Allen wrench or wrench. Make sure it fits snugly into the bolt head. Then, turn the wrench clockwise. Tighten the bolt until it feels snug. If you’re using a torque wrench, set it to the recommended torque. Then, tighten the bolt until the wrench clicks. This means you’ve reached the correct tightness. After tightening, check the accessory. Make sure it’s secure. If it’s still loose, tighten the bolt a little more. But be careful not to overtighten. This step-by-step guide makes learning how to tighten bolt on bike accessory mount simple.
- Identify the correct tool size for the bolt.
- Insert the tool fully into the bolt head.
- Turn the tool clockwise to tighten the bolt.
- Tighten until snug, then a little bit more.
- Use a torque wrench for precise tightening.
- Check the accessory for stability after tightening.
Imagine you’re tying your shoes. You don’t want to tie them too loose. They’ll come undone. You also don’t want to tie them too tight. They’ll be uncomfortable. Tightening bolts is similar. You want to find the right balance. Start by finding the right tool. Make sure it fits snugly into the bolt head. Turn the tool slowly and steadily. Feel the bolt tightening. Stop when it feels snug. If you’re using a torque wrench, let it do the work. It will click when you’ve reached the correct tightness. Always double-check the accessory after tightening. Make sure it’s secure and doesn’t wobble.
Preparing the Bolt and Tool
Have you ever tried to paint on a dirty canvas? The paint doesn’t stick well, right? Preparing the bolt and tool is similar. Clean the bolt head with a rag. This removes dirt and grime. Make sure the tool is also clean. A clean tool fits better and prevents slippage. If the bolt is rusty, use a little grease. This helps the tool turn smoothly. Preparing the bolt and tool makes tightening easier. It also prevents damage to the bolt and accessory. Proper preparation is important for how to tighten bolt on bike accessory mount.
The Tightening Process
Think of tightening a bolt like climbing a ladder. You take it one step at a time. Insert the tool fully into the bolt head. Turn the tool slowly and steadily. Feel the bolt tightening. If you’re using a torque wrench, watch the gauge. Stop when you reach the recommended torque. If you’re not using a torque wrench, tighten until snug. Then, give it a little extra turn. Check the accessory after each turn. Make sure it’s not wobbling. The tightening process should be smooth and controlled. It’s a key part of learning how to tighten bolt on bike accessory mount.
Final Checks and Adjustments
Imagine you’ve built a Lego tower. You need to make sure it’s stable before you walk away. After tightening the bolts, do a final check. Wiggle the accessory gently. Make sure it’s secure and doesn’t move. If it’s still loose, tighten the bolts a little more. If it’s too tight, loosen them slightly. The goal is to find the perfect balance. The accessory should be secure but not overstressed. Final checks and adjustments ensure your bike is safe and ready to ride. This is the final step in knowing how to tighten bolt on bike accessory mount.
Fun Fact or Stat: Professional bike mechanics check bolt tightness on bikes before every race to ensure safety and performance!
Common Mistakes to Avoid
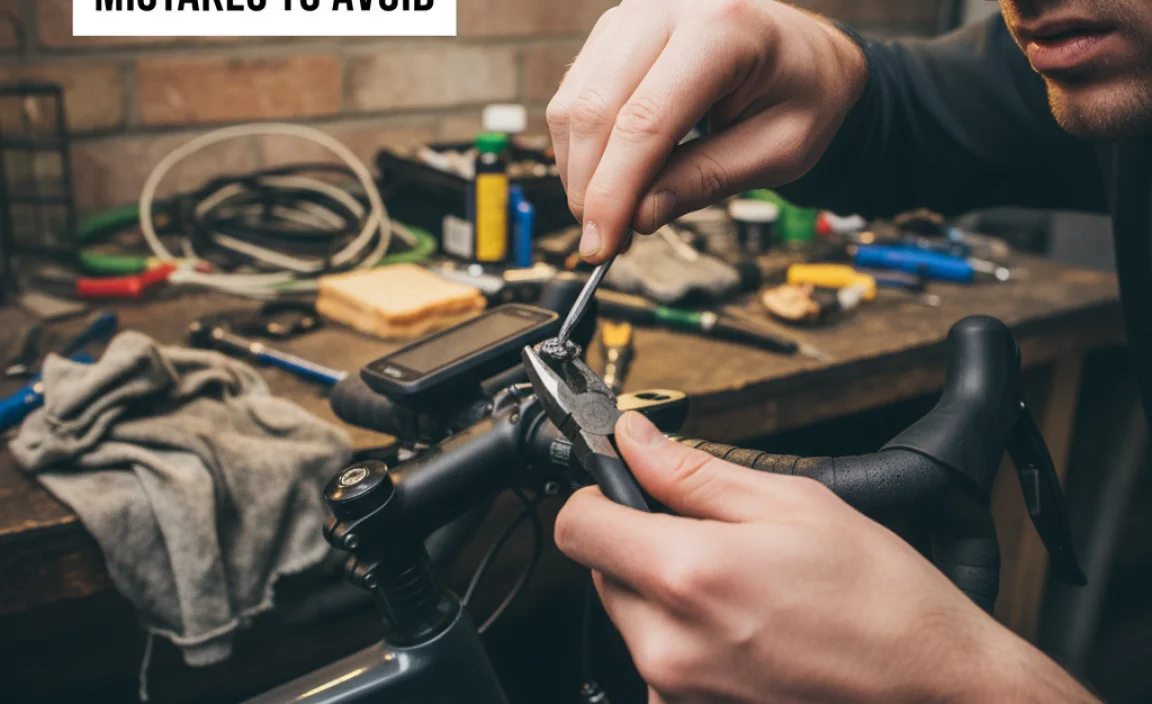
When tightening bolts, it’s easy to make mistakes. One common mistake is using the wrong size tool. This can strip the bolt head, making it impossible to tighten. Another mistake is overtightening. This can break the bolt or damage the accessory. Always use the right size tool. And be careful not to overtighten. Another mistake is not cleaning the bolts. Dirt and grime can make it harder to tighten the bolts. Clean the bolts before you start. Avoiding these mistakes will help you learn how to tighten bolt on bike accessory mount correctly.
- Using the wrong size tool.
- Overtightening the bolt.
- Not cleaning the bolt before tightening.
- Ignoring torque specifications.
- Forgetting to check tightness after a ride.
Imagine you’re trying to put a puzzle together. You can’t force the pieces to fit. You have to find the right piece and the right orientation. Tightening bolts is similar. You can’t force the bolt to tighten. You have to use the right tool and the right amount of force. Using the wrong size tool can damage the bolt head. Overtightening can break the bolt or the accessory. Always take your time and be careful. If you’re not sure, ask for help from a bike mechanic. Avoiding these mistakes will keep your bike safe and your accessories secure.
Stripping Bolts
Have you ever tried to open a jar with a slippery lid? It’s frustrating because you can’t get a good grip. Stripping a bolt is similar. The tool can’t grip the bolt head. This happens when you use the wrong size tool or overtighten the bolt. Once a bolt is stripped, it’s hard to tighten or loosen. To avoid stripping bolts, always use the right size tool. Make sure the tool fits snugly into the bolt head. Tighten slowly and carefully. If the bolt feels like it’s slipping, stop. You might need to replace the bolt. Avoiding stripping bolts is important for how to tighten bolt on bike accessory mount.
Overtightening Dangers
Think of overtightening a bolt like squeezing a balloon too hard. It might pop! Overtightening can damage the bolt or the accessory. It can also make it harder to loosen the bolt later. To avoid overtightening, use a torque wrench. This tool tells you exactly how much force you’re using. If you don’t have a torque wrench, tighten until snug. Then, give it a little extra turn. Be careful not to use too much force. Overtightening can be a costly mistake. Avoiding this helps you master how to tighten bolt on bike accessory mount.
Neglecting Regular Checks
Imagine you have a plant. If you never water it, it will die. Bike bolts are similar. If you never check them, they can loosen over time. Vibrations from riding can cause bolts to loosen. Neglecting regular checks can lead to accessories falling off. This can be dangerous, especially for lights and racks. Check your bolts before each ride. Tighten them if they’re loose. Regular checks keep your bike safe and your accessories secure. It is a vital element of how to tighten bolt on bike accessory mount.
| Mistake | Description | Prevention |
|---|---|---|
| Using wrong size tool | Damages bolt head, makes tightening impossible. | Always use the correct size wrench or Allen key. |
| Overtightening | Breaks the bolt or damages the accessory. | Use a torque wrench or tighten until snug, then a little more. |
| Not cleaning bolts | Dirt makes tightening harder. | Clean bolts before tightening. |
| Ignoring torque specs | Risk of undertightening or overtightening. | Check torque specifications before tightening. |
Fun Fact or Stat: Overtightening bolts is one of the most common mistakes made by amateur bike mechanics!
Maintaining Your Bike Accessories
Keeping your bike accessories in good shape is important. Clean them regularly with a damp cloth. This removes dirt and grime. Check the bolts on your accessories before each ride. Make sure they’re not loose. If they are, tighten them. Lubricate the bolts with grease. This prevents them from rusting. Store your bike in a dry place. This protects your accessories from the weather. Maintaining your bike accessories keeps them working well. It also makes your rides more enjoyable. Consistent maintenance ensures you rarely need to think about how to tighten bolt on bike accessory mount.
- Clean accessories regularly with a damp cloth.
- Check bolts before each ride.
- Lubricate bolts to prevent rust.
- Store bike in a dry place.
- Replace worn-out accessories.
Imagine you have a favorite toy. You want to take care of it so it lasts a long time. Maintaining your bike accessories is similar. You want to keep them in good shape so they work well. Clean your accessories regularly. Check the bolts before each ride. Lubricate the bolts with grease. Store your bike in a dry place. Replace accessories when they wear out. These simple steps will keep your accessories working well. They will also make your rides more enjoyable. Regular upkeep makes knowing how to tighten bolt on bike accessory mount only a small part of your care routine.
Cleaning and Inspection
Have you ever tried to read a book with dirty glasses? It’s hard to see the words clearly. Cleaning your bike accessories is similar. Dirt and grime can make it hard to see the bolts. Clean your accessories with a damp cloth. This removes dirt and grime. Inspect the bolts for rust and damage. Replace any damaged bolts. Cleaning and inspection keep your accessories in good shape. It also makes it easier to tighten the bolts. Keeping things clean is the first step in how to tighten bolt on bike accessory mount.
Lubrication Tips
Think of lubrication as giving your bike bolts a drink of water. It helps them turn smoothly and prevents them from rusting. Apply a small amount of grease to the bolt threads. This makes it easier to tighten and loosen the bolts. It also protects them from corrosion. Use a grease that is designed for bikes. Avoid using oil, as it can attract dirt. Lubrication keeps your bolts working well. This makes it easier to learn how to tighten bolt on bike accessory mount.
Storage Solutions
Imagine you have a box of toys. If you leave them scattered around, they can get lost or broken. Storing your bike properly is similar. Store your bike in a dry place, away from the weather. This protects your accessories from rust and damage. If you have to store your bike outside, cover it with a tarp. This will keep it dry and clean. Proper storage keeps your accessories in good shape. It also makes them last longer. Storing your bike correctly means you won’t need to stress about how to tighten bolt on bike accessory mount as often.
Fun Fact or Stat: Bike accessories that are regularly cleaned and maintained can last up to 50% longer!
Summary
Learning how to tighten bolt on bike accessory mount is important for bike safety. Using the right tools and techniques keeps accessories secure. This prevents accidents and ensures a smooth ride. Always use the correct size wrench or Allen key. A torque wrench is helpful for precise tightening. Avoid overtightening, which can damage bolts and accessories. Regular checks can catch loose bolts before they cause problems. Keeping bolts clean and lubricated also helps. These steps will help you take care of your bike.
Remember to inspect your accessories regularly. Clean them to remove dirt and grime. Store your bike in a dry place to protect it from the weather. By following these tips, you can keep your bike and accessories in top condition. You’ll also be able to enjoy safe and fun bike rides.
Conclusion
Knowing how to tighten bolts on your bike is a useful skill. It helps keep your accessories secure. This makes your rides safer and more enjoyable. Always use the right tools and techniques. Check your bolts regularly. With a little practice, you can master how to tighten bolt on bike accessory mount. This will help you take care of your bike. This will also let you focus on enjoying your ride.
Frequently Asked Questions
Question No 1: What tools do I need to tighten bolts on my bike?
Answer: You will need a set of Allen wrenches. These come in different sizes. You might also need a torque wrench. This helps you tighten bolts to the right amount. Some bolts might need a regular wrench. Having the right tools makes it easier to learn how to tighten bolt on bike accessory mount. Make sure your tools are clean and in good shape. This will help you avoid damaging the bolts.
Question No 2: How do I know how tight to make the bolts?
Answer: Check the accessory for a torque specification. This tells you how much force to use. A torque wrench helps you measure this force. If you don’t have a torque wrench, tighten the bolt until it feels snug. Then, give it a little extra turn. Be careful not to overtighten. Overtightening can damage the bolt or the accessory. It’s important to find the right balance for how to tighten bolt on bike accessory mount.
Question No 3: What happens if I overtighten a bolt?
Answer: Overtightening a bolt can damage it. It can also damage the accessory. The bolt might break or strip. This means the threads get damaged. It can become impossible to tighten or loosen the bolt. Overtightening can also damage carbon fiber parts. These parts are delicate and can break easily. Always be careful not to overtighten. This is essential to proper technique for how to tighten bolt on bike accessory mount.
Question No 4: How often should I check the bolts on my bike accessories?
Answer: You should check the bolts before each ride. This helps you catch loose bolts before they cause problems. Vibrations from riding can loosen bolts over time. Regular checks can prevent accessories from falling off. This is especially important for lights and racks. These accessories can be dangerous if they come loose. Regular checks are a key part of bike safety. This will give you confidence in your knowledge of how to tighten bolt on bike accessory mount.
Question No 5: What should I do if a bolt is stripped?
Answer: If a bolt is stripped, it means the threads are damaged. It can be hard to tighten or loosen. You might need to replace the bolt. First, try using a bolt extractor. This tool can help remove stripped bolts. If that doesn’t work, you might need to drill out the bolt. This is a more difficult task. If you’re not comfortable doing it yourself, take your bike to a mechanic. Dealing with stripped bolts can be part of how to tighten bolt on bike accessory mount maintenance.
Question No 6: Can I use any type of grease on my bike bolts?
Answer: No, you should use a grease that is designed for bikes. Bike grease is formulated to protect bolts from rust and corrosion. It also helps them turn smoothly. Avoid using oil, as it can attract dirt. Apply a small amount of grease to the bolt threads before tightening. This will make it easier to tighten and loosen the bolts. The right grease helps with how to tighten bolt on bike accessory mount. It also makes your bike last longer.