
Testing Standards for Bicycle Chucks: The Smart Guide
Quick Summary: Bicycle chucks, the small valves that connect your pump to your tire, need to be reliable for safe riding. Testing standards ensure they hold pressure, don’t leak, and connect securely. These tests include pressure testing, material checks, and durability assessments to make sure your chuck works when you need it most. Knowing these standards helps you choose a dependable chuck and keep your tires properly inflated.
Hey there, Raymond Ammons from BicyclePumper.com here! Ever had a bike ride ruined by a faulty chuck that just wouldn’t hold air? It’s super frustrating, right? A good chuck is essential for keeping your tires inflated properly, which means a safer and more enjoyable ride. But how do you know if a chuck is up to snuff?
That’s where testing standards come in. These standards make sure chucks are strong, reliable, and won’t let you down when you’re miles from home. In this article, we’ll break down the key tests and what they mean for you. We’ll cover everything from pressure testing to material quality, so you can choose a chuck that’s built to last. Let’s dive in and get you rolling with confidence!
Understanding Testing Standards for Bicycle Chucks

Bicycle chucks might seem like small, simple parts, but they play a vital role in keeping your tires properly inflated. Testing standards ensure these chucks meet specific performance and safety criteria. These standards cover various aspects, from the materials used to the chuck’s ability to withstand pressure and repeated use.
Why Testing Standards Matter
Testing standards matter for several reasons:
- Safety: A reliable chuck ensures proper tire inflation, which is critical for safe riding. Underinflated tires can lead to accidents.
- Performance: A good chuck provides a secure seal, preventing air leaks and maintaining optimal tire pressure for better performance.
- Durability: Testing standards ensure chucks are made from durable materials that can withstand regular use and environmental conditions.
- Reliability: Standardized testing means you can trust that the chuck will perform as expected, reducing the risk of failure during a ride.
Key Areas Covered by Testing Standards
Testing standards for bicycle chucks typically cover the following areas:
- Material Quality: Ensuring the materials used are strong, durable, and resistant to corrosion.
- Pressure Testing: Verifying the chuck can withstand high pressure without leaking or failing.
- Durability Testing: Assessing the chuck’s ability to withstand repeated use and wear.
- Compatibility: Ensuring the chuck is compatible with different valve types (Presta, Schrader, Dunlop).
- Leakage Testing: Checking for air leaks under various conditions.
Types of Testing Standards
Several types of tests are performed to ensure bicycle chucks meet the required standards. These tests evaluate different aspects of the chuck’s performance and durability.
Material Testing
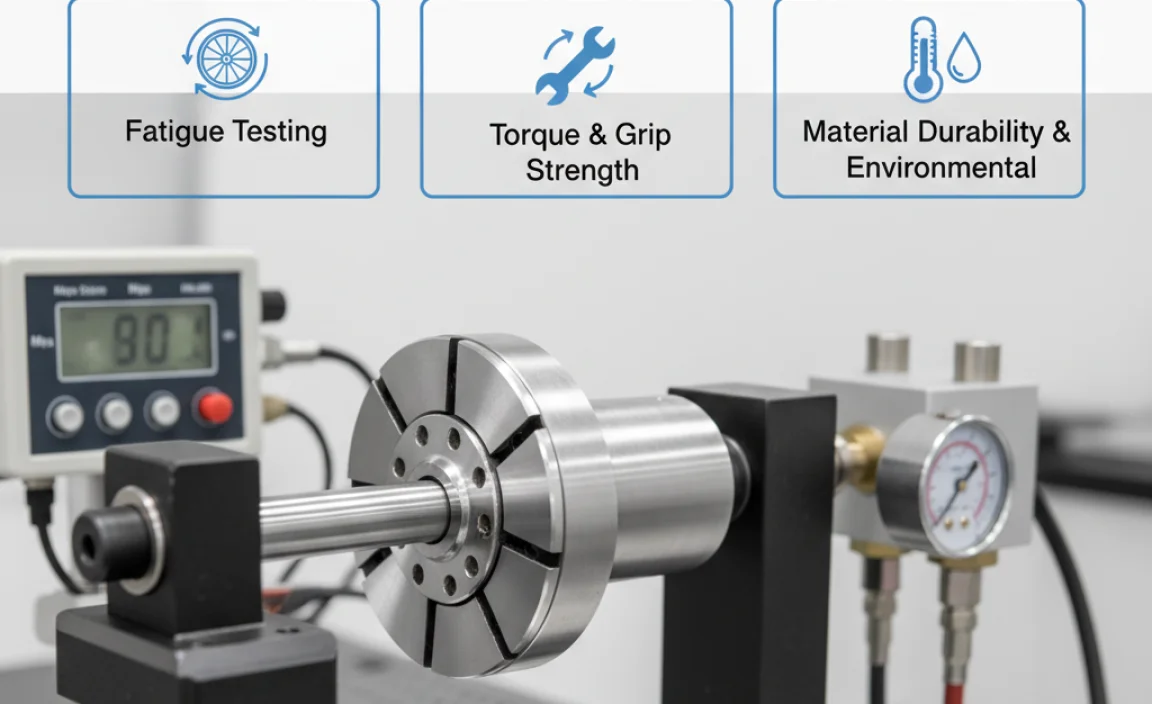
Material testing ensures that the materials used to make the chuck are of high quality and can withstand the stresses of regular use. This includes tests for tensile strength, corrosion resistance, and material hardness.
- Tensile Strength: Measures the amount of force a material can withstand before breaking. High tensile strength ensures the chuck won’t break under pressure.
- Corrosion Resistance: Evaluates the material’s ability to resist corrosion from moisture, salt, and other environmental factors. This is particularly important for chucks used in outdoor conditions.
- Material Hardness: Determines the material’s resistance to indentation or scratching. Harder materials are generally more durable.
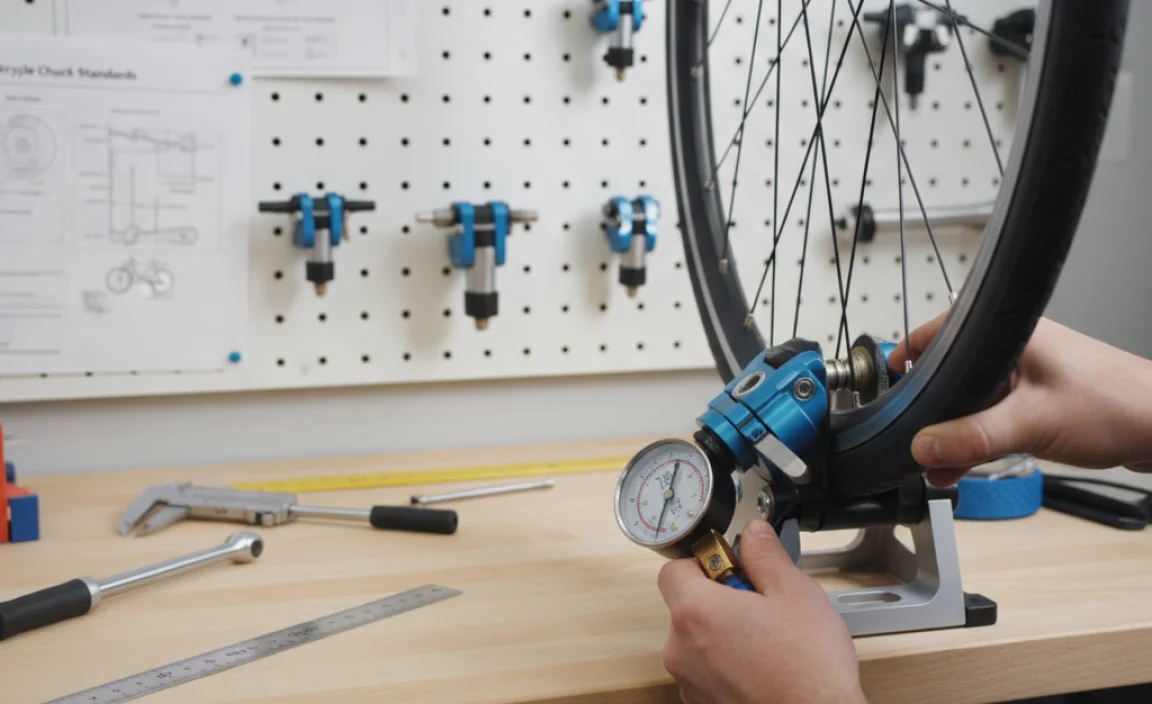
Pressure Testing
Pressure testing is a critical part of evaluating bicycle chucks. It ensures the chuck can handle the high pressures required for inflating tires without leaking or failing.
- Static Pressure Test: The chuck is subjected to a constant high pressure for a specified period to check for leaks or deformation.
- Burst Pressure Test: The chuck is subjected to increasing pressure until it fails. This test determines the maximum pressure the chuck can withstand.
- Cyclic Pressure Test: The chuck is repeatedly pressurized and depressurized to simulate the stresses of regular use.
Durability Testing
Durability testing assesses the chuck’s ability to withstand repeated use and wear over time. This includes tests for the number of cycles the chuck can perform before failing.
- Cycle Testing: The chuck is repeatedly connected and disconnected from a valve to simulate regular use. The number of cycles before failure is recorded.
- Fatigue Testing: The chuck is subjected to repeated stress to evaluate its resistance to fatigue failure.
- Environmental Testing: The chuck is exposed to various environmental conditions, such as extreme temperatures and humidity, to assess its performance and durability.
Leakage Testing
Leakage testing ensures the chuck provides a secure seal and does not leak air. This is crucial for maintaining proper tire pressure.
- Submersion Test: The chuck is submerged in water while connected to a pressurized system. Any air bubbles indicate a leak.
- Pressure Decay Test: The chuck is connected to a pressurized system, and the pressure is monitored over time. A drop in pressure indicates a leak.
- Soap Bubble Test: A soap solution is applied to the chuck and valve connection. Bubbles indicate an air leak.
Compatibility Testing
Compatibility testing ensures the chuck is compatible with different types of valves, such as Presta, Schrader, and Dunlop valves. This ensures the chuck can be used with a wide range of bicycles.
- Valve Compatibility Test: The chuck is tested with different valve types to ensure a secure and leak-free connection.
- Thread Compatibility Test: For threaded chucks, this test ensures the threads match the valve threads for a secure fit.
Common Testing Standards Organizations
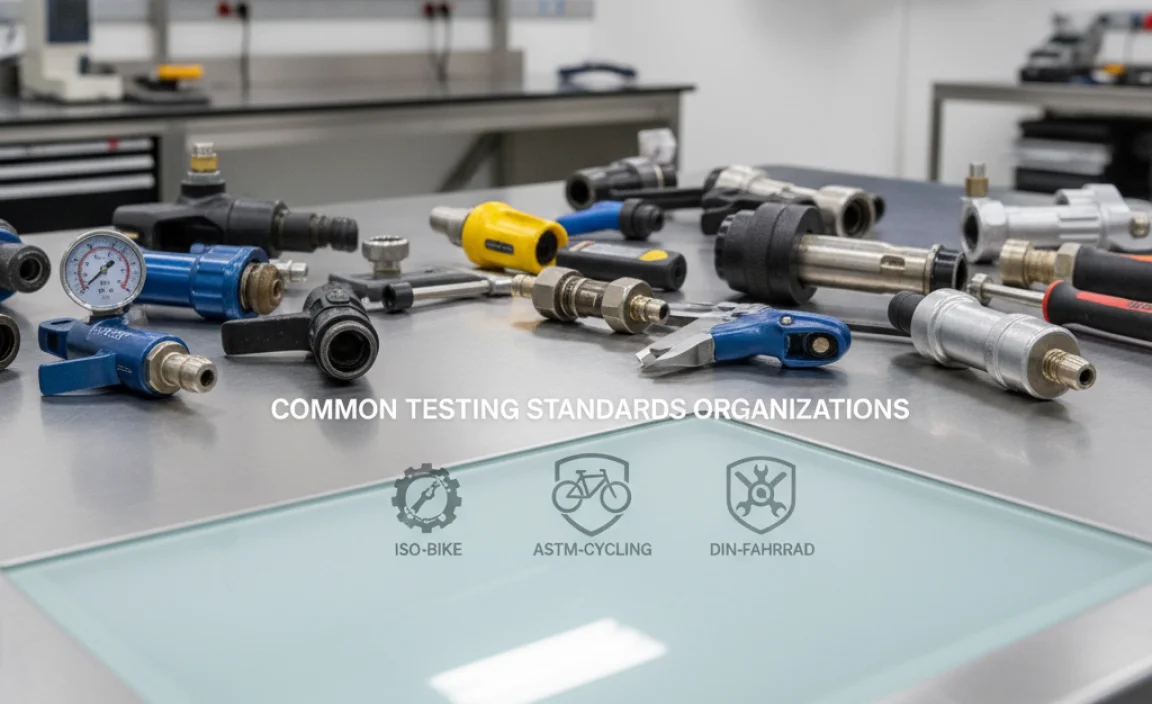
Several organizations develop and maintain testing standards for bicycle components, including chucks. These organizations provide guidelines and procedures for testing and certifying products.
ISO (International Organization for Standardization)
ISO is a global organization that develops and publishes international standards for a wide range of industries, including cycling. ISO standards for bicycle components cover safety, performance, and durability. You can explore their resources at ISO’s official website.
CPSC (Consumer Product Safety Commission)
In the United States, the CPSC sets safety standards for consumer products, including bicycles and bicycle components. These standards aim to protect consumers from unreasonable risks of injury or death. Learn more at the CPSC website.
EN Standards (European Standards)
EN standards are developed by the European Committee for Standardization (CEN) and are used throughout Europe. These standards cover various aspects of bicycle safety and performance. For more details, visit CEN’s official site.
ASTM International
ASTM International develops voluntary consensus standards for a wide range of materials, products, systems, and services. While not specific to bicycle chucks, their material and testing standards can be relevant. Check out their standards at ASTM International’s website.
How to Evaluate a Bicycle Chuck
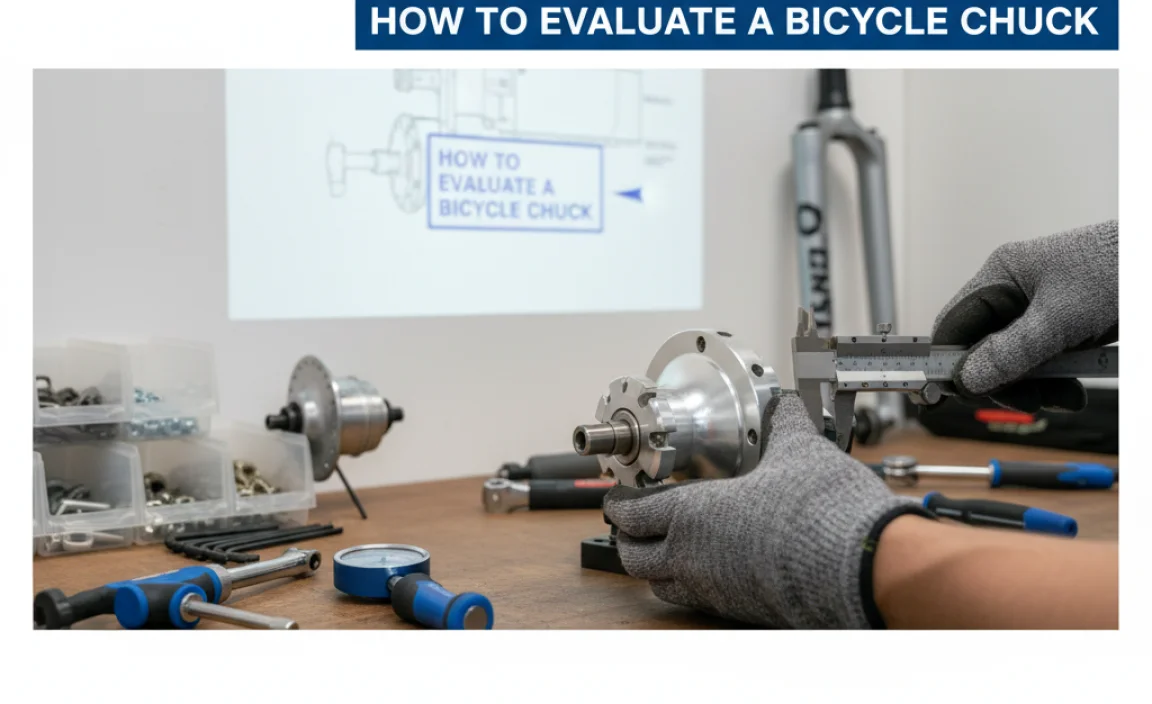
When choosing a bicycle chuck, it’s important to consider several factors to ensure you select a reliable and durable option. Here’s how to evaluate a bicycle chuck:
Check for Certifications
Look for certifications from reputable organizations like ISO, CPSC, or EN. These certifications indicate that the chuck has been tested and meets specific safety and performance standards.
Inspect Material Quality
Examine the materials used to make the chuck. High-quality materials like brass, stainless steel, and durable plastics are more likely to withstand wear and corrosion. Avoid chucks made from cheap, flimsy materials.
Assess Compatibility
Ensure the chuck is compatible with the valve types on your bicycles (Presta, Schrader, Dunlop). Some chucks are designed to work with multiple valve types, while others are specific to one type.
Read Reviews
Read reviews from other cyclists to get an idea of the chuck’s performance and durability. Look for reviews that mention issues like leaks, ease of use, and longevity.
Consider the Design
Choose a chuck with a design that is easy to use and provides a secure connection. Features like a lever or locking mechanism can help ensure a tight seal and prevent air leaks.
Check the Warranty
A good warranty indicates that the manufacturer stands behind their product. Look for chucks with a warranty that covers defects in materials and workmanship.
Step-by-Step Guide to Testing Your Bicycle Chuck at Home
While formal testing requires specialized equipment, you can perform some basic tests at home to evaluate the performance of your bicycle chuck.
Tools You’ll Need
- Bicycle pump with pressure gauge
- Bicycle tire with valve
- Bowl of water
- Soap solution
- Clean cloth
Step 1: Visual Inspection
Carefully inspect the chuck for any signs of damage, such as cracks, dents, or corrosion. Check the threads (if any) for damage.
Step 2: Compatibility Test
Connect the chuck to your bicycle valve. Ensure it fits securely and without excessive force. Try it on both Presta and Schrader valves if your chuck is designed for both.
Step 3: Pressure Test
Connect the chuck to your tire valve and inflate the tire to the recommended pressure. Observe the pressure gauge on your pump. The pressure should hold steady without dropping.
Step 4: Leakage Test
Inflate the tire and disconnect the pump. Listen for any hissing sounds near the chuck. If you hear a hiss, there may be a leak.
Step 5: Submersion Test
Inflate the tire and submerge the chuck and valve connection in a bowl of water. Look for air bubbles. Any bubbles indicate a leak.
Step 6: Soap Bubble Test
Apply a soap solution to the chuck and valve connection. Look for bubbles forming. Bubbles indicate an air leak.
Step 7: Repeated Use Test
Connect and disconnect the chuck from the valve several times. Check for any signs of wear or damage. Repeat the pressure and leakage tests after this to ensure the chuck still performs well.
Maintaining Your Bicycle Chuck
Proper maintenance can extend the life of your bicycle chuck and ensure it performs reliably. Here are some tips for maintaining your chuck:
- Clean Regularly: Clean the chuck regularly with a clean cloth to remove dirt and debris.
- Lubricate: Apply a small amount of lubricant to the moving parts of the chuck to keep them working smoothly. Use a silicone-based lubricant to avoid damaging rubber seals.
- Inspect Regularly: Regularly inspect the chuck for signs of wear or damage. Replace the chuck if you notice any cracks, leaks, or other issues.
- Store Properly: Store the chuck in a clean, dry place when not in use. Avoid exposing it to extreme temperatures or humidity.
- Replace Seals: If your chuck has replaceable seals, replace them when they become worn or damaged.
Troubleshooting Common Issues
Even with proper maintenance, you may encounter issues with your bicycle chuck. Here are some common problems and how to troubleshoot them:
| Issue | Possible Cause | Solution |
|---|---|---|
| Chuck won’t connect to valve | Incorrect valve type, damaged threads | Ensure chuck is compatible with valve type. Clean or replace damaged threads. |
| Air leaks from connection | Worn or damaged seals, loose connection | Replace seals. Ensure chuck is securely connected. |
| Chuck won’t hold pressure | Damaged chuck, faulty valve | Replace chuck. Check and replace valve if necessary. |
| Chuck is difficult to use | Dirt or debris, lack of lubrication | Clean chuck. Apply lubricant to moving parts. |
Understanding Valve Types
Understanding the different valve types is crucial for selecting a compatible bicycle chuck. The three main types are Presta, Schrader, and Dunlop.
Presta Valves
Presta valves are commonly found on road bikes and high-performance bicycles. They are narrower than Schrader valves and have a locking nut that must be unscrewed before inflating the tire.
- Pros: Lightweight, can hold higher pressures, easier to inflate to precise pressures.
- Cons: More fragile than Schrader valves, require a specific chuck or adapter.
Schrader Valves
Schrader valves are similar to those found on car tires and are commonly used on mountain bikes, hybrid bikes, and some commuter bikes. They have a spring-loaded pin that must be depressed to inflate the tire.
- Pros: Durable, easy to inflate at gas stations, compatible with many pumps.
- Cons: Can be less precise when inflating to high pressures, slightly heavier than Presta valves.
Dunlop Valves
Dunlop valves are commonly used in Europe and Asia. They are similar to Presta valves but do not have a locking nut. They are inflated by pushing down on the valve core.
- Pros: Simple design, easy to maintain.
- Cons: Less precise pressure control, not as widely used as Presta and Schrader valves.
Choosing the Right Bicycle Chuck for Your Needs
Selecting the right bicycle chuck depends on your specific needs and the types of bikes you own. Here are some factors to consider:
- Valve Compatibility: Ensure the chuck is compatible with the valve types on your bikes.
- Pump Type: Consider the type of pump you use. Some chucks are designed for specific pumps, such as floor pumps or mini pumps.
- Durability: Choose a chuck made from durable materials that can withstand regular use and environmental conditions.
- Ease of Use: Select a chuck that is easy to connect and disconnect from the valve.
- Price: Bicycle chucks range in price from a few dollars to over $50. Consider your budget and choose a chuck that offers good value for the price.
FAQ: Testing Standards for Bicycle Chucks
Here are some frequently asked questions about testing standards for bicycle chucks:
What are the most important testing standards for bicycle chucks?
The most important testing standards include material testing (tensile strength, corrosion resistance), pressure testing (static, burst, cyclic), durability testing (cycle, fatigue, environmental), and leakage testing (submersion, pressure decay, soap bubble).
How do I know if a bicycle chuck meets testing standards?
Look for certifications from reputable organizations like ISO, CPSC, or EN. These certifications indicate that the chuck has been tested and meets specific safety and performance standards.
Can I test a bicycle chuck at home?
Yes, you can perform some basic tests at home, such as visual inspection, compatibility test, pressure test, leakage test (submersion and soap bubble), and repeated use test.
What should I do if my bicycle chuck is leaking?
First, ensure the chuck is securely connected to the valve. If the leak persists, check for worn or damaged seals and replace them if necessary. If the chuck is still leaking, it may need to be replaced.
How often should I replace my bicycle chuck?
The lifespan of a bicycle chuck depends on its quality and how often it is used. Inspect the chuck regularly for signs of wear or damage and replace it when needed. A good quality chuck can last for several years with proper maintenance.
What are the benefits of using a high-quality bicycle chuck?
A high-quality bicycle chuck provides a secure seal, prevents air leaks, is durable, and ensures proper tire inflation, which is critical for safe and efficient riding.
Are all bicycle chucks compatible with both Presta and Schrader valves?
No, not all bicycle chucks are compatible with both Presta and Schrader valves. Some chucks are designed for specific valve types, while others are dual-headed and can be used with both. Check the product specifications to ensure compatibility.
Conclusion
Understanding testing standards for bicycle chucks empowers you to make informed decisions when choosing and maintaining your equipment. By knowing what to look for in terms of material quality, pressure resistance, and durability, you can ensure that your tires are always properly inflated for a safe and enjoyable ride. Remember to perform regular maintenance and inspections, and don’t hesitate to replace your chuck if you notice any issues. With the right knowledge and care, your bicycle chuck will be a reliable companion on all your cycling adventures. Now get out there and enjoy the ride!

